Embedded Files
Now, open AI and create a document and use the same AI dimensions.
In your group (or solo if you don't have one) have one person create one of the main backgrounds in your story section and the other partner do a totally different scene in the story section.
Email the file and JPG to Wordpress and the link to the spreadsheet.
Part B
With your partner, create your storyboard for your part of the story which you will later present in class.
Storyboard Requirements:
- Number your boxes at the top right of each box while you draw them (do not prenumber them)
- You need to have a minimum of two choice decisions in your story
- You will only be required to make a minimum of two backgrounds per person in your group but then you can use variations of your two backgrounds to fill other sequences of your story/storyboard
- For your storyline you need to have at least 12 storyboards drawn
Then using the same AI dimensions, create a second story background using the same AI dimensions. Both you and your partner should always create totally separate backgrounds and each will be graded on what he or she created, AI not graded as a group.
When finished, export your AI illustration as a full quality JPG and upload to MF Picasa and email the file and image to your Wordpress. Then upload the file to the shared dropbox folder.
Part C
Each member should open a new AI file that is 1024x768 pixel screen at 150 dpi with the number of total artboards your group has (e.g. 12). Name the file one word to describe your scene and by your classIDs (e.g. doctor ca8john15 ca8sue15). Then gather the previous backgrounds you and your partner created and insert them into the appropriate box order in your new AI document.
Using the backgrounds you already created or ones other classmates created, create three backgrounds each but they can be the same or similar just a little different. Do not spend a lot of time and detail in making them. If you finish early you can go back and edit.
When finished, export your AI illustration as a full quality JPG and upload to MF Picasa and email the file and image to your Wordpress. Then upload the file to the shared dropbox folder. Also email the file and JPG to Wordpress


Part D
You and your partner should now finish the remainder of your backgrounds. Remember, you can use parts of other student's backgrounds to help you create them faster and better.
Continue adding your backgrounds to the artboards of your AI project file. Have one person in your group collect and combine all the backgrounds into one. If you finish early you can go back and edit.
When finished, export your AI illustration as a full quality JPG and upload to MF Picasa and email the file and images to your Wordpress.

Also, upload the JPGs & AI file to the shared dropbox folder. To do this, make sure you are logged into your classID dropbox and go to your folder and at the top right you will see an upload button. Name the AI file with the following format: #AI Concert classID.Part E
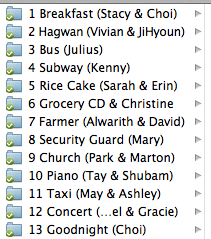
Open your AI artboard file and add Minjee and any needed family members and people to your backgrounds.Then save all the JPG background images into the class dropbox folder with the following format: #1 Concert classID, #2 Concert classID, #3 Concert classID, etc.Also make sure the AI file is in the dropbox folder, email the AI & JPGs to your Wordpress, and upload the final backgrounds to one of your group member's Picasa album and name it according to your folder name on the right. To invite someone to upload photos to your Picasa album, go to the album and on the right side there is a share button and then enter their email.

Resources
- Reduce file size
- 2048 x 1536
- dimensions
Page updated
Google Sites
Report abuse