Embedded Files
The Basics of Woodworking
The Basics of Woodworking
When it gets down to formulating the very basic idea of woodworking there are simply three steps or activities involved. The rest are nuances of the trade, if you will, like finishing, design considerations, aesthetics, etc. Woodworking basically involves: measuring, cutting, and then finally assembling, or the joining or putting together the parts of your project. These are essentially what woodworking is all about. A couple of terminology definitions: a workpiece, or just piece refers to an individual item being cut, drilled, or planed, while a part could be two or several pieces joined together where the parts are then assembled together to complete a project. So, pieces, parts and project have their specific meanings.
1. Measure twice, cut once is an old woodworking cliche but it is the very basic principle to go by if you don't want to waste time and material. Tip: Measure and scribe your line; measure again and if it matches the line you just scribed you have measured correctly.
2. If measuring is where you start the engine, cutting is where the 'rubber meets the road'. At this point you commit to the project because now there is no turning back. The good news is that this is where you start to build your confidence. Cutting precisely at the desired measurement is the level from which a woodworker first senses a satisfying experience. Tip: Put an "X" mark on the waste side of your work piece so you know where to line up your cutting tool (saw blade, hand saw, etc.) You'd be surprised at cutting mistakes made simply because you cut into the measured side.
3. Assembling is the beginning of the end of the journey. Sanding and putting finish, if you so choose, completes your project. I've included the pocket hole joinery kit in my recommended tools to buy first because this allows for quick, strong and precise assembly without having to go through complex processes in joinery. As you improve your skills there are many nuances to assembling where aesthetics are the desired preference but the joinery may not necessarily be any stronger. Pocket hole joinery, to me, is an essential tool because it allows for the beginning woodworker to assemble his/her project in no time (not even waiting for glue to dry) and dis-assembly is easy if one needs to redo the work. Tip: Lay out your work pieces well, and away from the clutter, to have a good visual before final assembly.
So those are the basics. When you think about it there is not a whole lot of mystique in woodworking. People are intimidated by the seeming difficulty that woodworking entails and that comes from seeing the finished product, the elaborate design and spectacular finish and the endless variations. But, as I mention, those are nuances that one develops over time, through improved skills, and the experience of using more elaborate and modern tools. All components that went into the finished project, no matter how complex, go through the three basic steps and worth mentioning here again - measure, cut and assemble.
Note: I anticipate that some woodworkers will ask: what about planing to certain thickness, routing, mortising, etc., where do these belong? It is still under cutting if the process is required before assembly. If for decorative purposes, like a router making a round over of the edges, then that is under finishing.
The Basic Rules of Woodworking
The Basic Rules of Woodworking
1. Operate your tools safely by carefully reading and understanding every instruction that came with the tool.
2. Wear protective glasses, dust masks and hearing protection when operating power tools. Put another way for emphasis: Protect your eyesight, your lungs and the entire respiratory system and preserve your continued ability to hear and listen to your favorite music or participate in conversation for the rest of your life.
3. Avoid distractions. Do not have a TV at your workshop, garage, or wherever you are operating a power tool. Avoid, as much as possible, operating your power tools when there are other people around when you're working. It is safer for you and safer for your family and friends. Unless, of course, when you are just merely showing off your new toy (tool, I mean). Still, take extra care when you do so.
4. Stay alert all the time. Rest for 20-30 minutes after every two hours of continued work. If you had a late night of partying it makes no sense to do woodworking on the day after as it is likely to affect your concentration or judgment. There are many days ahead to do woodworking.
5. Always take your time. Woodworking is not a sport so speed offers no advantage. Hurrying is often times the cause for mistakes and it is a major precursor to accidents. Even one of the most hurried activities in woodworking - gluing up joinery - must be done deliberately but not in haste. Preparation before assembly, where all the components and material are well laid out, is the key to a successful glue up. More on that on a separate blog.
The tools of the trade for under $500
The tools of the trade for under $500
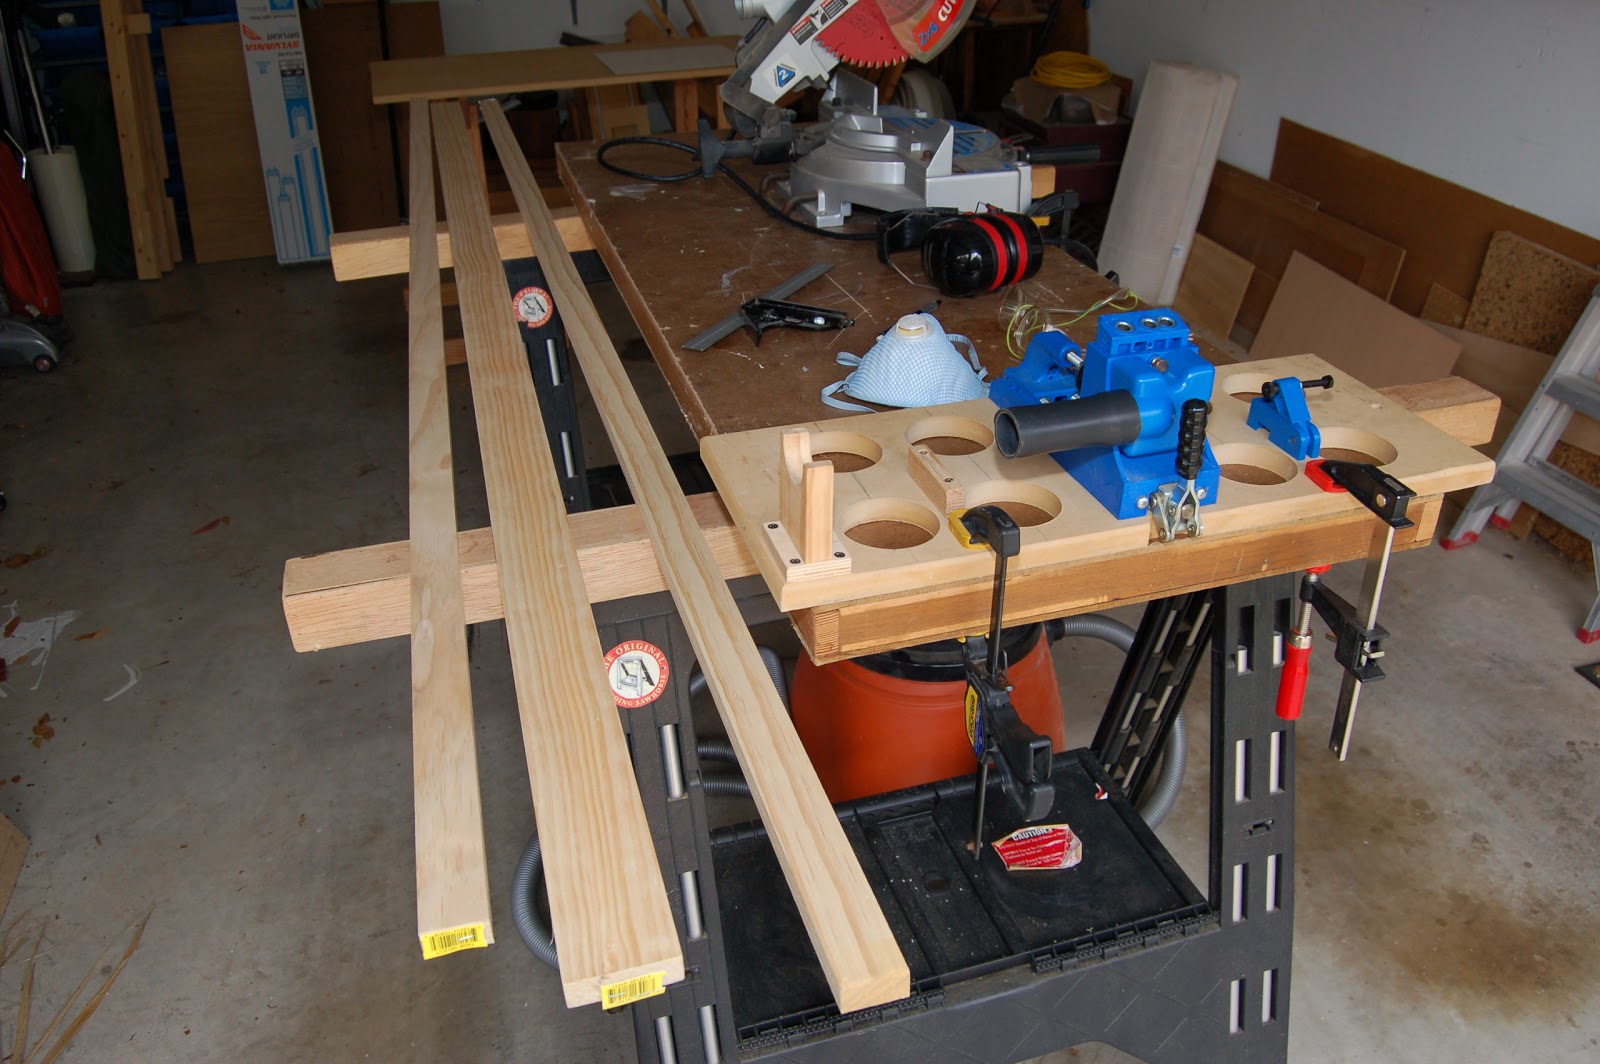
All woodworkers start with a few tools in the beginning. I went through that but it was a practically random experience where I bought tools one at a time as I needed them. I now realized that there is a better way of optimizing your purchase of these tools and get the most out of it, if you are just beginning to build things. With these tools, which will not exceed $500.00 (new), one can actually begin to build very respectable, durable projects you can be proud of. Not included is a drill (cordless or otherwise) because I assume that every household has a drill, and that next to screw drivers and pliers drills are the most common tool (outside of the kitchen, of course). Anyhow, drills these days are inexpensive.
It includes everything, including safety equipment : protective glasses, dust mask and hearing protector. I must emphasize above all things before you embark on a woodworking project to make safety and personal health paramount before you even start thinking about making things. Below are what I would have you consider buying. Click picture to enlarge.
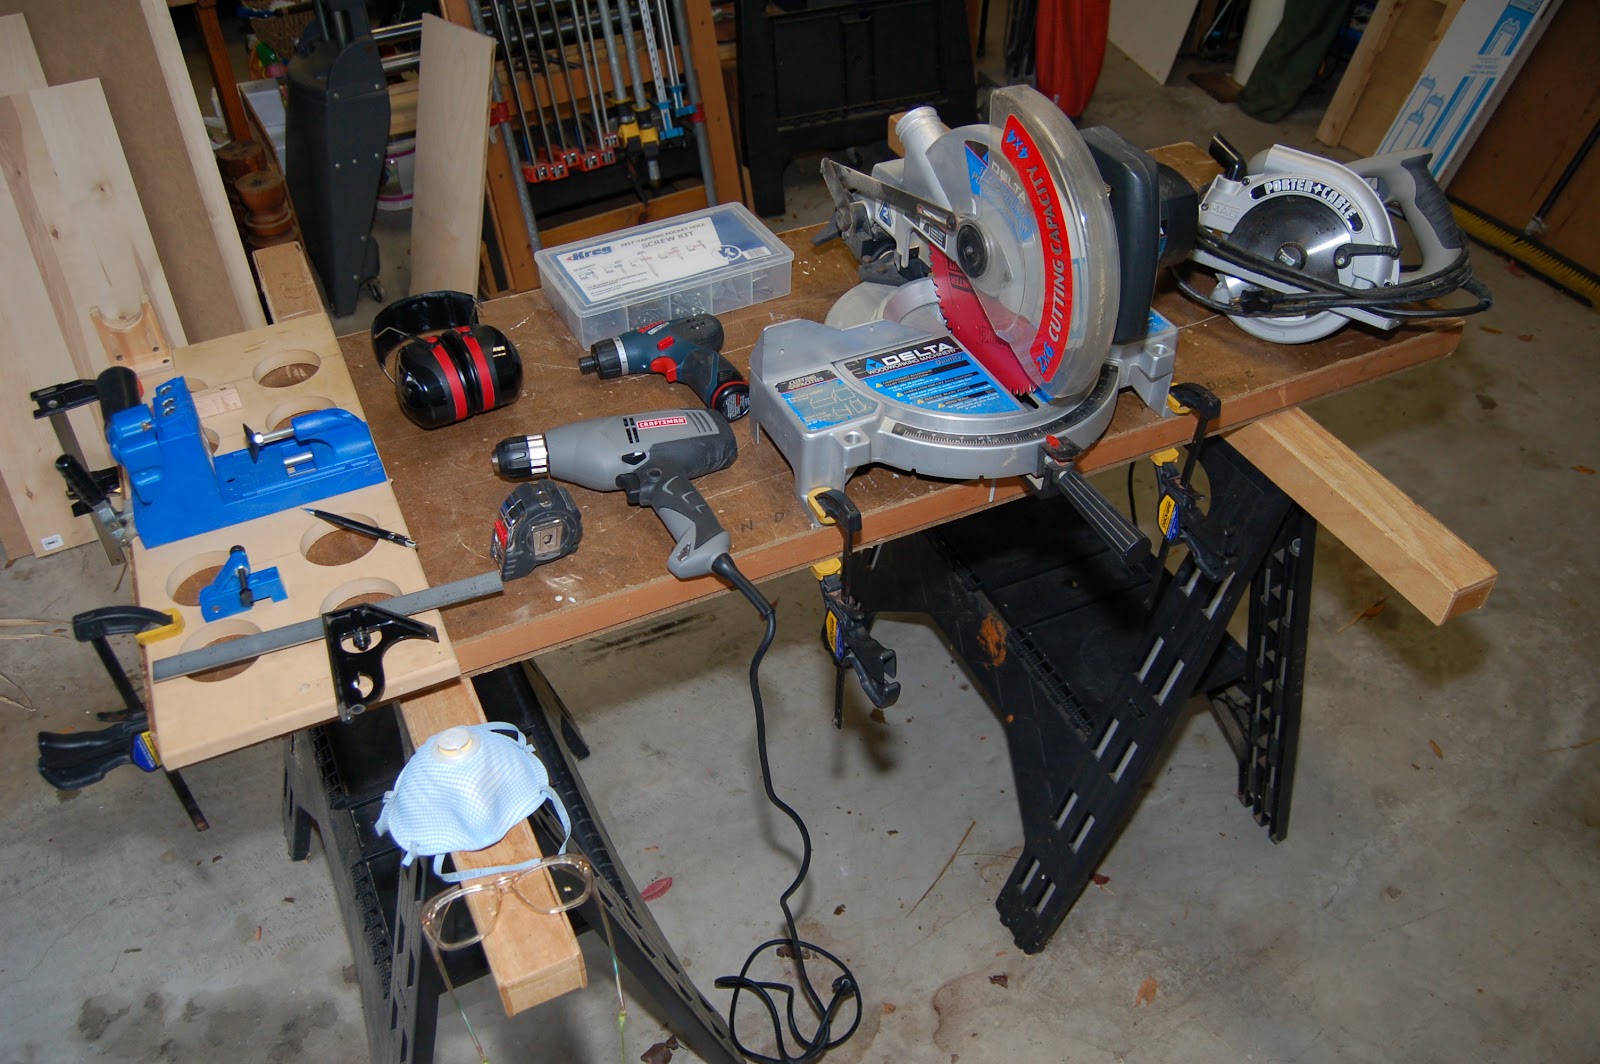
The practical total cost may not be as I estimate because many of you may already have some of the tools, i.e., a drill, a tape measure, a combination square and others. Lower even if you get into acquiring used tools instead of new ones. There are plenty of those. So clearly you can start woodworking on the cheap, with one caveat, do not go for really flimsy looking, very cheap tools, and more importantly don't try to use defective tools.
I have some suggestions below of the bare minimum to acquire or have in your line up of tools before you venture into your first project in this blog. These were all picked from one online site simply for ease of selection and, more importantly, the tools have been reviewed previously by other users.
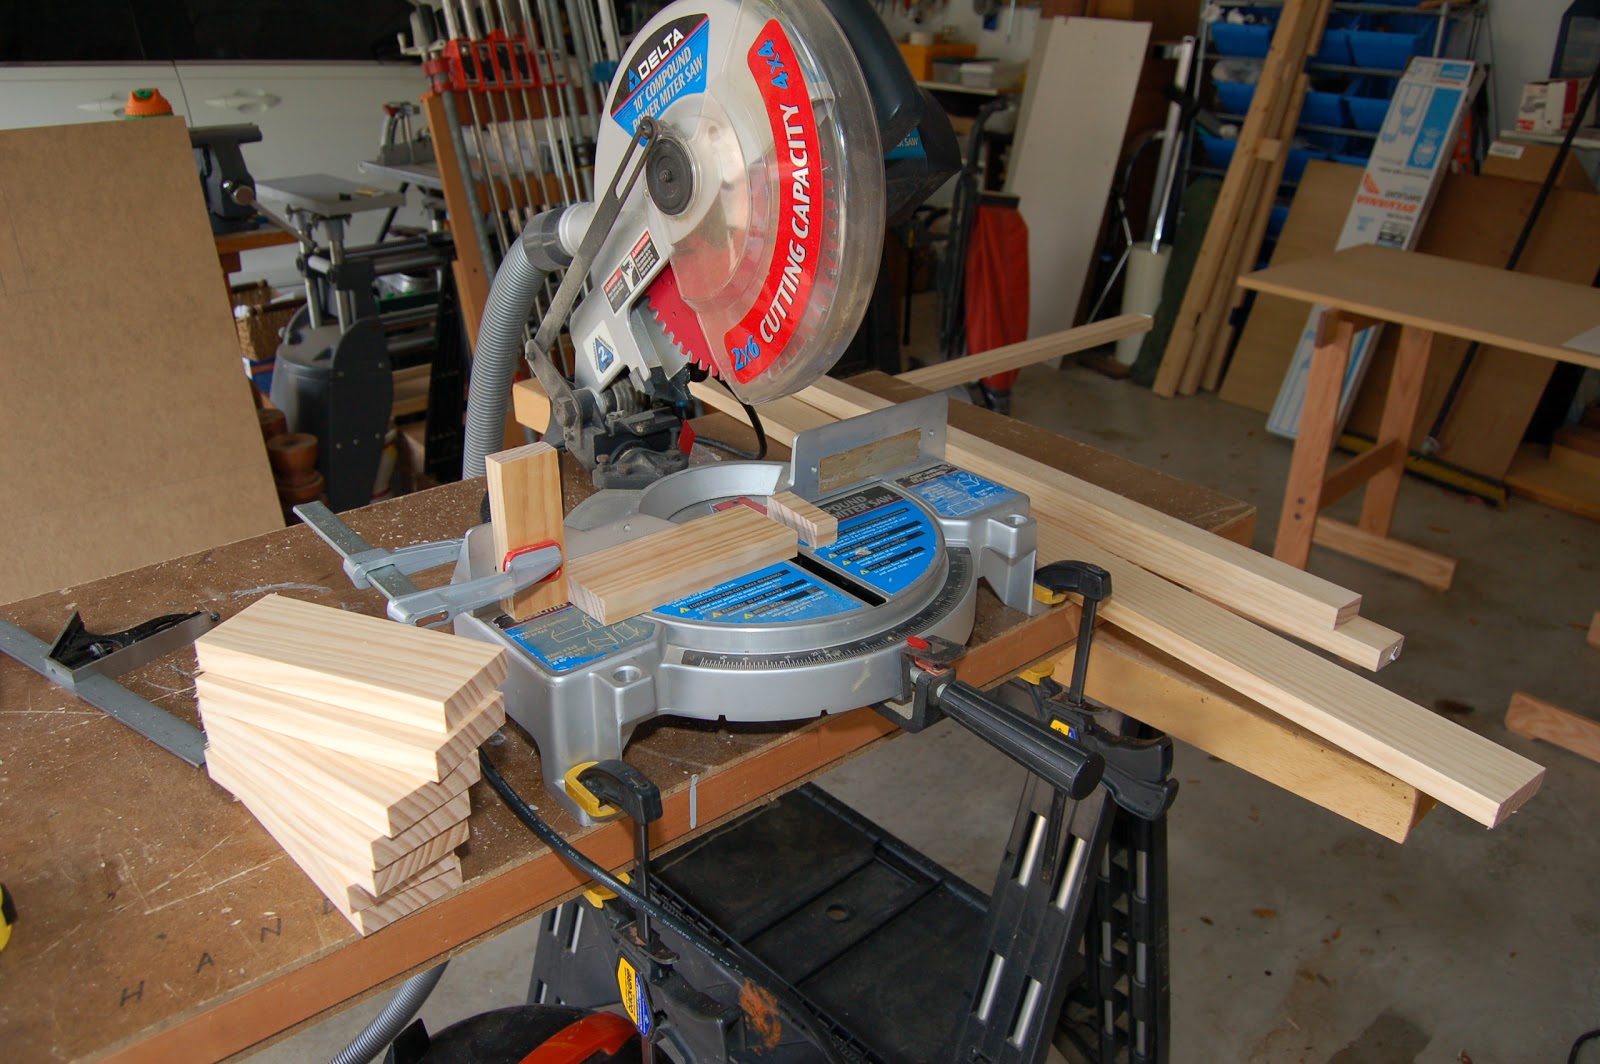
$118.97 Miter saw
$49.50 Miter saw blade
$99.95 Kreg Pocket Screw Kit
$8.50 Safety glasses
$20.00 Dust mask
$19.50 Hearing protector
$23.81 Starter screw of 5 popular sizes and about 650 screws total
$39.90 Combination square
$12.69 Measuring tape
$89.99 Circular Saw
Total cost - $ 482.81
Why Pocket hole joinery?
Why Pocket hole joinery?
Pocket hole joinery was supposed to have been known to and used by the ancients long before other forms of joining or assembling wood were used. However, it is only recently that this method has gained popularity because commercial jigs have become available and reasonably priced. Click pictures to enlarge.
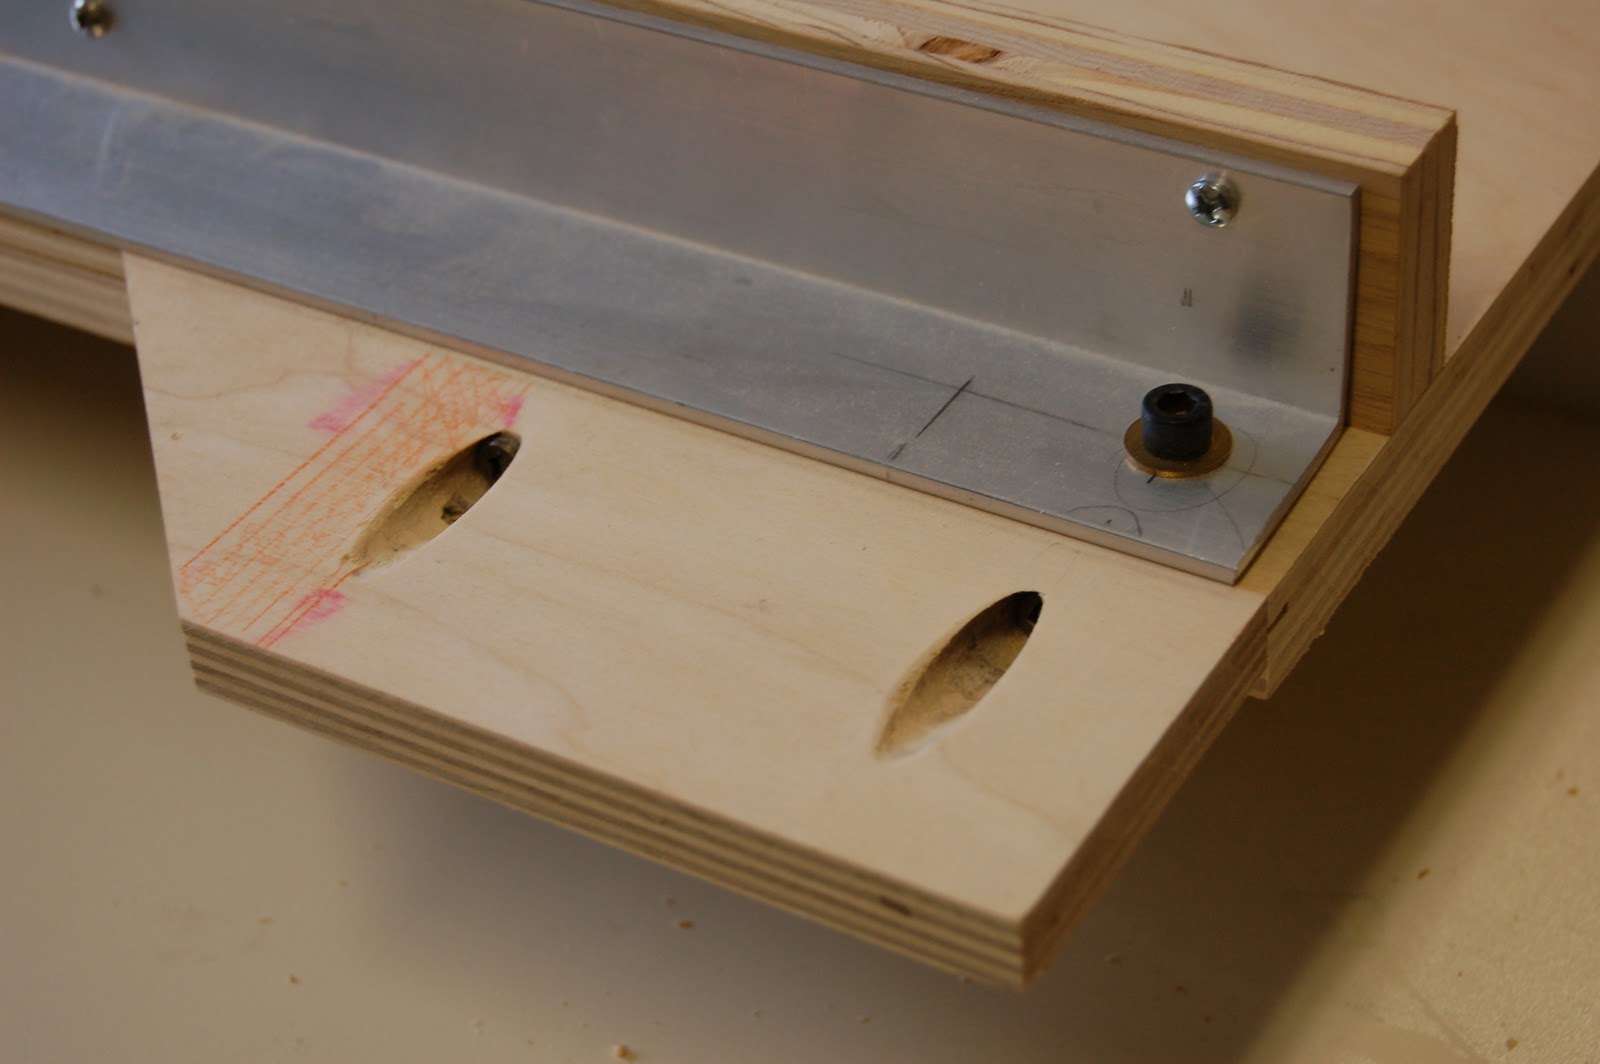
1. It is by far the easiest to do because you only have to drill holes into one workpiece to join it to another.
In this example, the holes were drilled to the vertical pieces; self-tapping screws were then driven to fasten them to the horizontal pieces for a very strong and durable joinery.
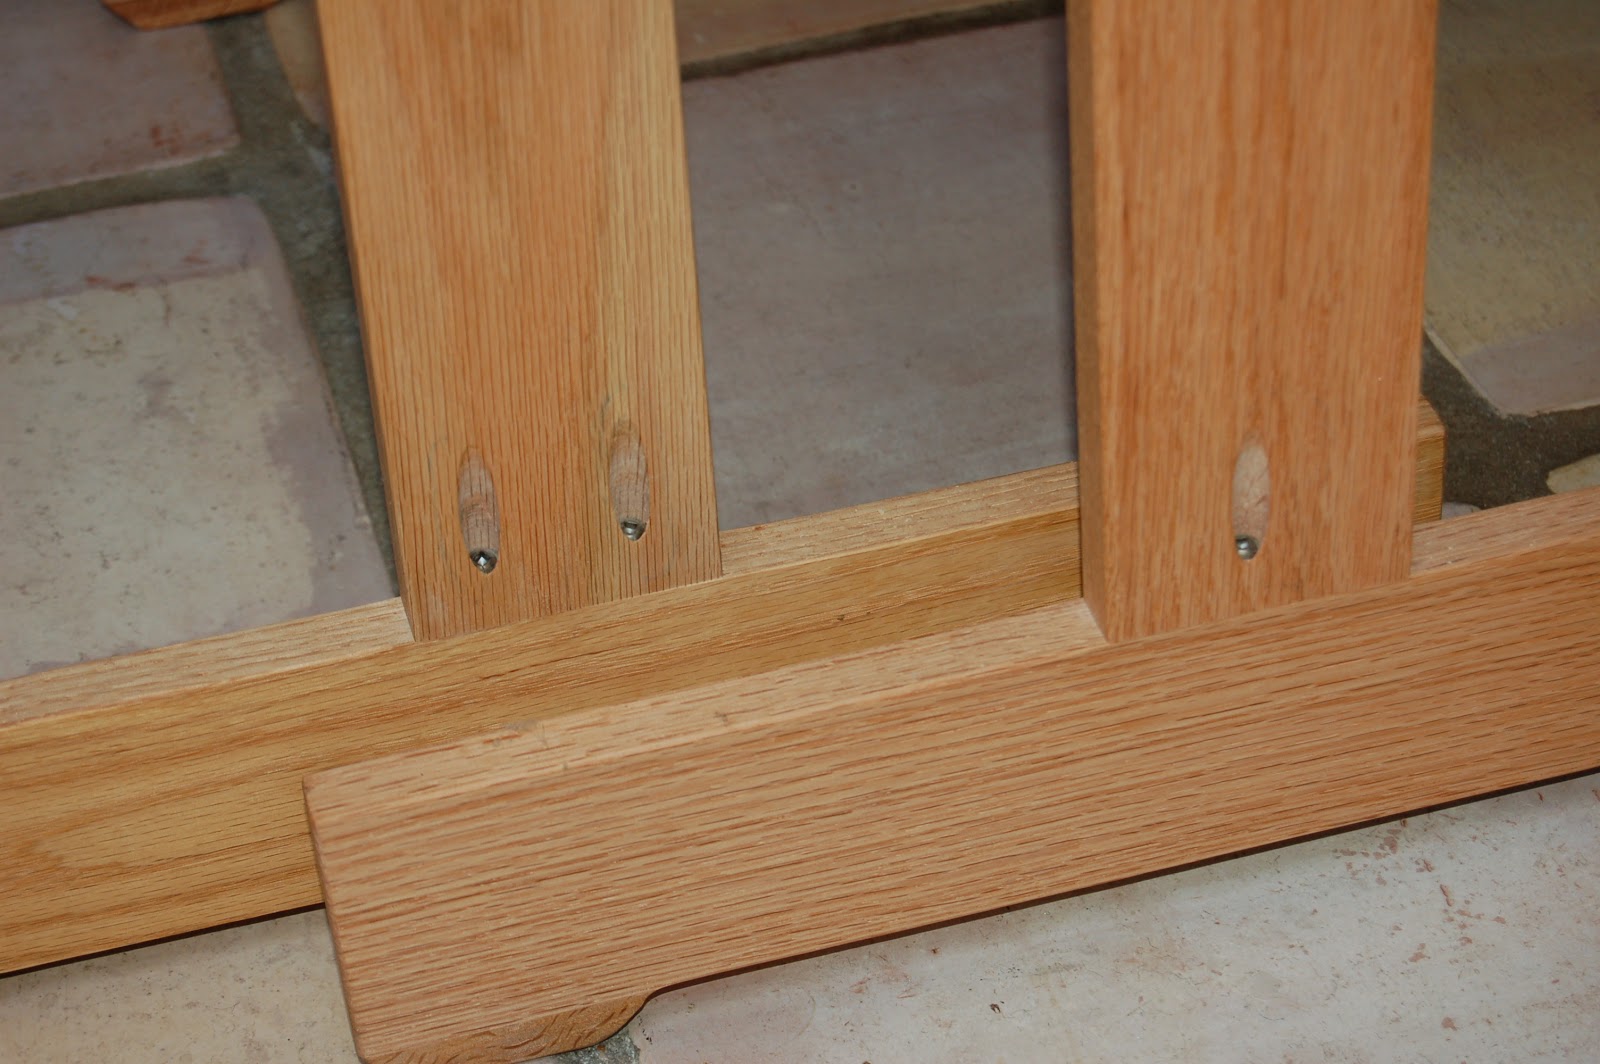
2. It is a very strong joint, without glue (although it is optional). On this test joint where a 4X4 is fastened to a 2X4 soft wood, the joinery is tight.

3. It is fast and the joint can be dis-assembled easily and just as quickly. As an afterthought, I needed a "lip" for a table saw sled to protect the corner. It took no time to do it.
4. In many of its applications one face of the joint has all the pieces perfectly flushed and that was made possible by the special clamp that comes with the jig.
5. A beginning woodworker can start assembling as quickly as he or she can cut the straight pieces and drill the pocket holes.
6. The process will not take long to master. Here I used the joinery to "stitch" several pieces to make a strong base for a sturdy workbench.
7. The instruction for this commercial jig that comes as a kit is very easy to understand.
The first two projects that I recommend a beginning woodworker should start with were done with pocket hole joinery to assemble the parts and the entire project. It is a very much more forgiving joinery to do versus dowels, mortise and tenons or even biscuit joinery (watch for a posting on this special form of joining wood)
Click link for photos of other various pocket hole applications:
http://picasaweb.google.com/109528829731927883373/ProjectsWherePocketHolesWereAlsoUsed#
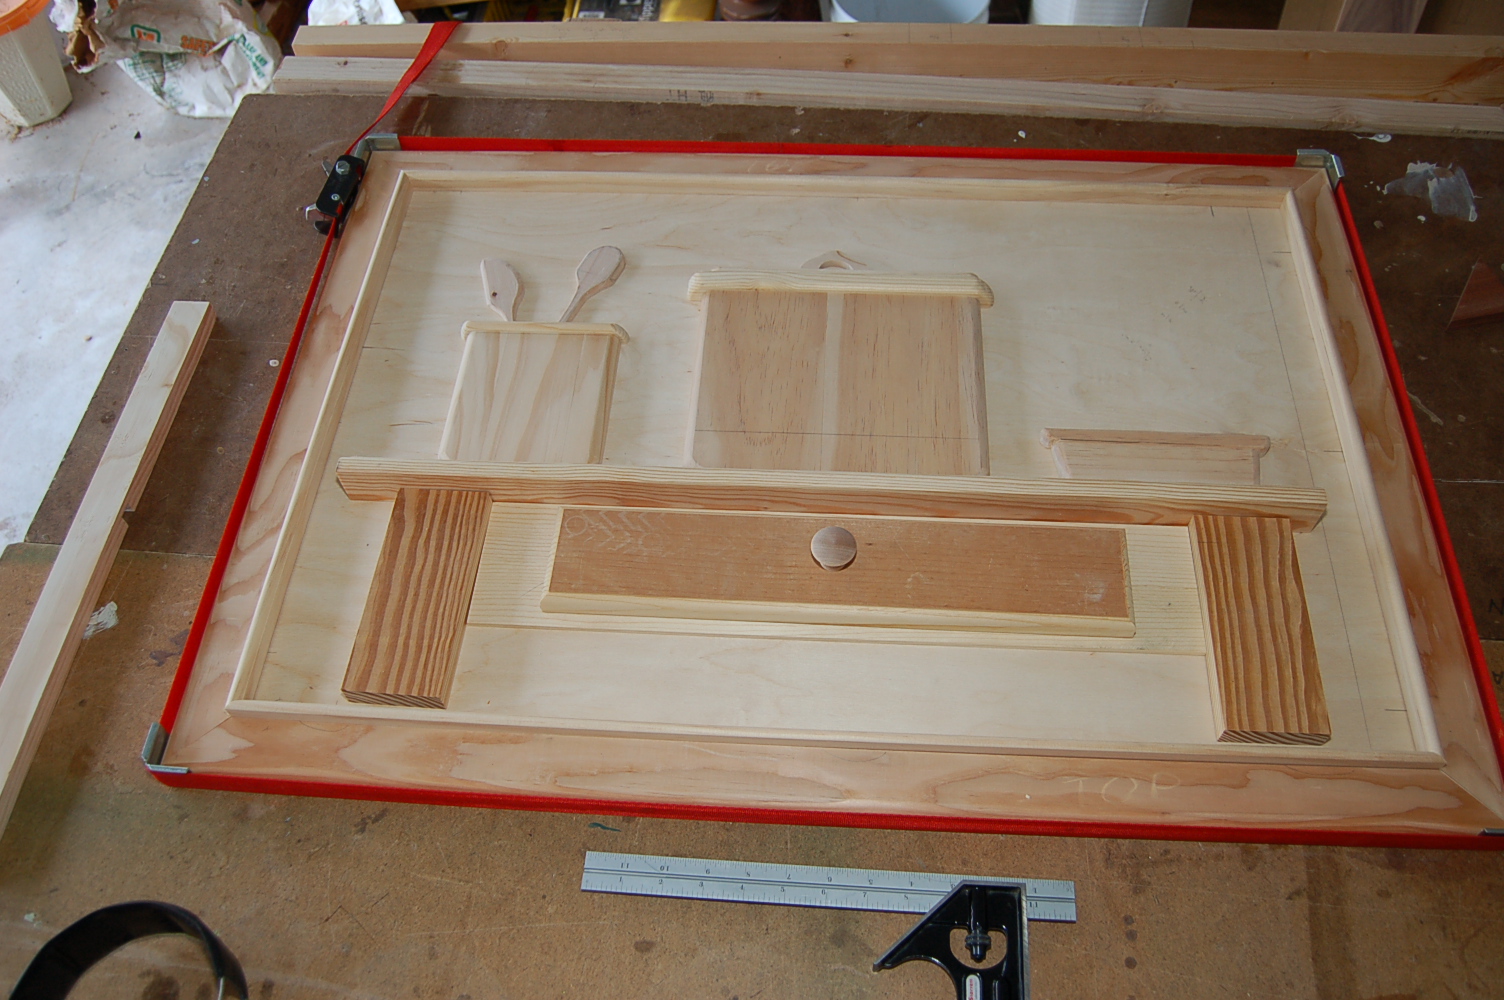
The Orchid Planter
The Orchid Planter
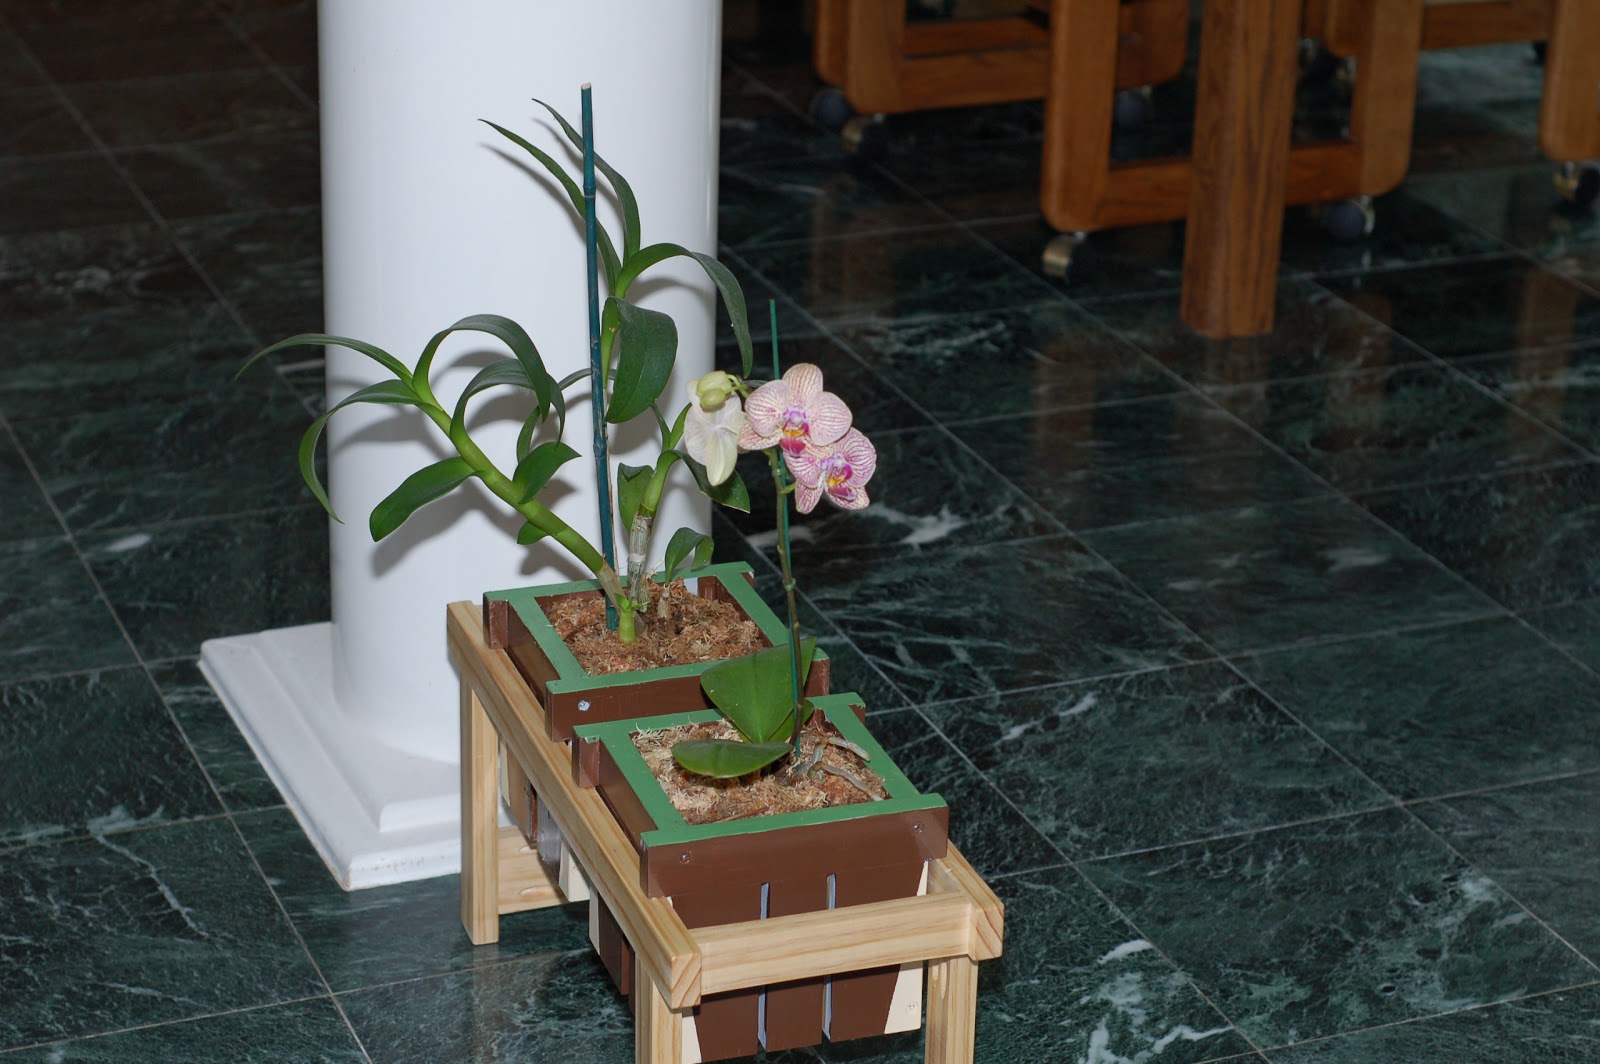
First, something about orchids. You may have all noticed that of late orchids have become one of the more popular gift plants at the price level of about $20-30 but it is also likely to be least understood and end up being thrown away after the first bloom is gone and the plant fails to propagate or bloom again. Actually, the new varieties are quite resilient but there are a few things to be mindful of. They need air circulation more than water. The roots do need to come out exposed to air like they do in the wild. Their "soil" requirement is different. This project is fun to do. Click pictures to enlarge

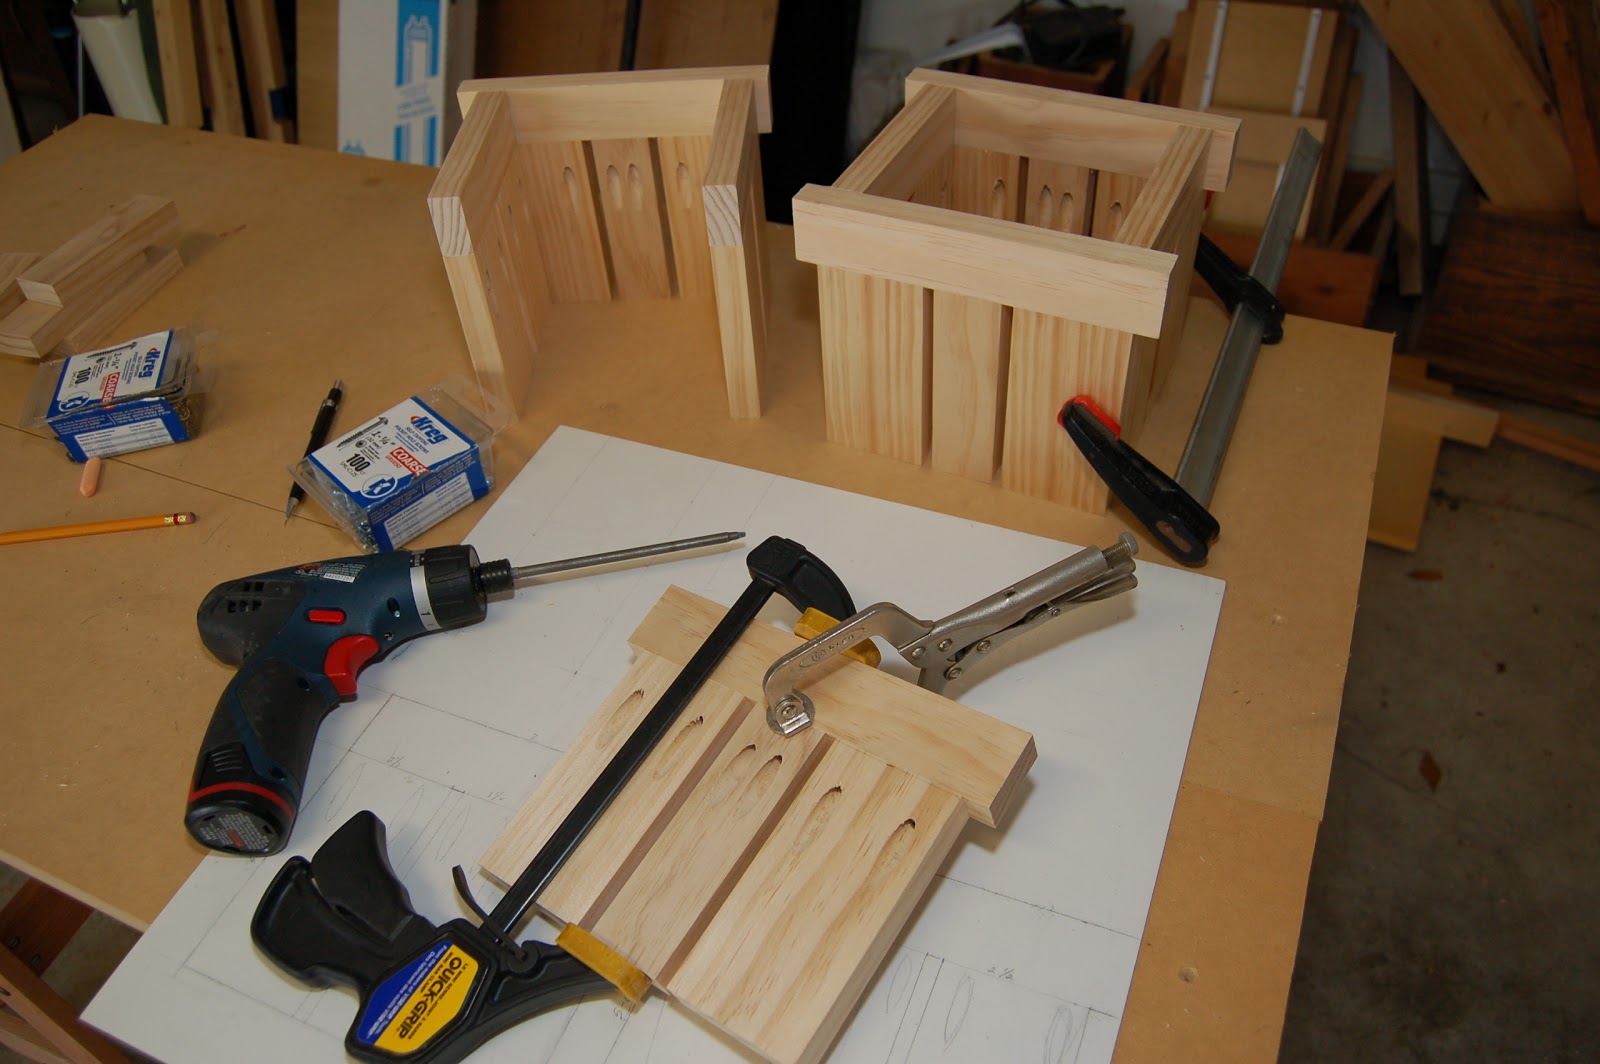
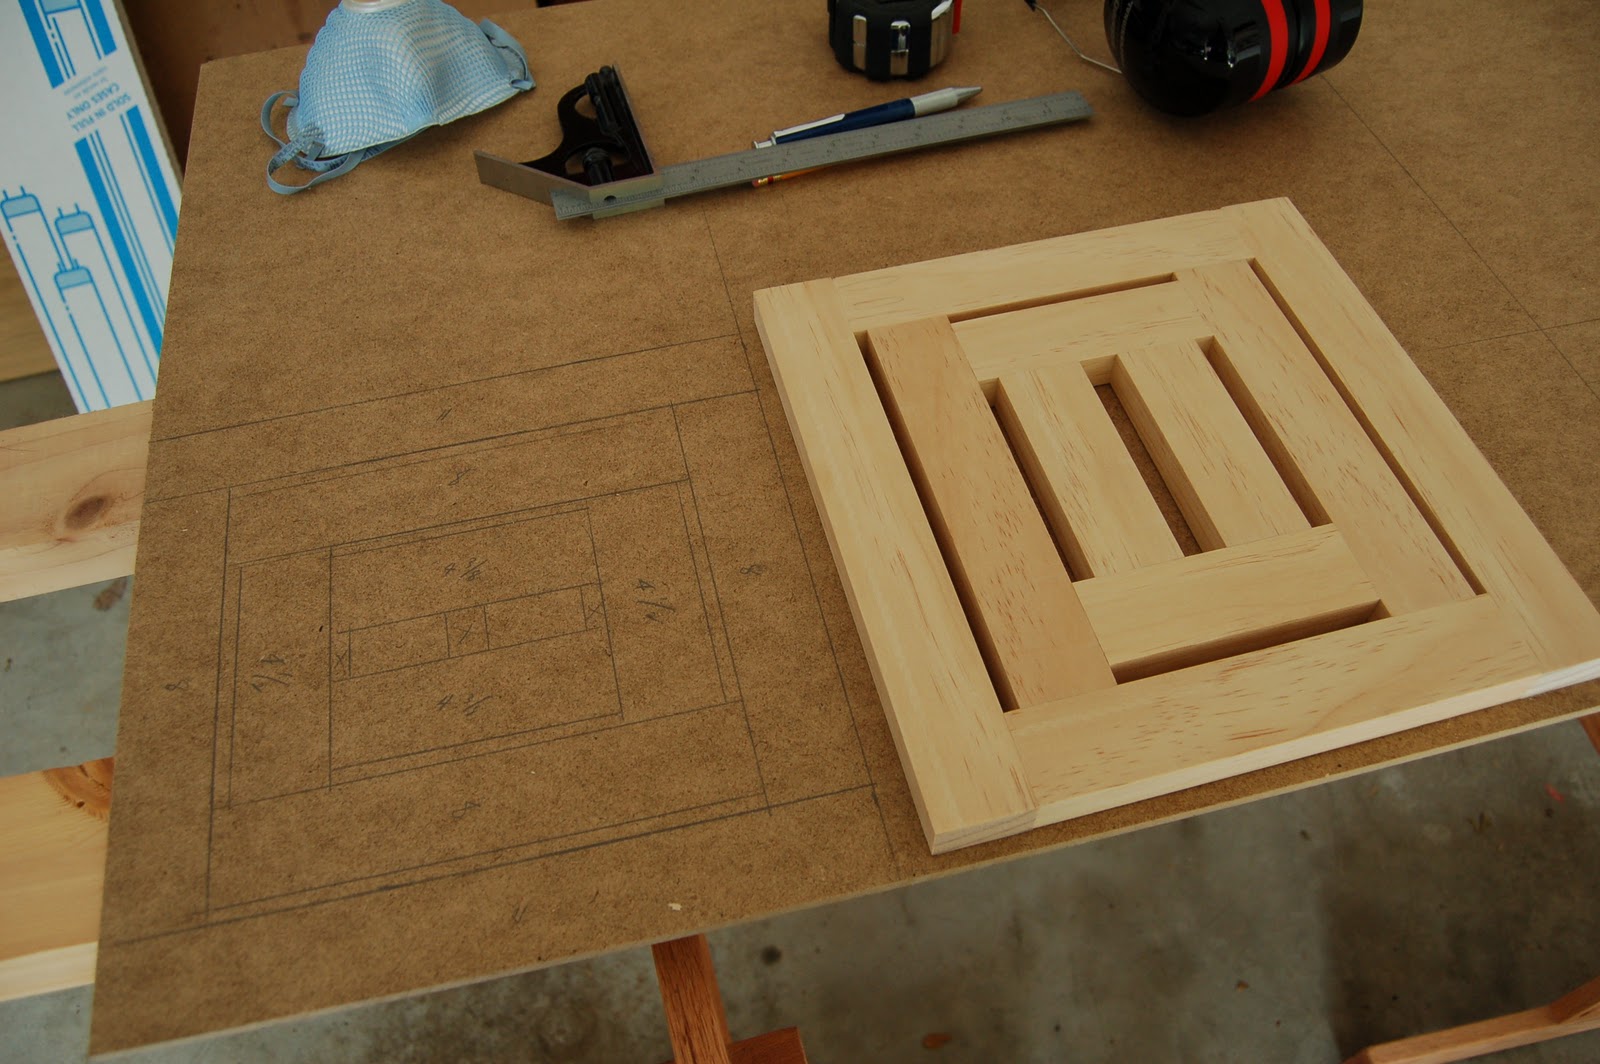
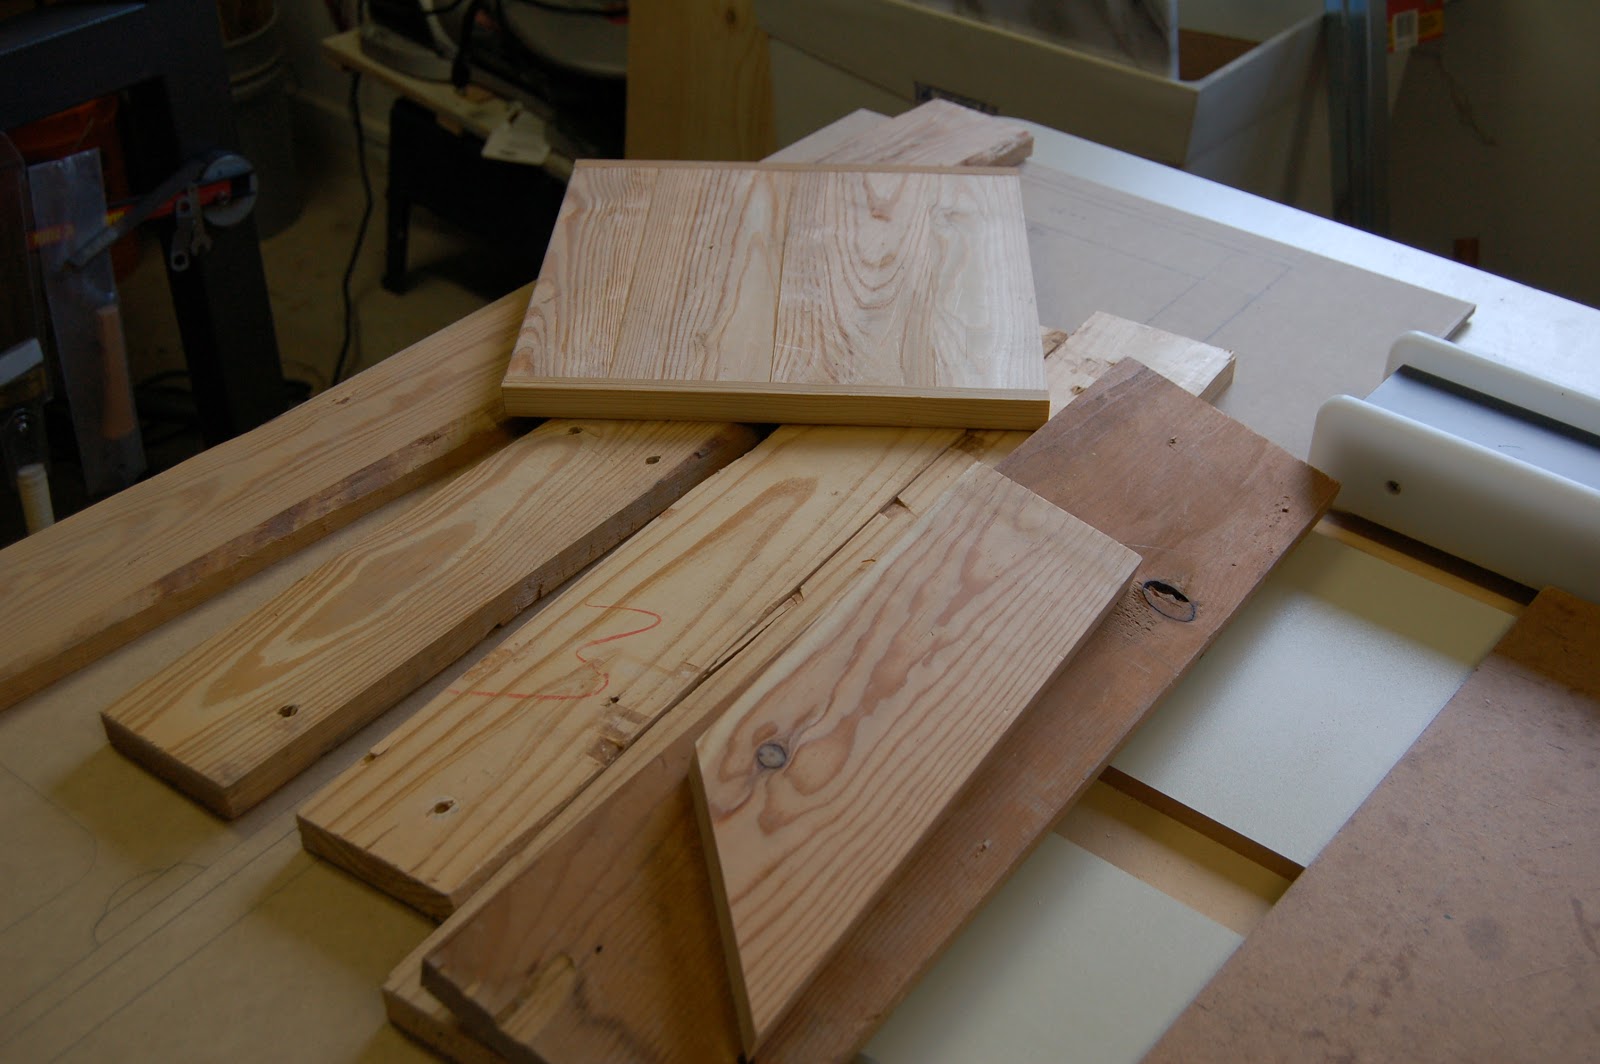
This project is all put together by pocket hole joinery and regular screws and all the work pieces were cut straight across - cross cut as it's commonly known. The wood material was purchased at the nearest home center for about $10 total. Two pieces of 1X2X8 premium pine and one piece of 1X3X8. The width and thickness are actually the original dimension of the lumber before they were rip-cut and planed to thickness. The effective dimension is actually 3/4 X 1 1/2 inches for the 1X2s and 3/4 by 2 1/2 for the 1X3s. But, as you know, part of the woodworking was already done for you by the lumber mill where the original rough lumber was cut and planed to consistent thickness and made smooth on all four sides. So now, all you need to do is cross cut the pieces to your desired dimensions.
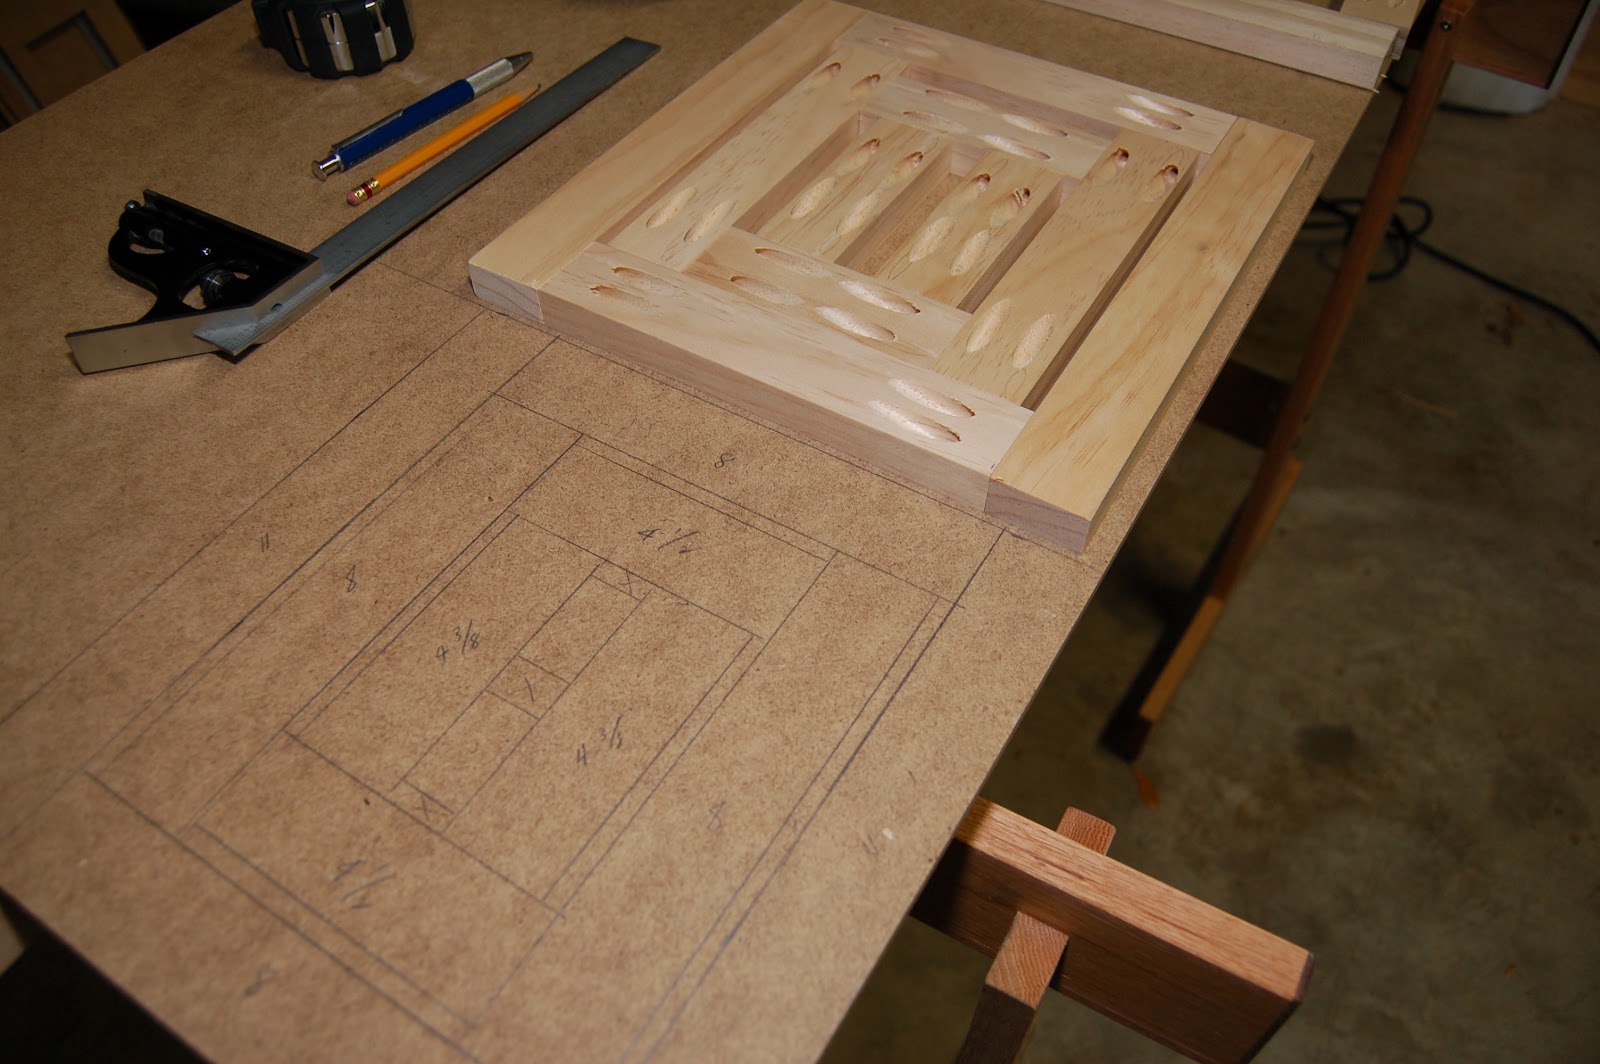
It is always desirable to draw a very simple plan at full scale (actual size) on any flat board of wood, card board or 1/4 plywood.
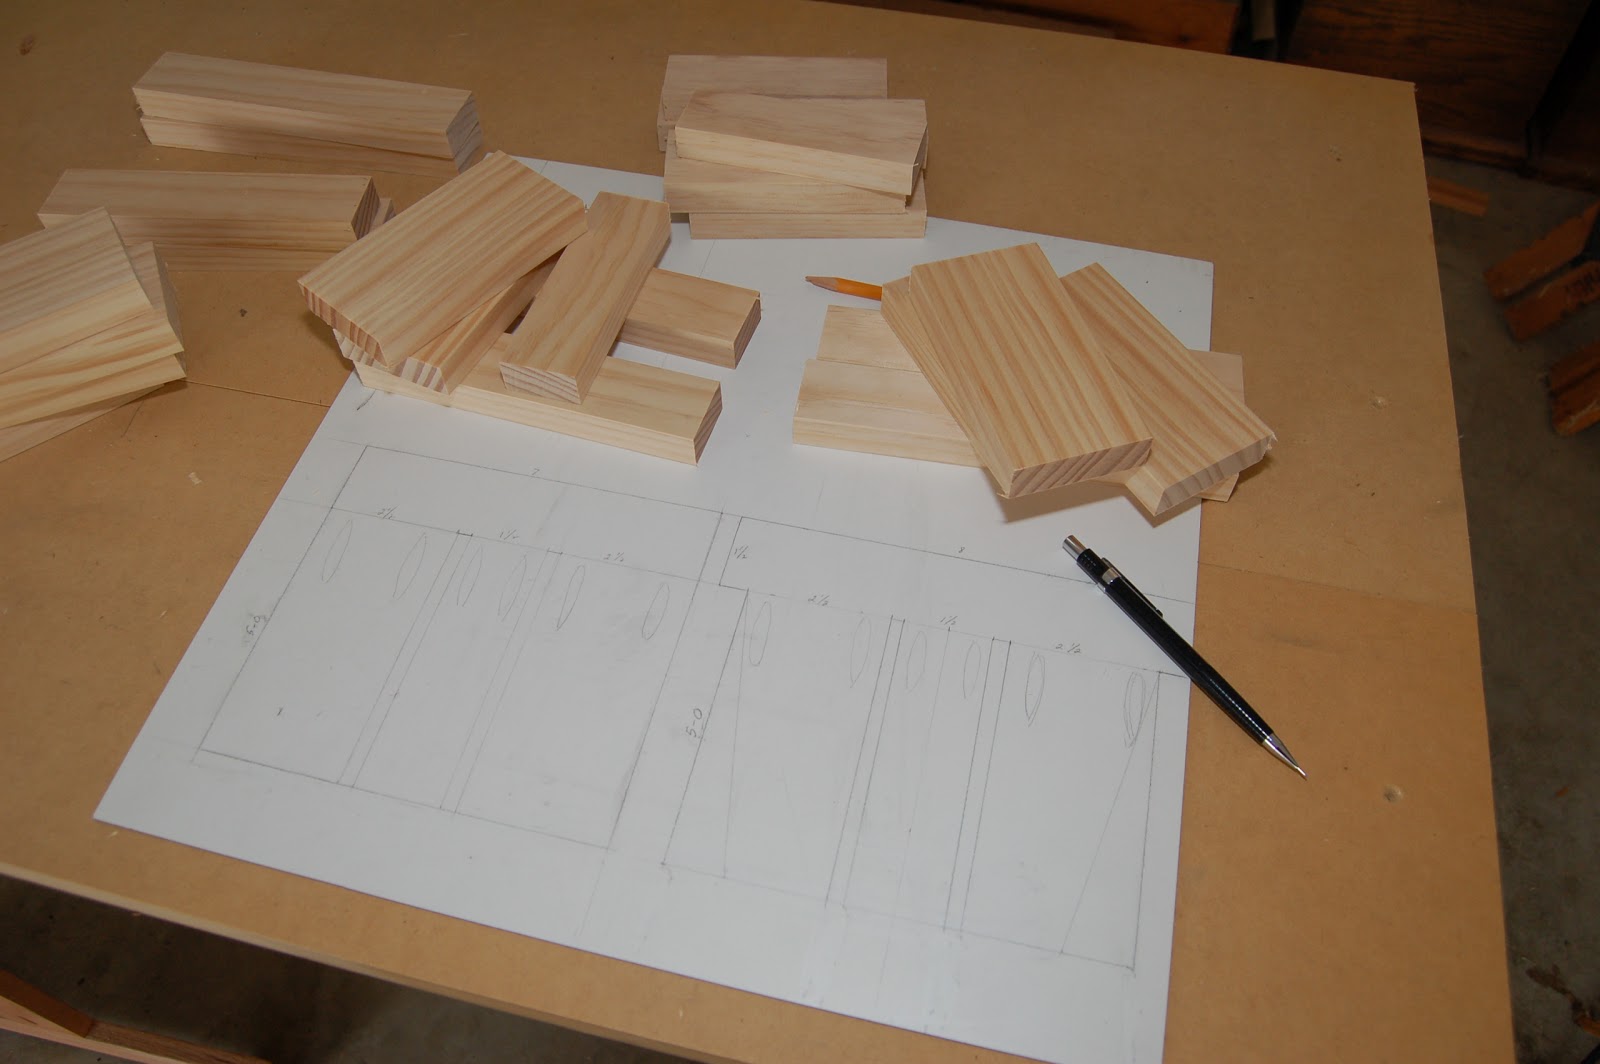
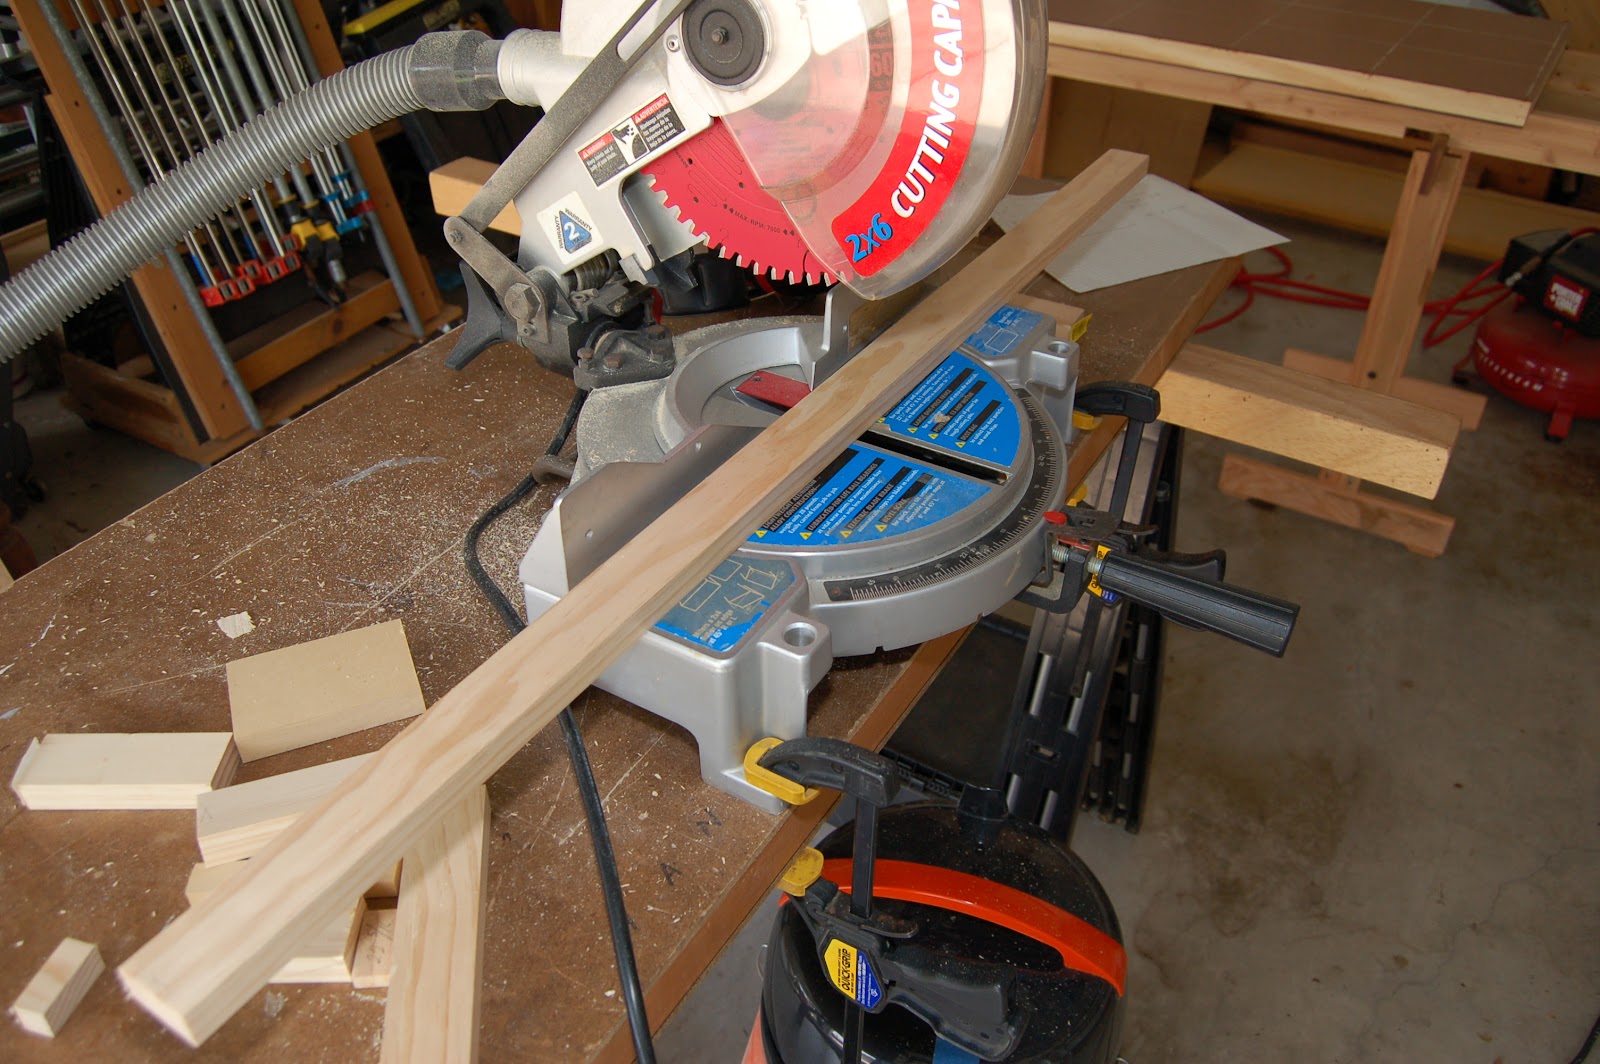
Make your measurements and adjust according to your liking. You will be drawing nothing but straight lines and there is no need to make it sophisticated. However, these laid out lines are important in checking your work pieces as you begin to assemble the project. It actually helps you to keep track of how many pieces you have already cut and how much more you need to do. This way you will always have the exact number of pieces and no wasted material or effort. Tip: Use stop blocks to ensure consistent cuts for all the pieces of similar lengths. This is also a safe way to secure the work piece. Pull down on the miter saw in a moderate but deliberate pace.
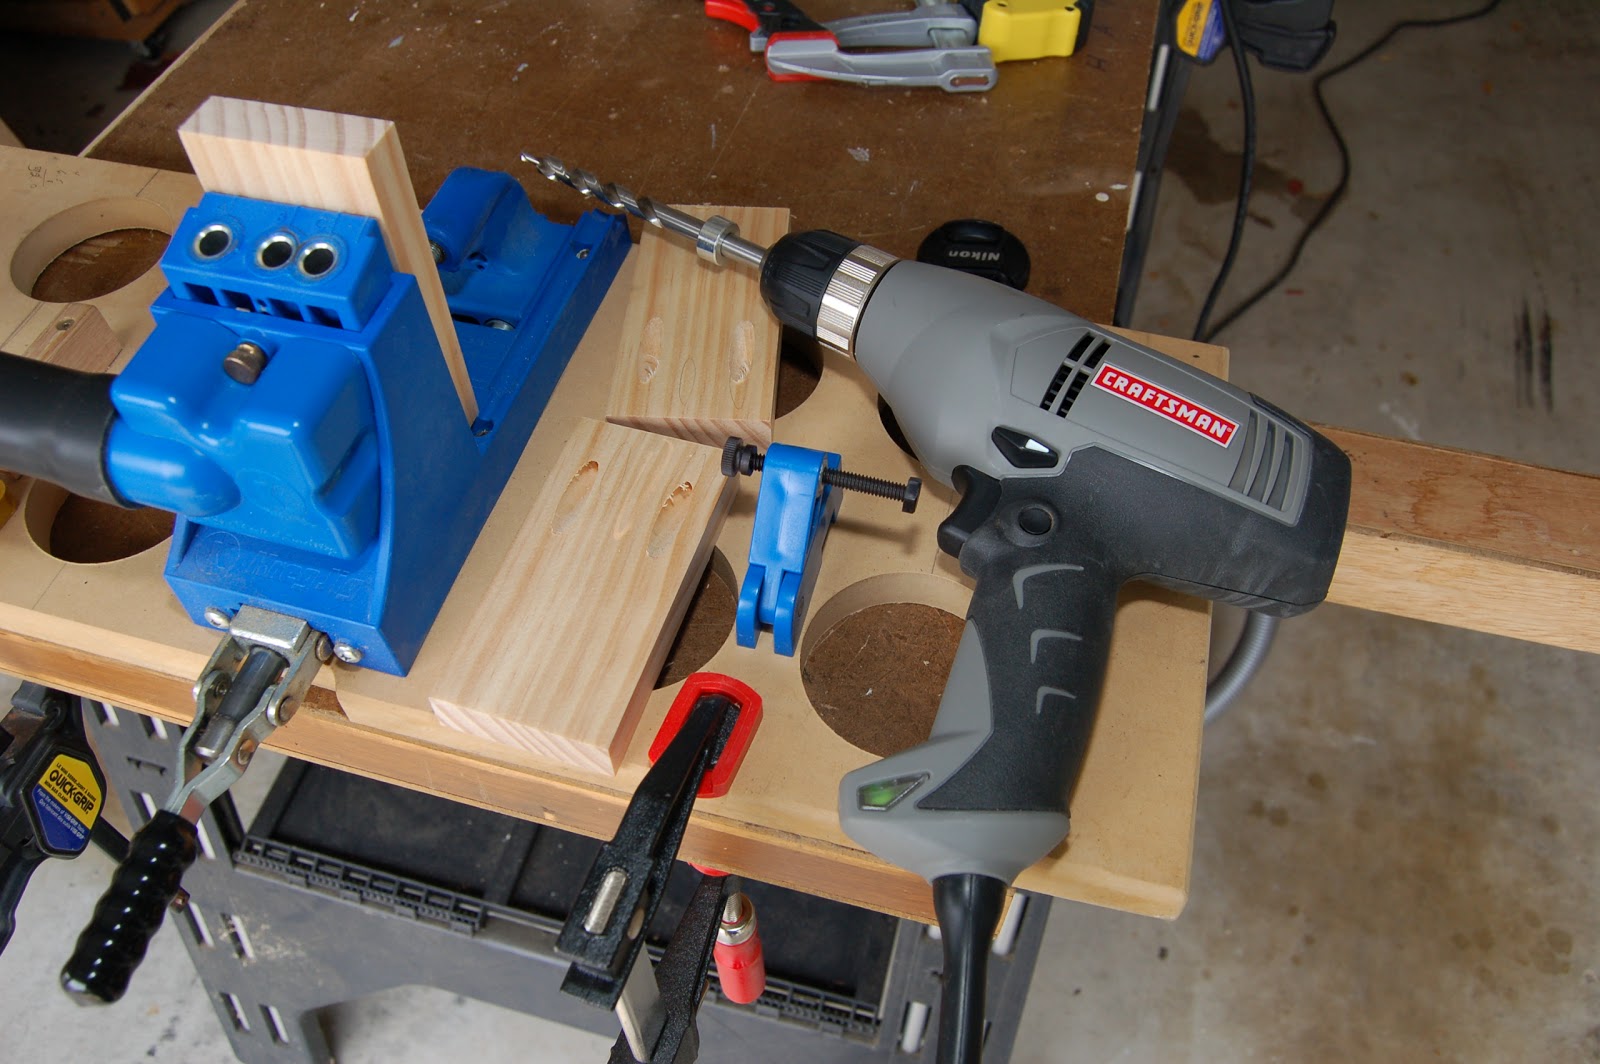
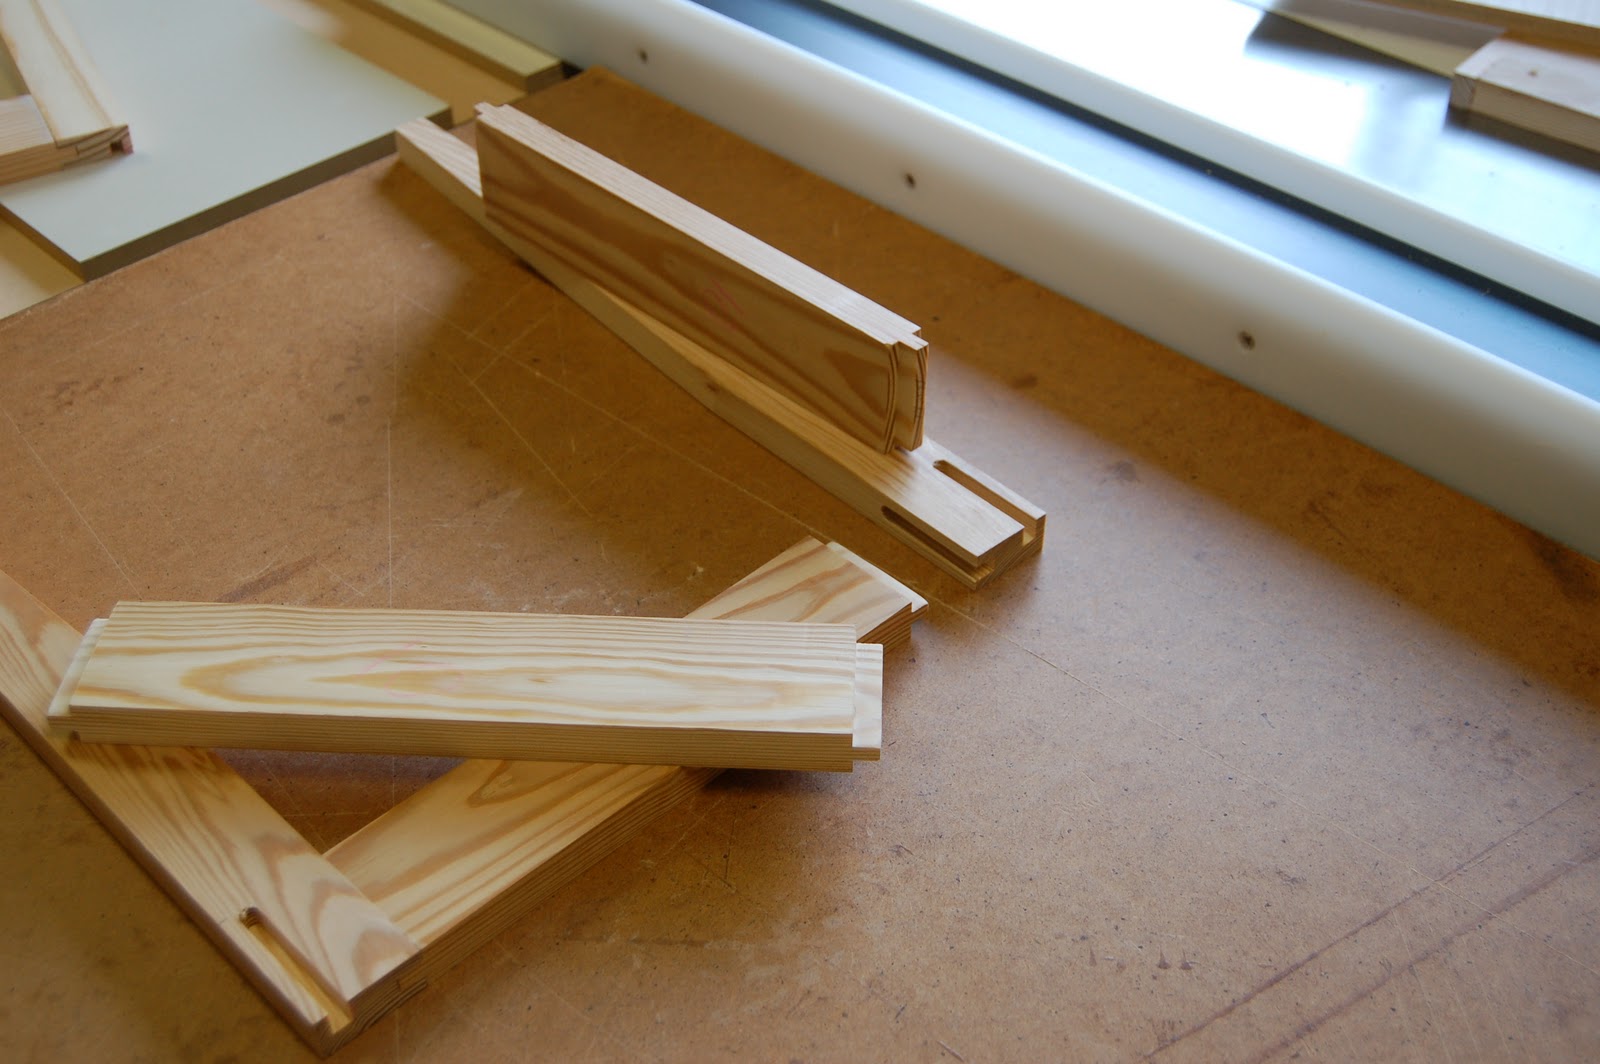
With all the cut pieces laid out you will begin to drill the pocket holes but before that you must decide which work piece to drill the holes at and be consistent for all the similar pieces. In this case most of the holes are such that the screw heads are pointing downward so that water and moisture will be prevented from accumulating over the pocket holes.
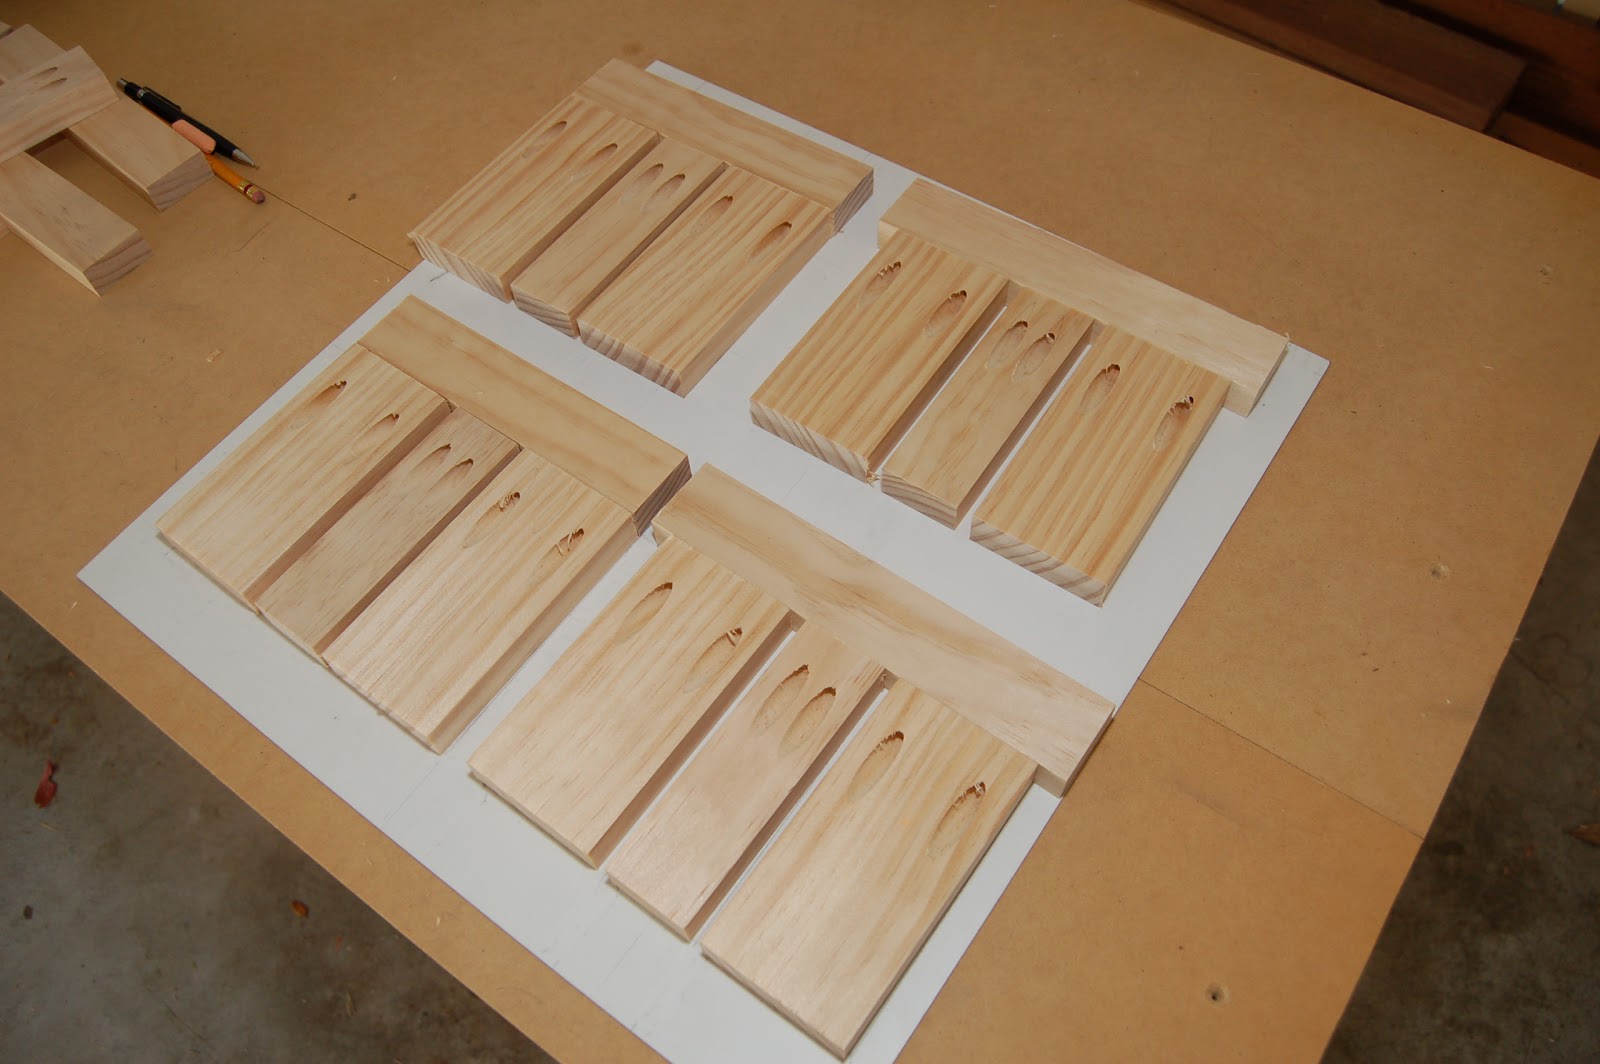
You can see that from the photos. Holes drilled sideways are good too for the same reason. Drill all the holes.
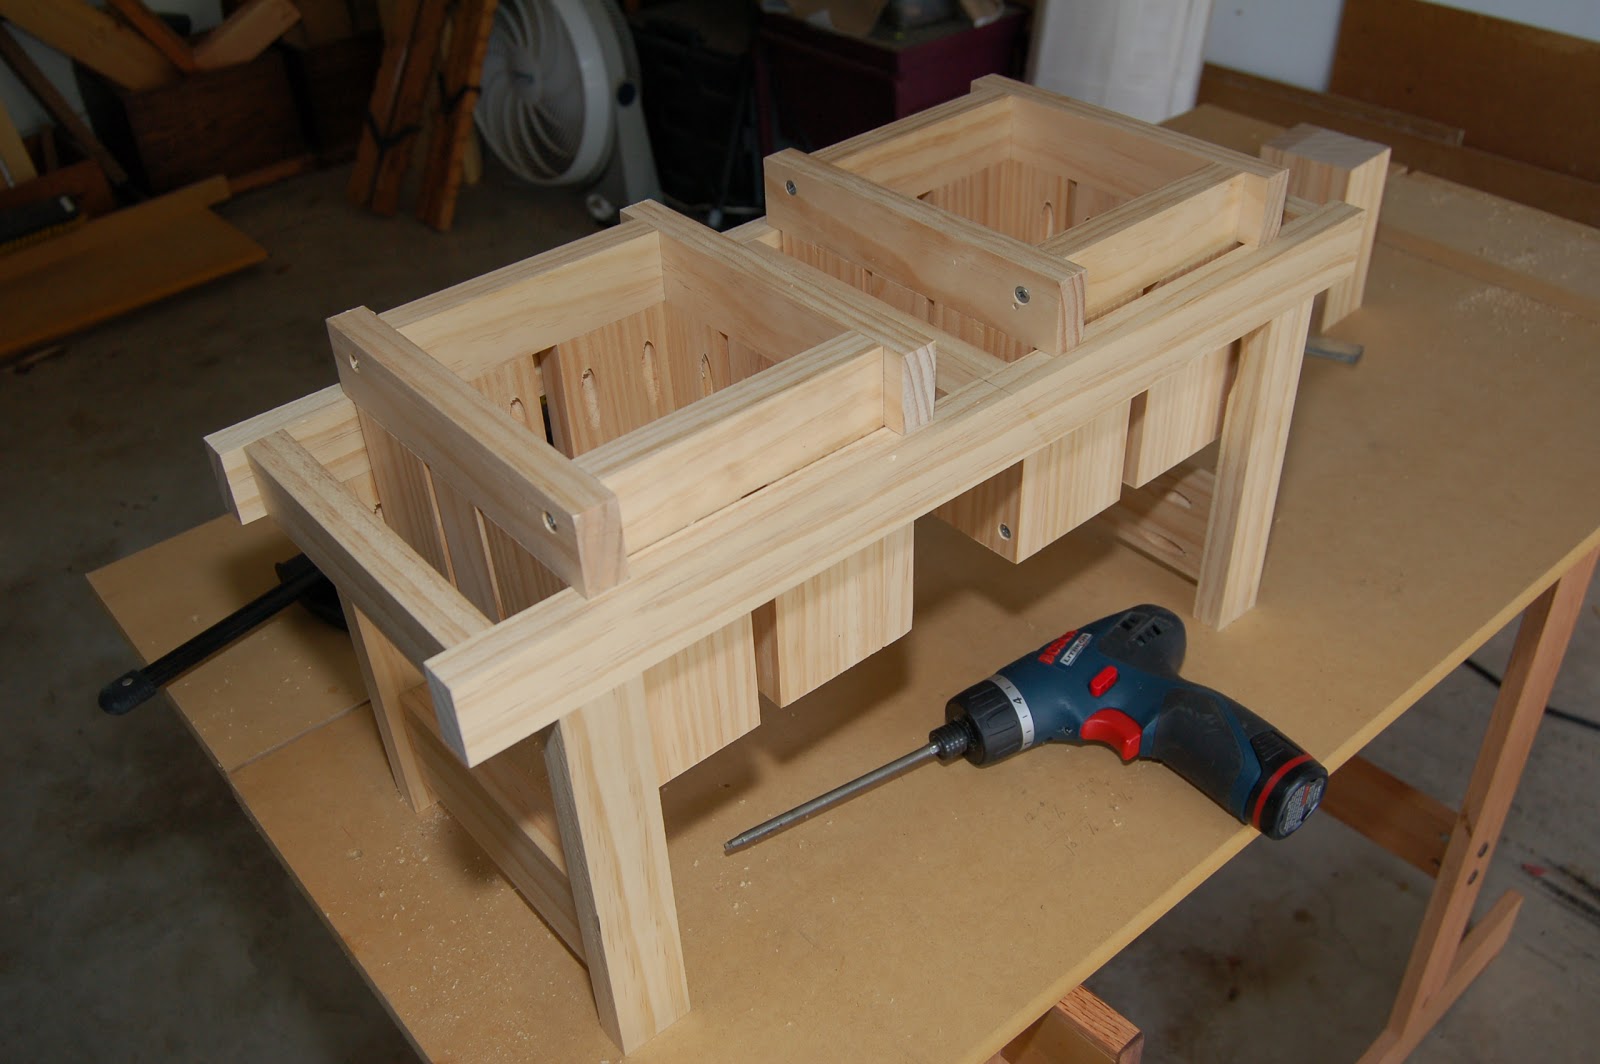
Again, before assembly, lay out the pieces over the drawing to re-check your work and make sure all the parts are there. Follow the instruction that came with the pocket hole kit in making the joints. Where possible use clamps to secure the parts at right angles (90 deg.) to each other and then, without fail, use the clamp that came with the jig to flush the "good" sides together. The good side is always the one opposite where the holes are drilled. Look at the photos to review.
In joining the individual parts to form the box, use regular screws. Always good practice to drill pilot holes to prevent the wood from splitting and it also ensures the screws to go down smoothly.
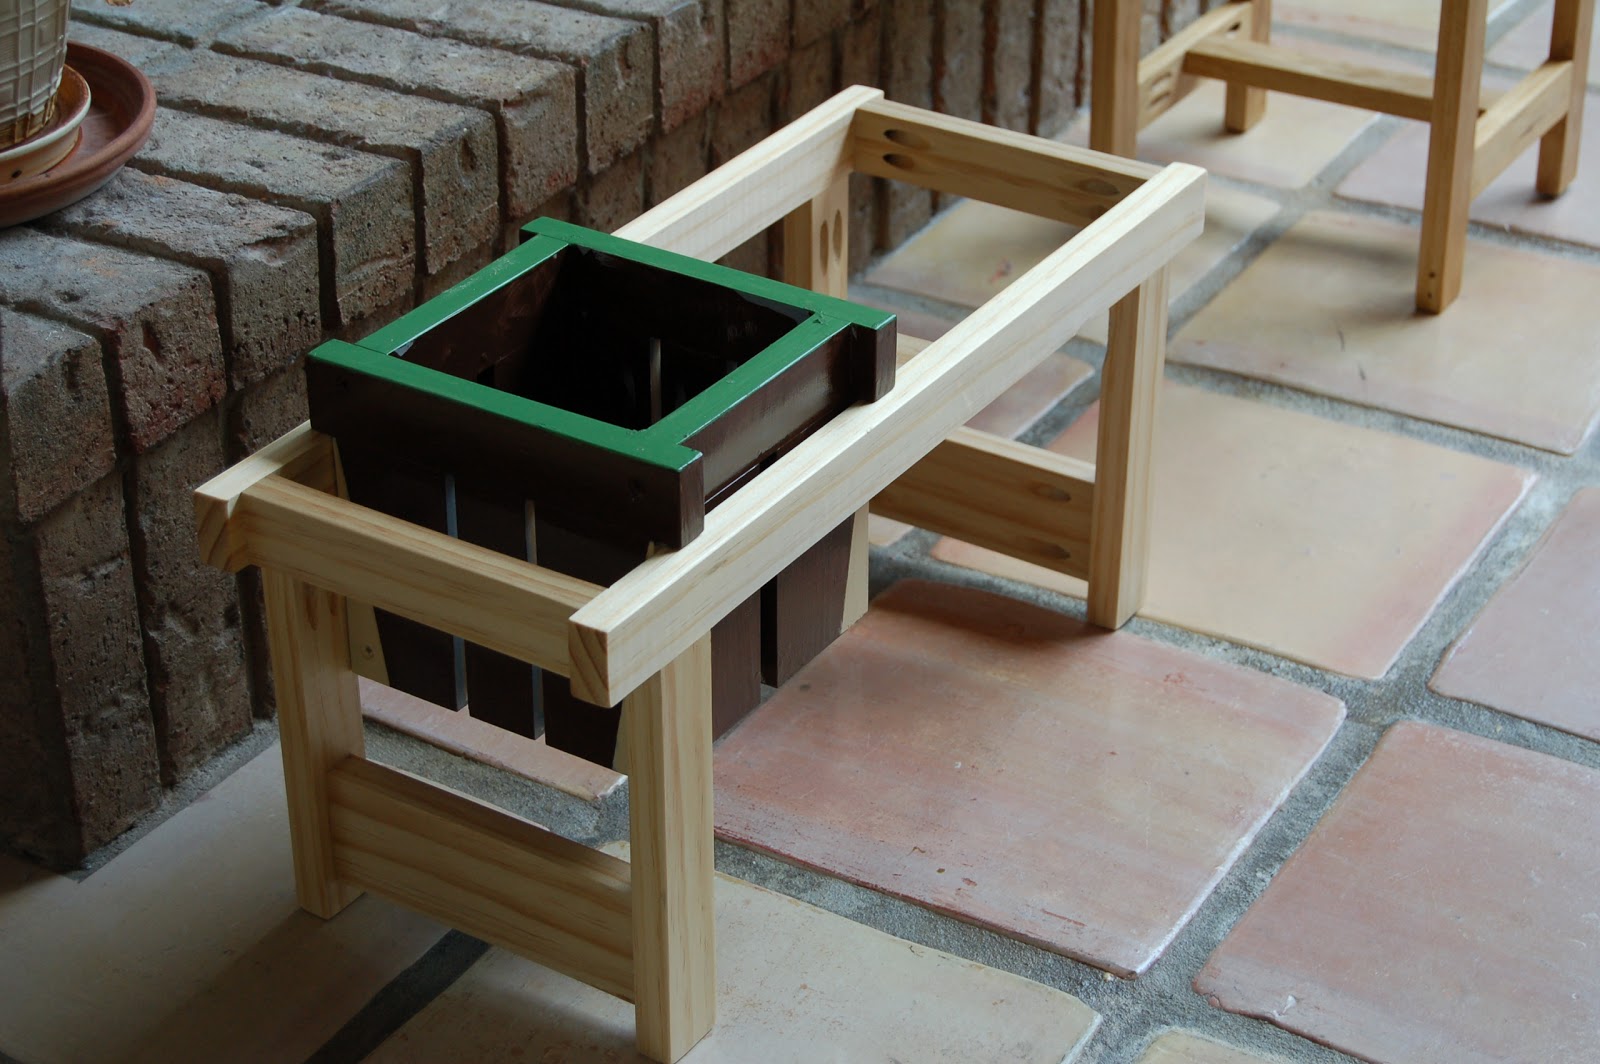
This project could very well have been left unfinished for a weathered look over time. Here I gave the base frame a natural finish and painted the actual "planter" for contrast.
This is a great weekend project.
Now, when you get comfortable with the process you can construct one out of hardwoods like oak, which are also sold at the same dimensions, albeit more expensive.
click here for all photos only
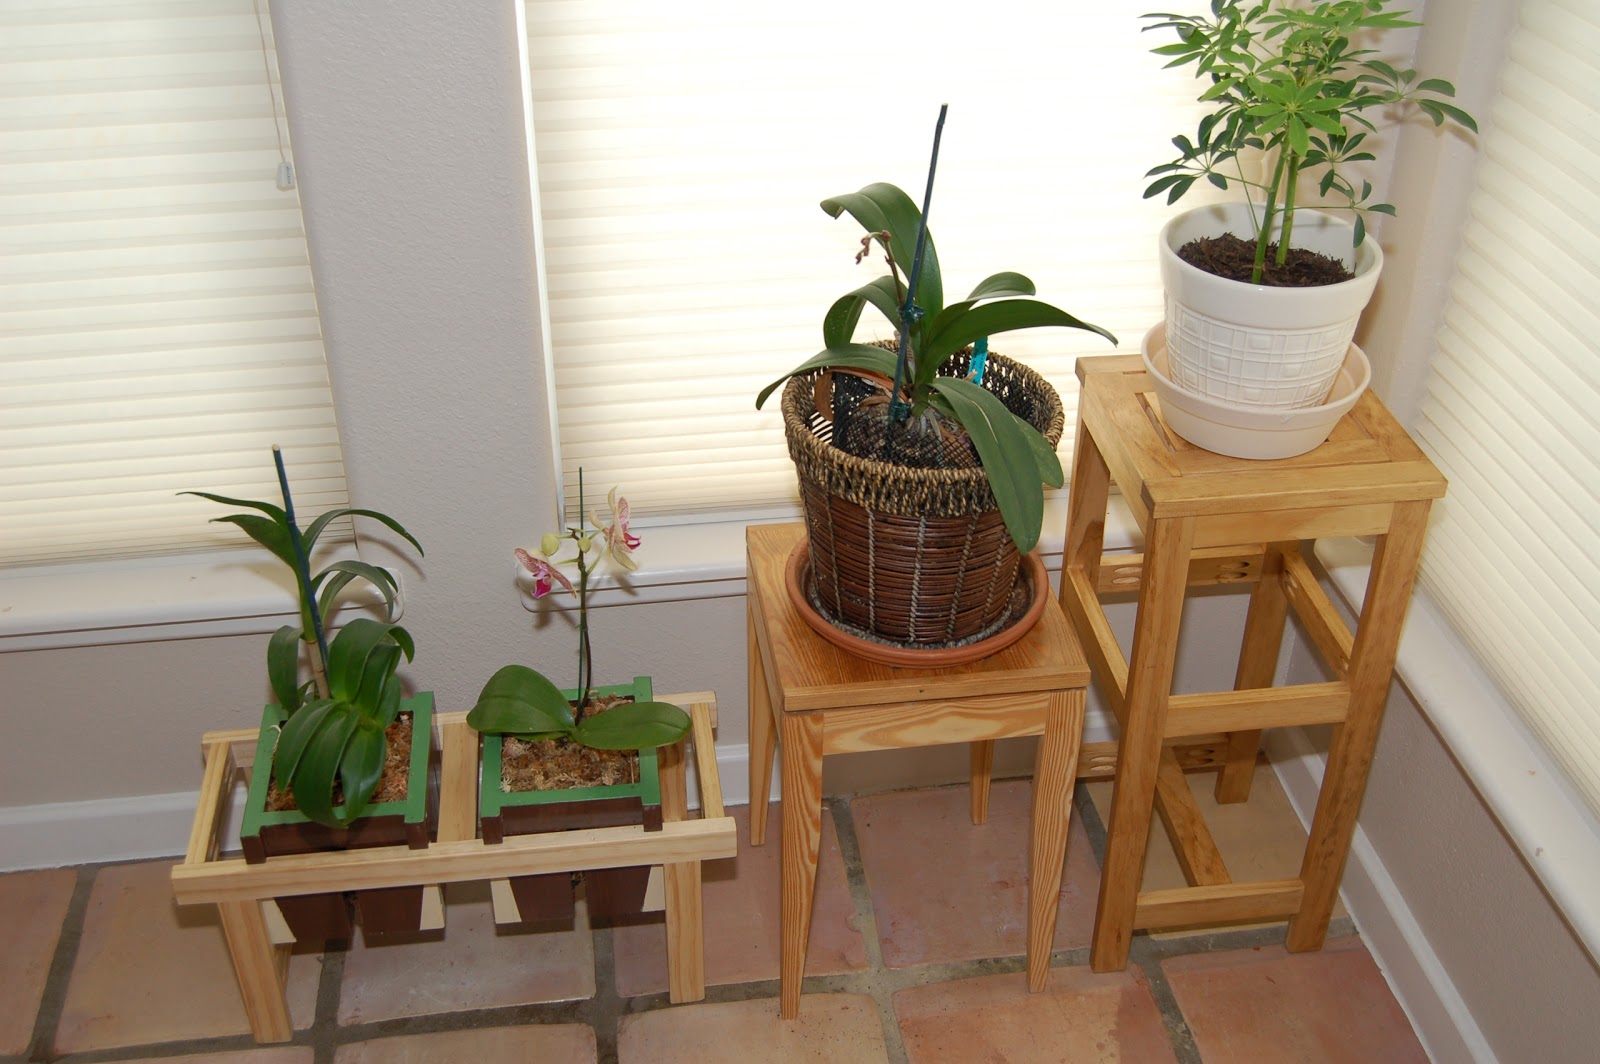
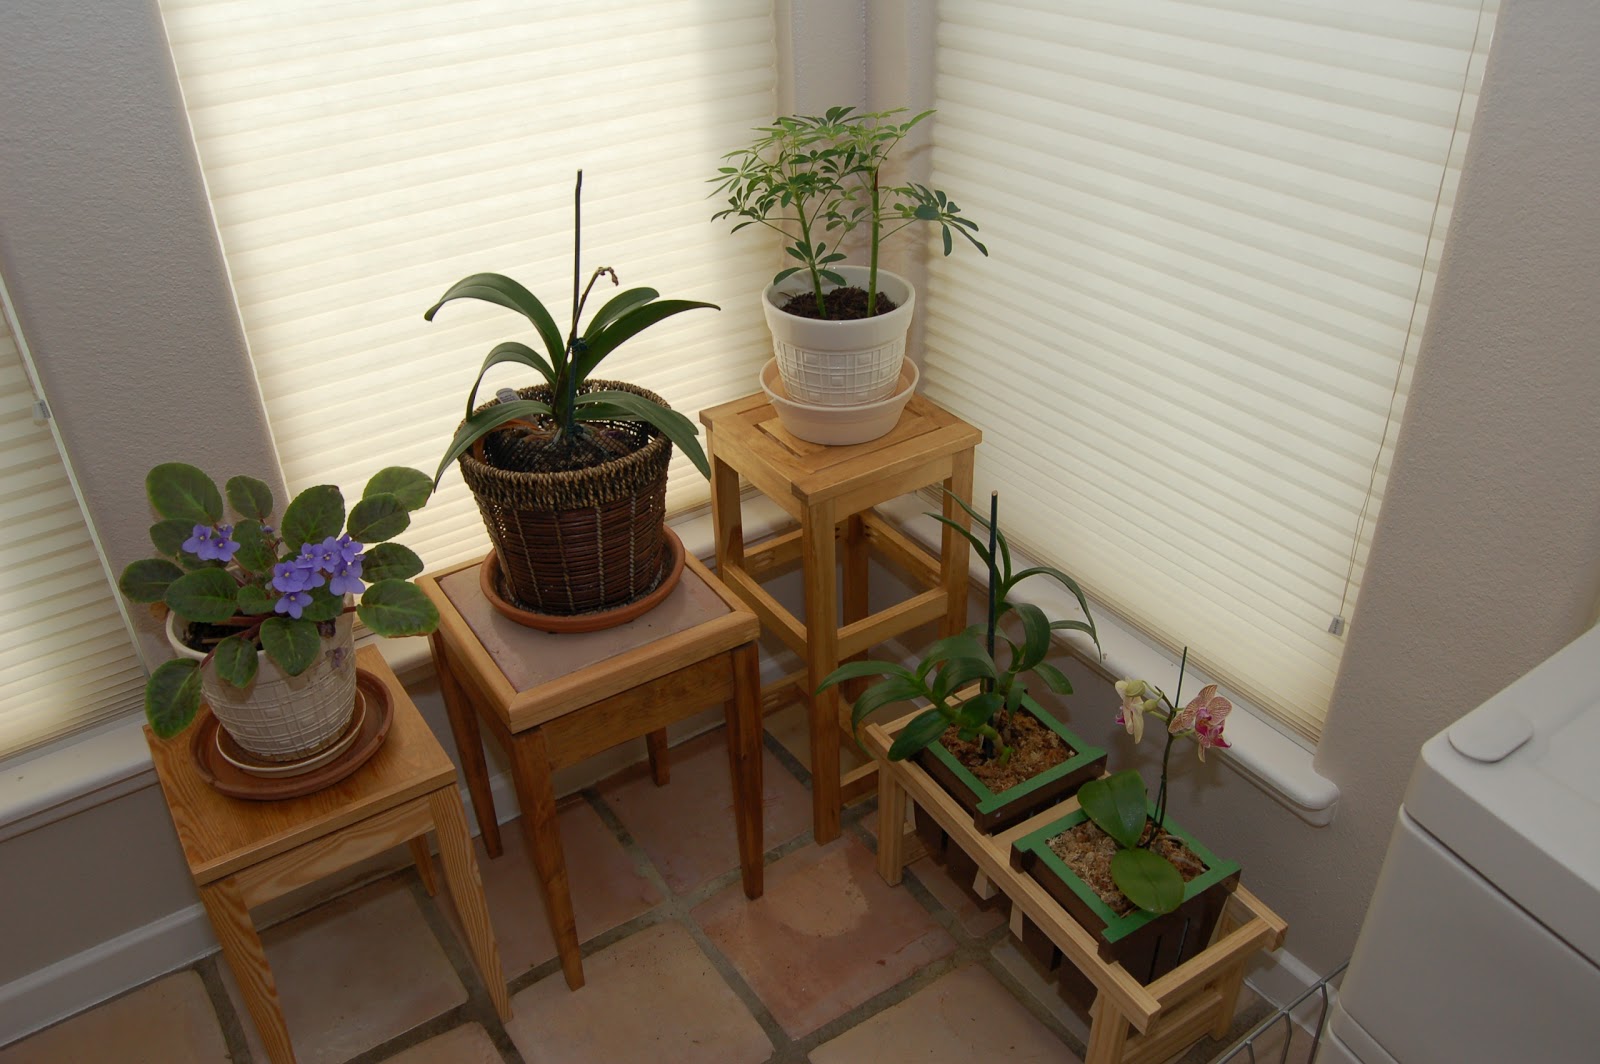
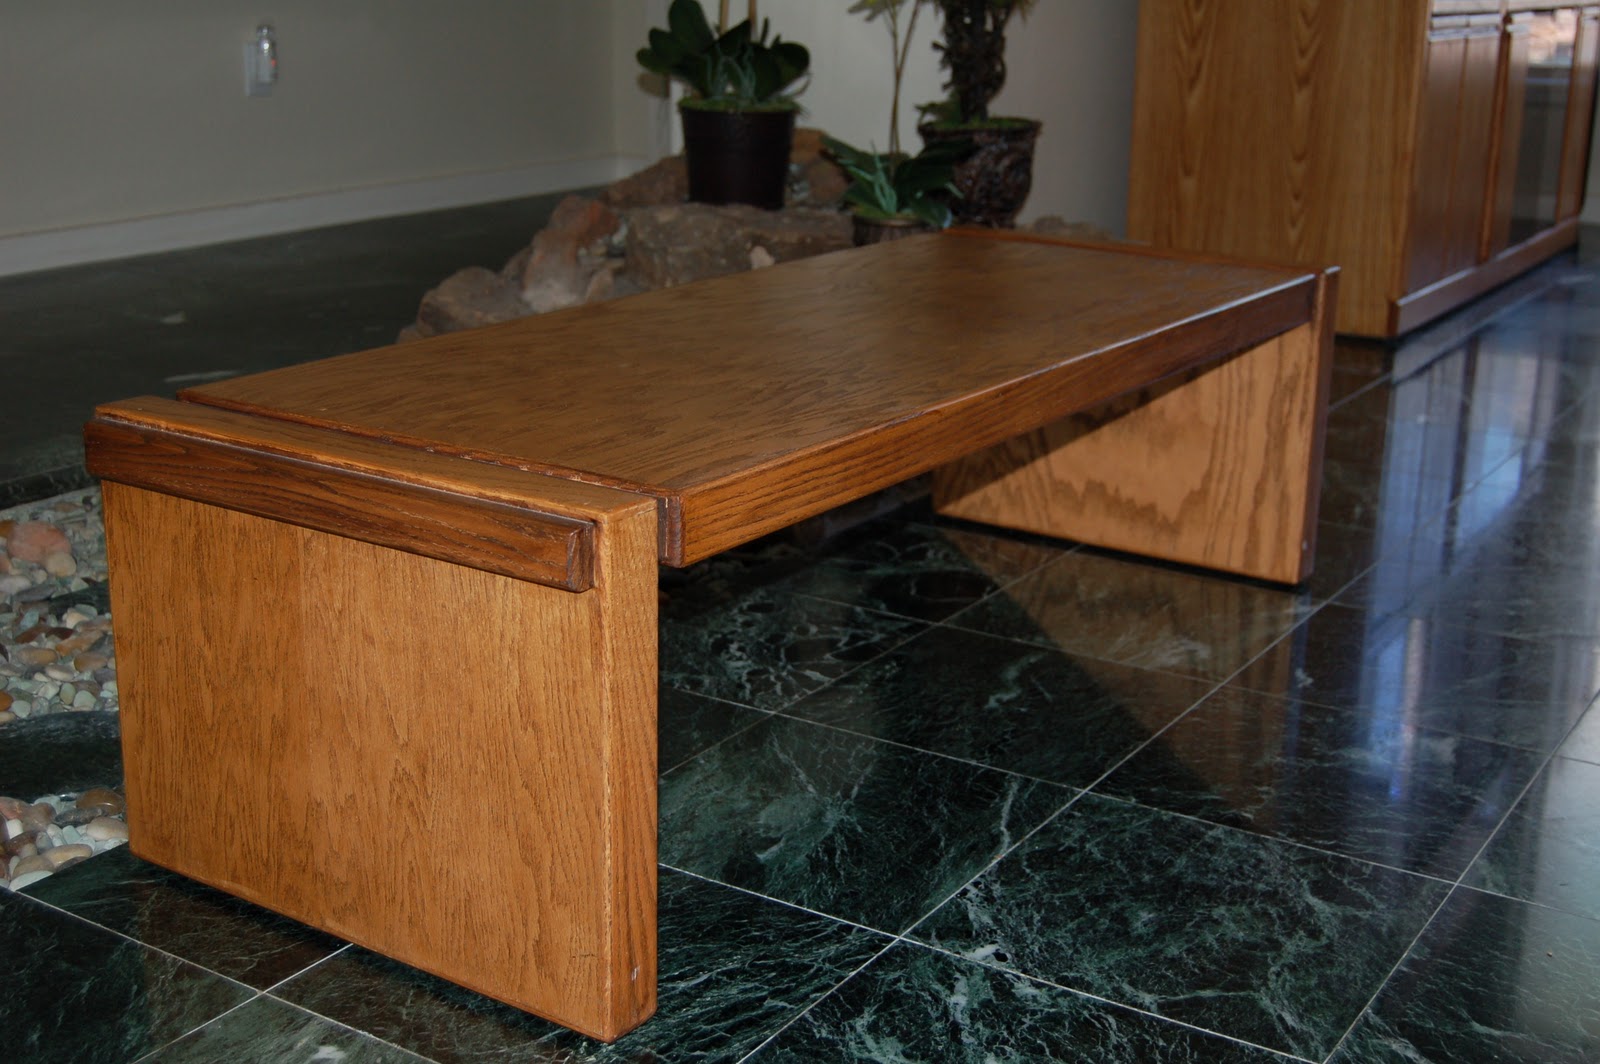
The Plant Stand
The Plant Stand
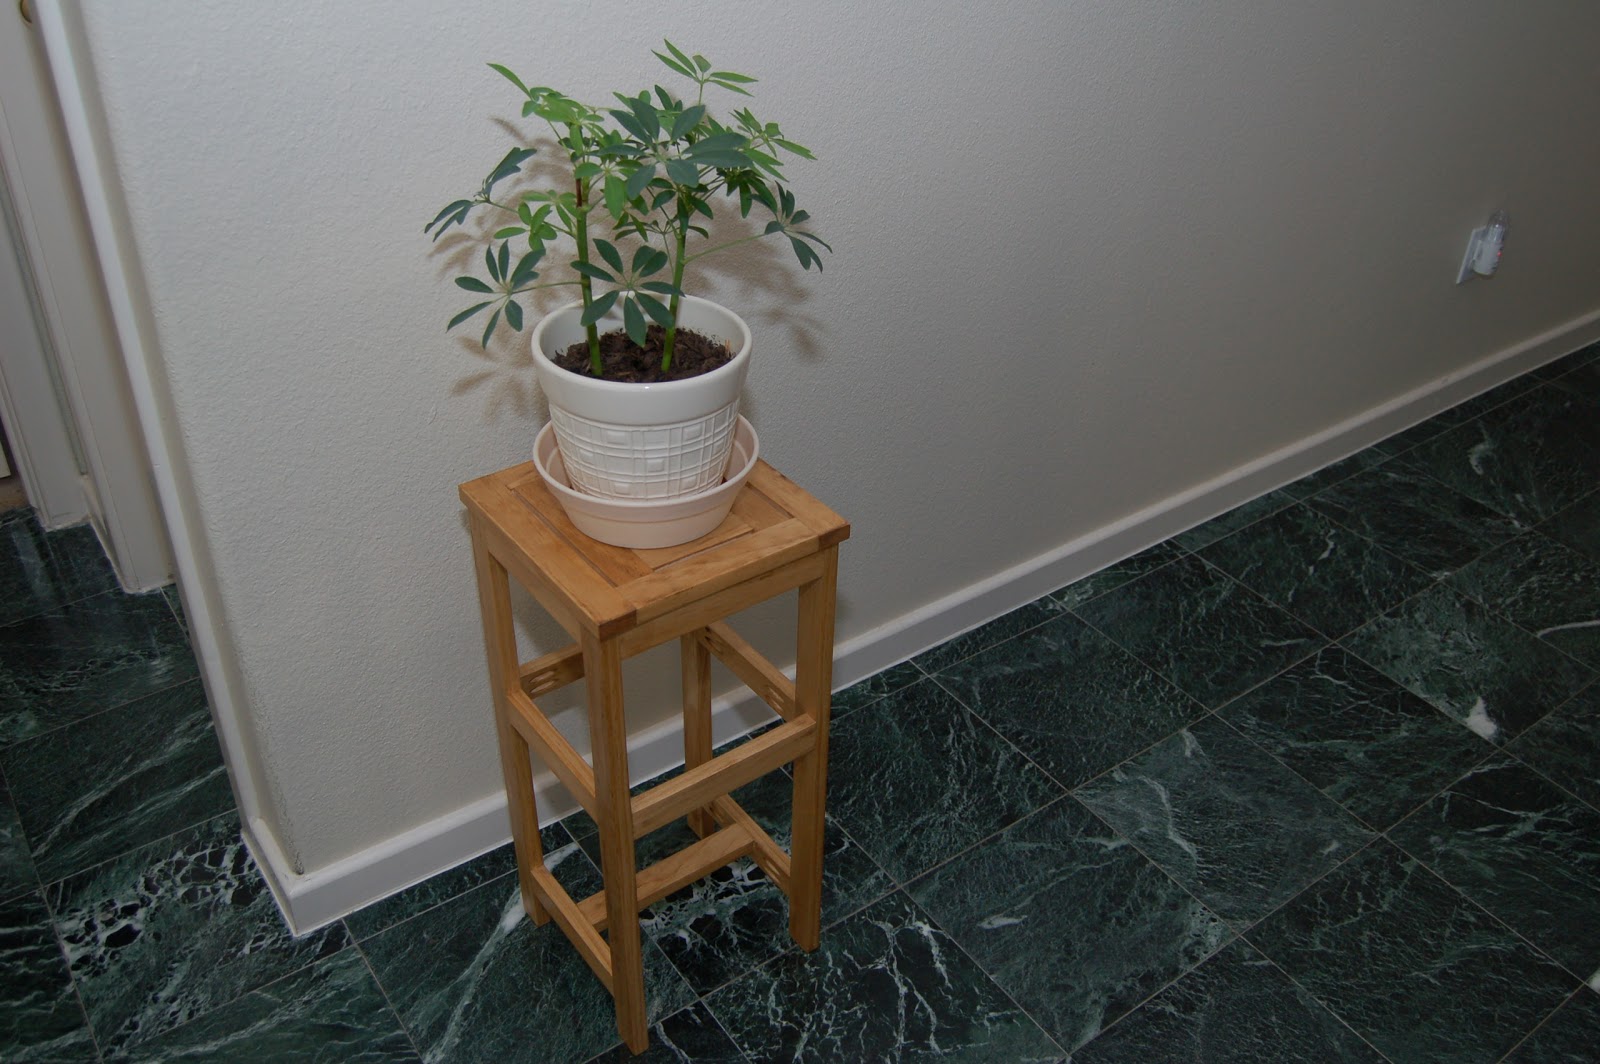
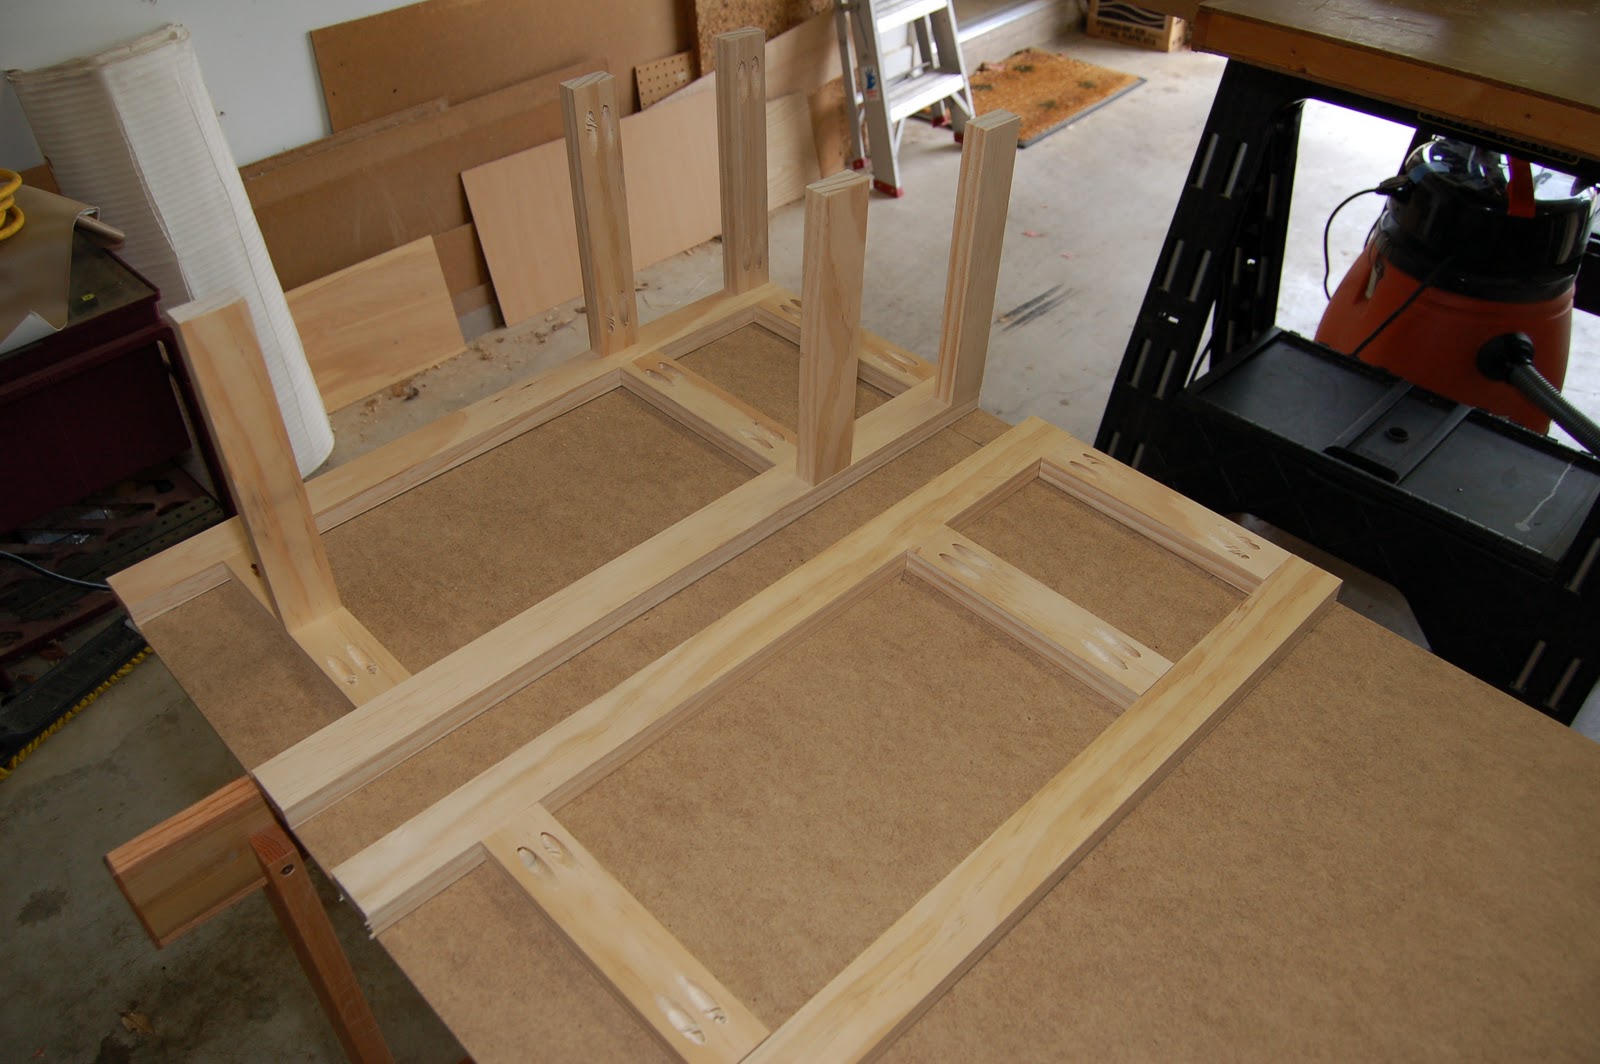
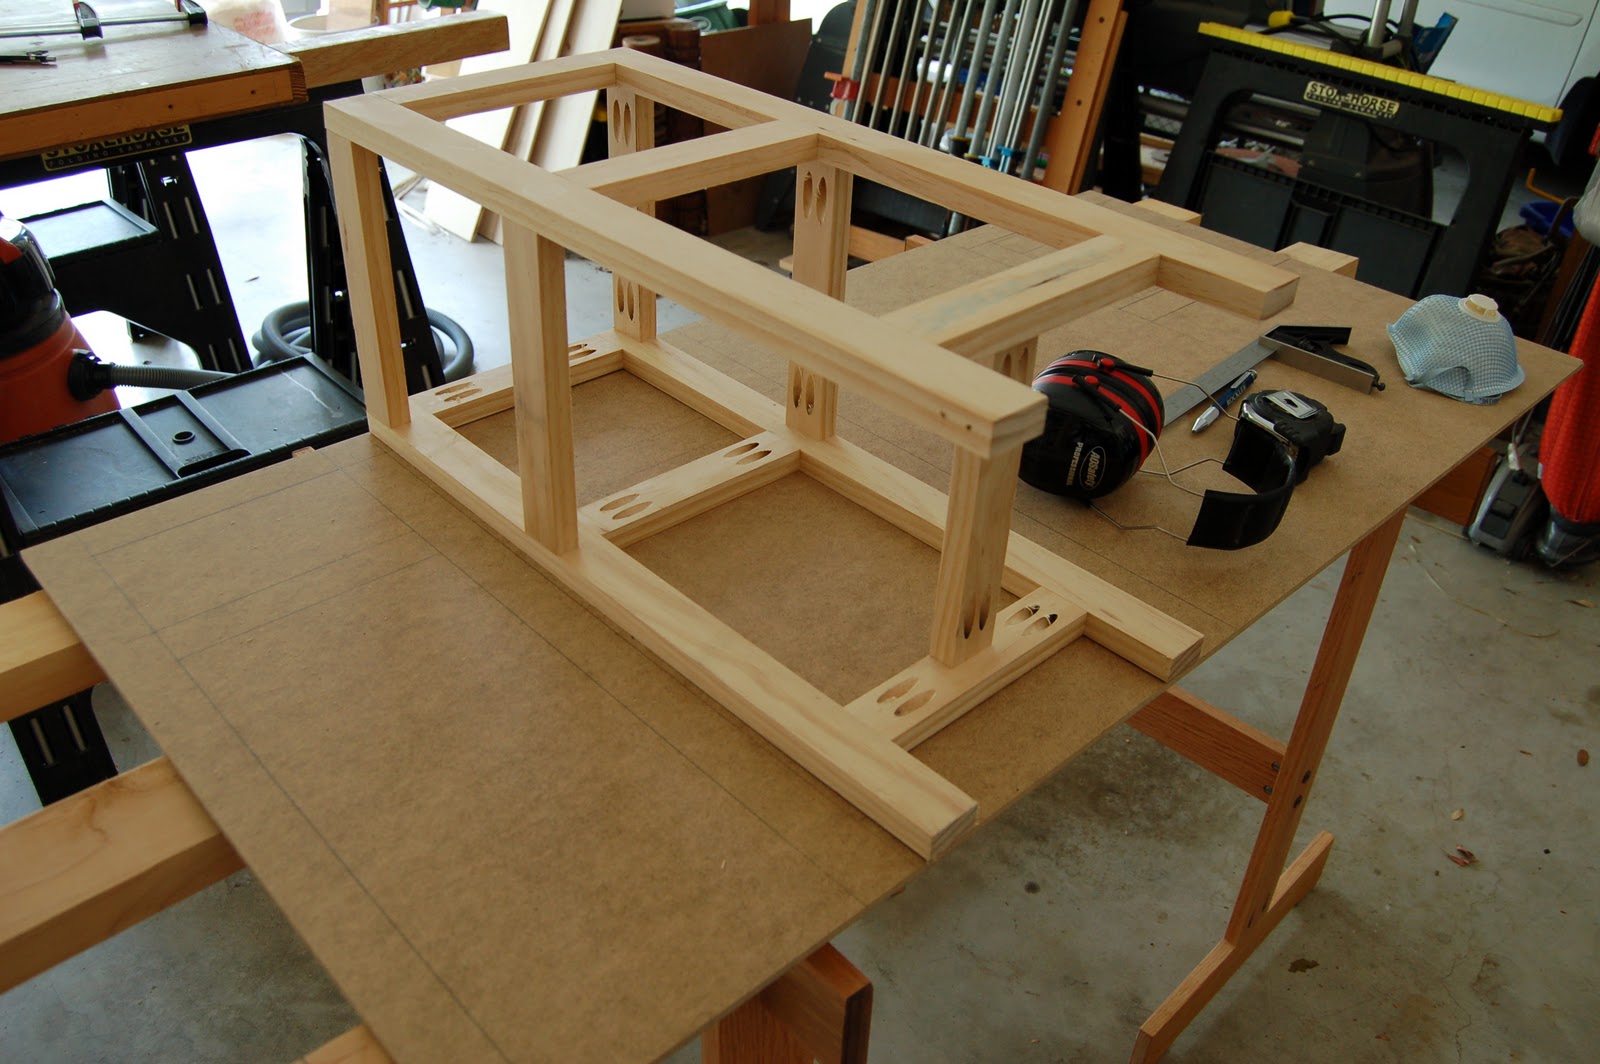
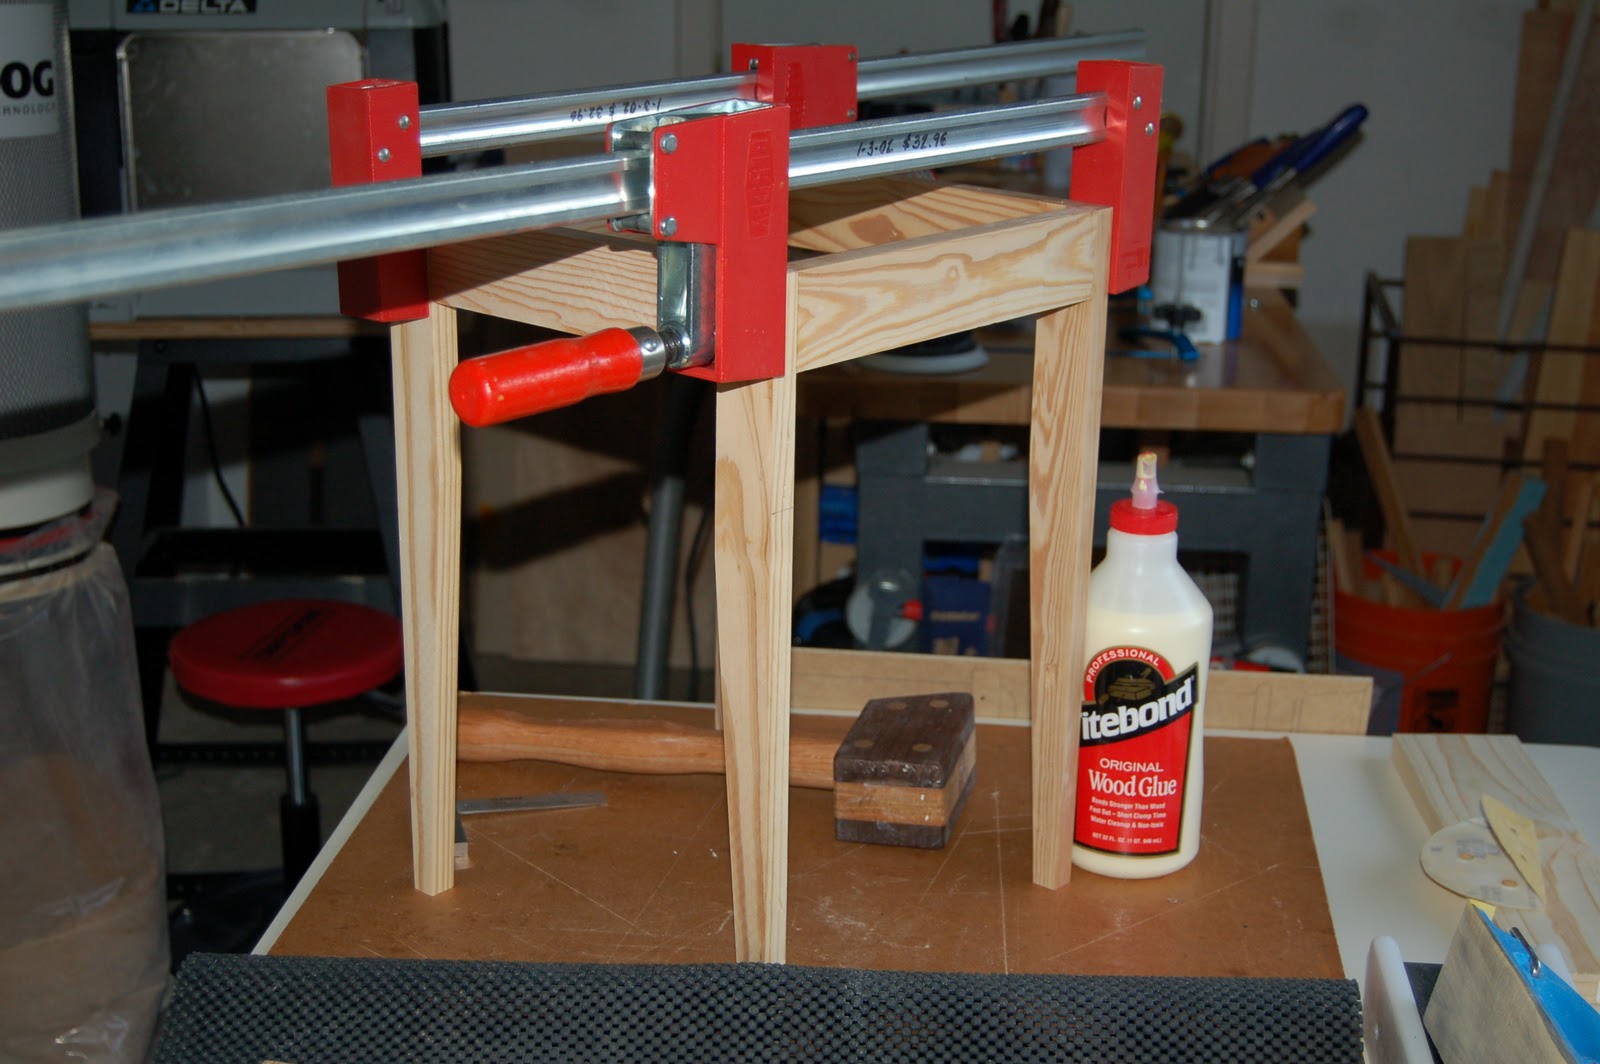
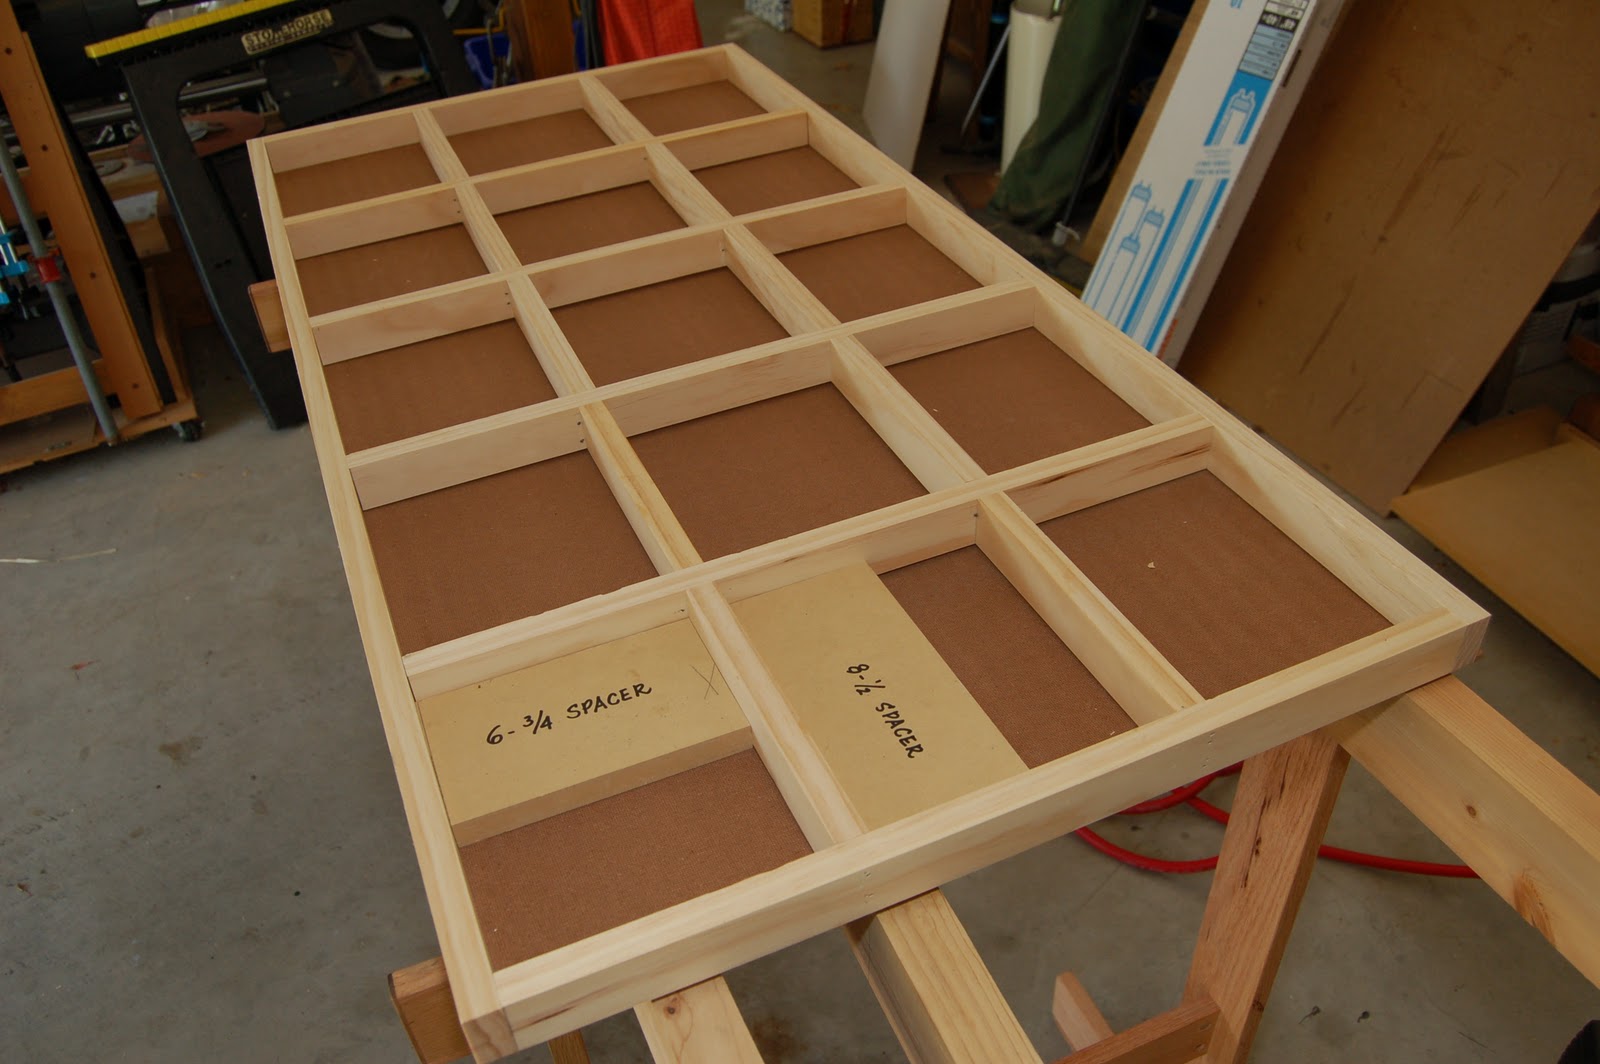
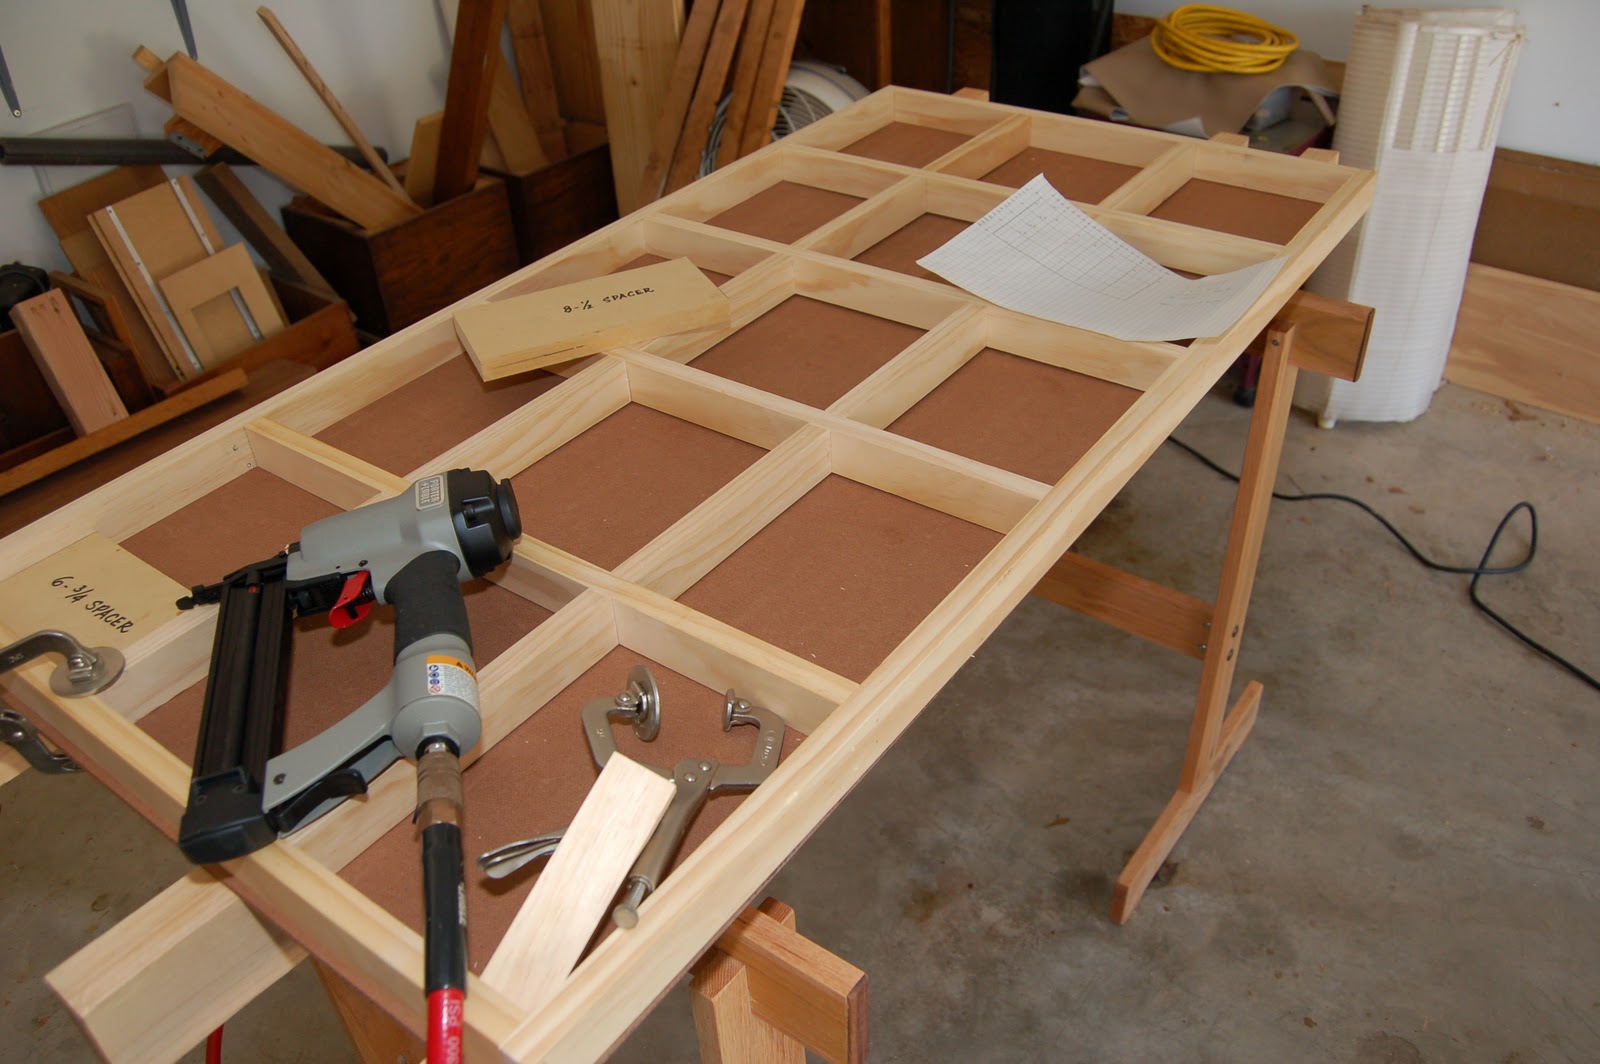
Wood material for this project was also bought for about $10 at the home center. The cutting of the work pieces and drilling of the pocket holes are the same processes as were used to construct the orchid planter. The frame that make up the stand is easily designed, again with just straight lines, with ample support structures that are at right angles to the four legs.Click picture to enlarge.
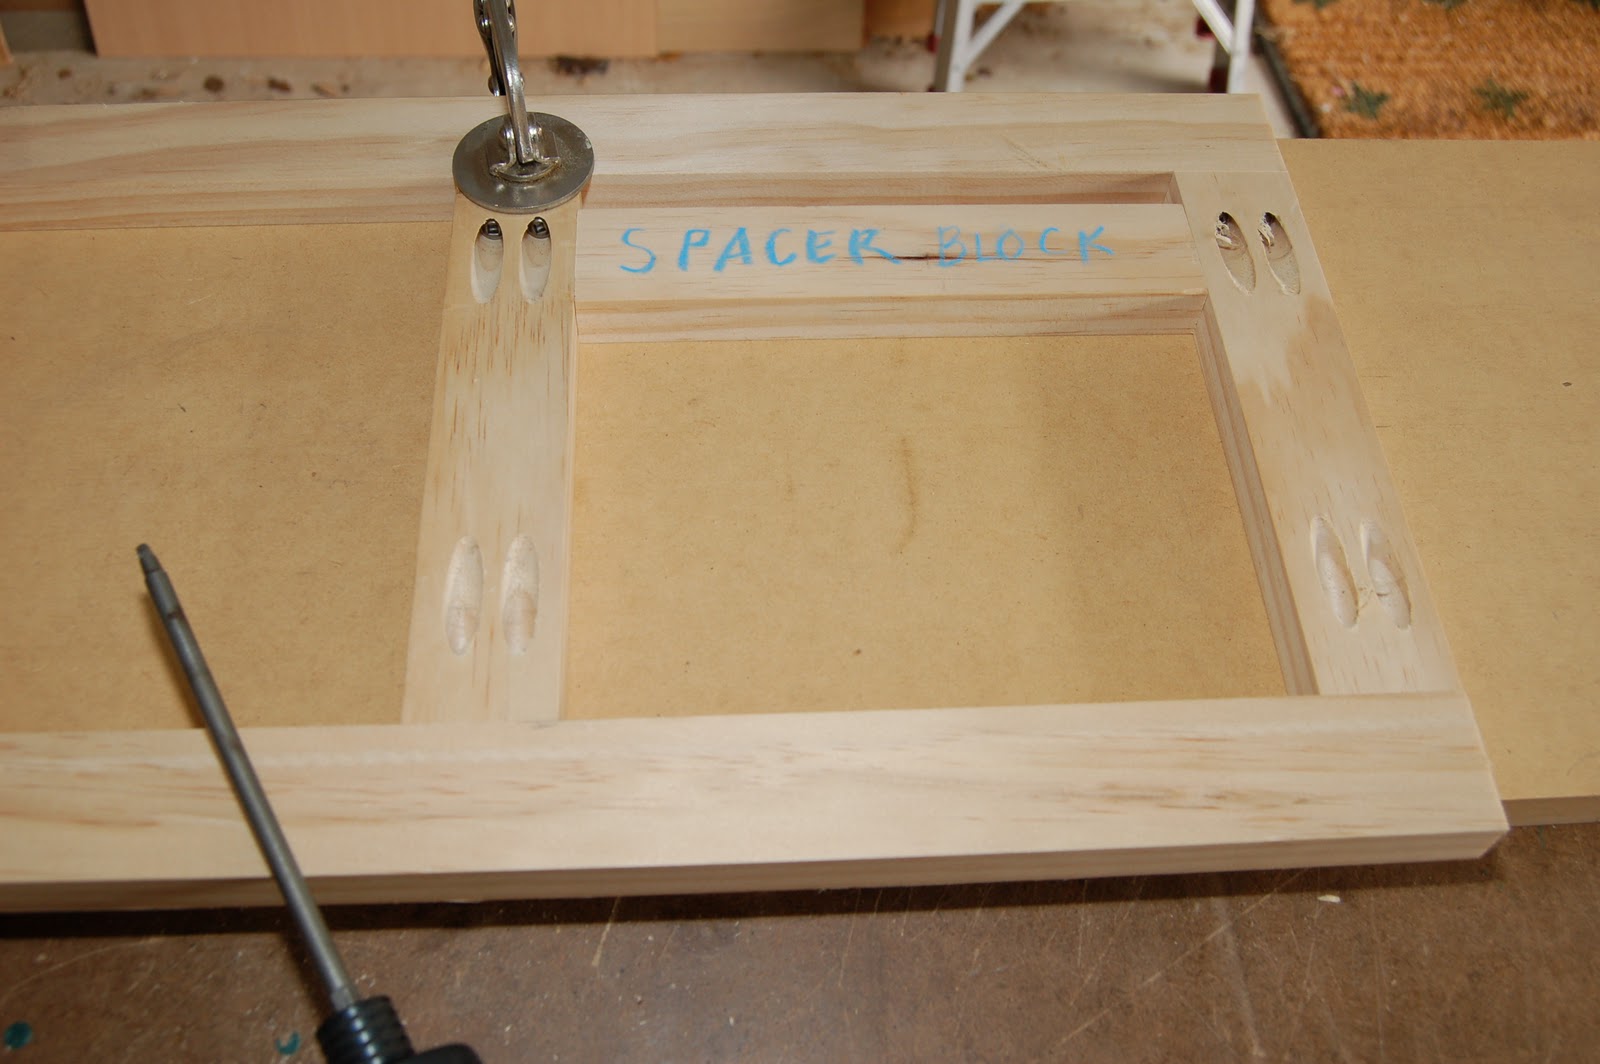
Drawing the lines on a hard board at full scale again is essential but easy to do. Carefully cut the four long posts at equal lengths but note that the short horizontal support structures have two different lengths if you want the cross section, when viewed from the top, to be an exact square. You'll discover this when you start drawing the lines of the opposite parts. A little note on the terms I use. "Work pieces" refer to individual cut pieces while "parts" are the partially assembled pieces that will ultimately make up the whole project.
Below are three pieces joined to form one side of the stand. A spacer block ensures consistent placement of the rail piece and a square double checks for 90 degree fit.
Another use of a spacer block to locate the rails equidistant with each other.
There are five parts to this project: four parts that make up the stand and one top. The top has many pieces joined together by pocket holes. It seems like a lot of pocket holes to do but by doing so you can achieve the pattern that it has without resorting to other more sophisticated joinery, yet this is stronger and easier than by any other method. And, more importantly, you will have a flat top with all the joints flushed with each other and all the screws are hidden underneath. Note the full scale drawings. They will help a lot when laying out the pieces and the parts.
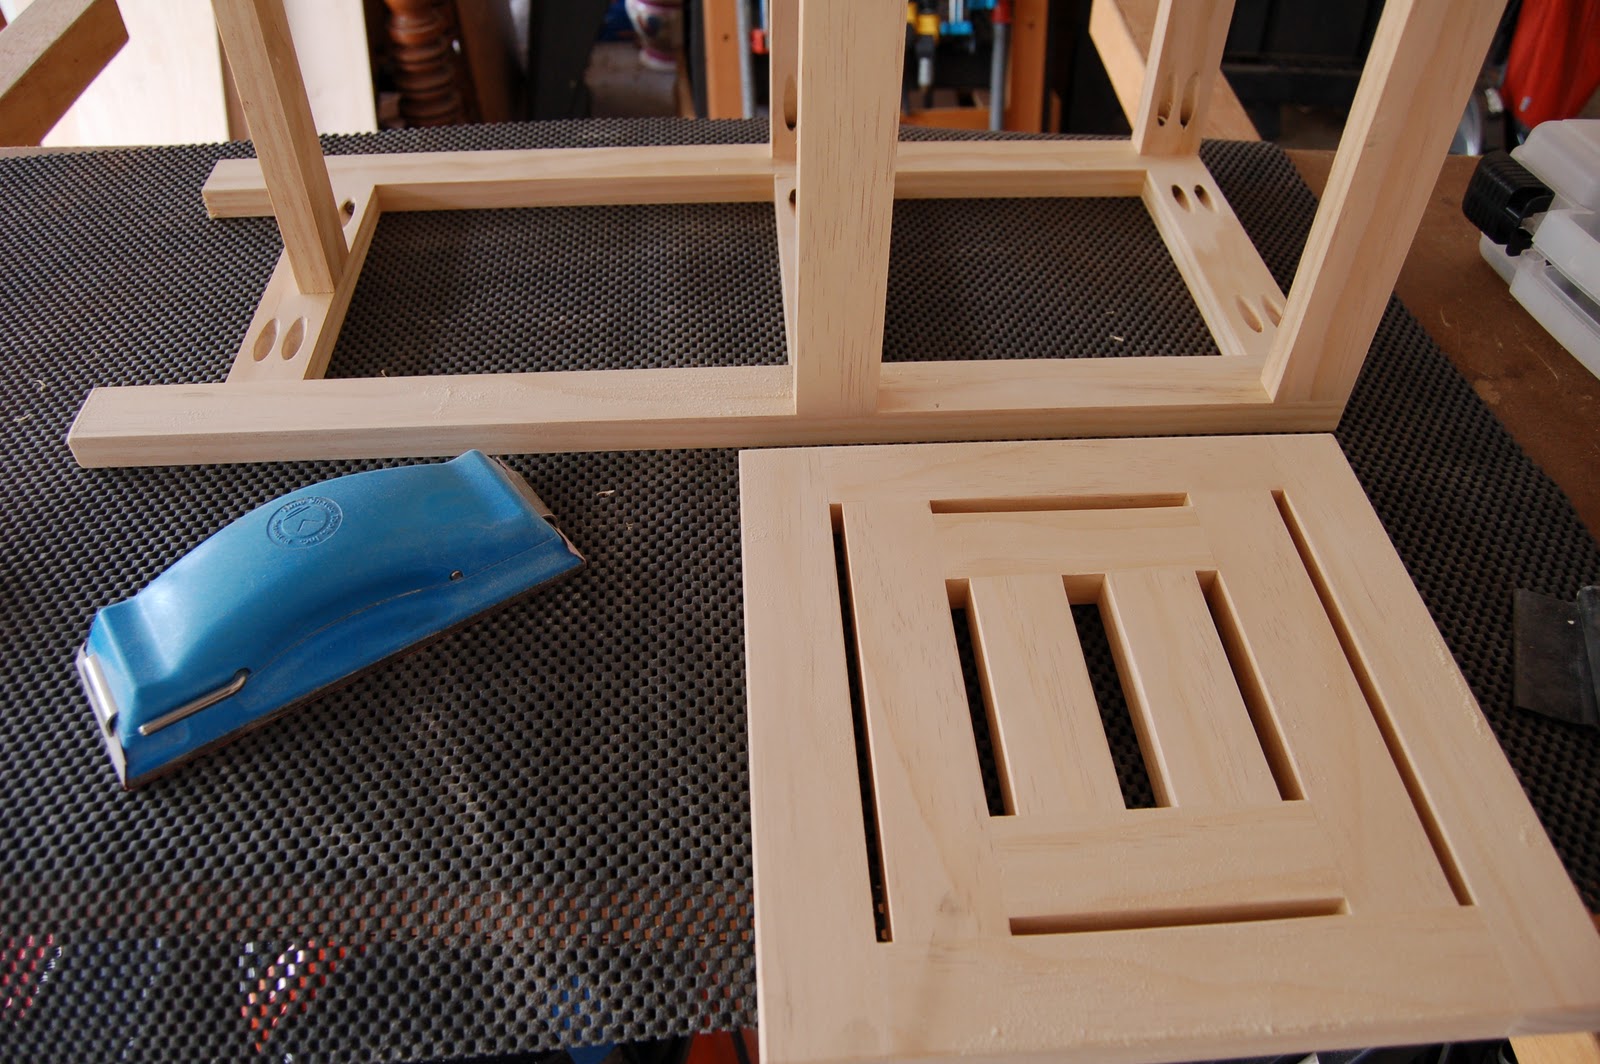
From the top rail of the stand, fasten the top with regular screws (drill pilot hole and counter sink to avoid splitting the rail)
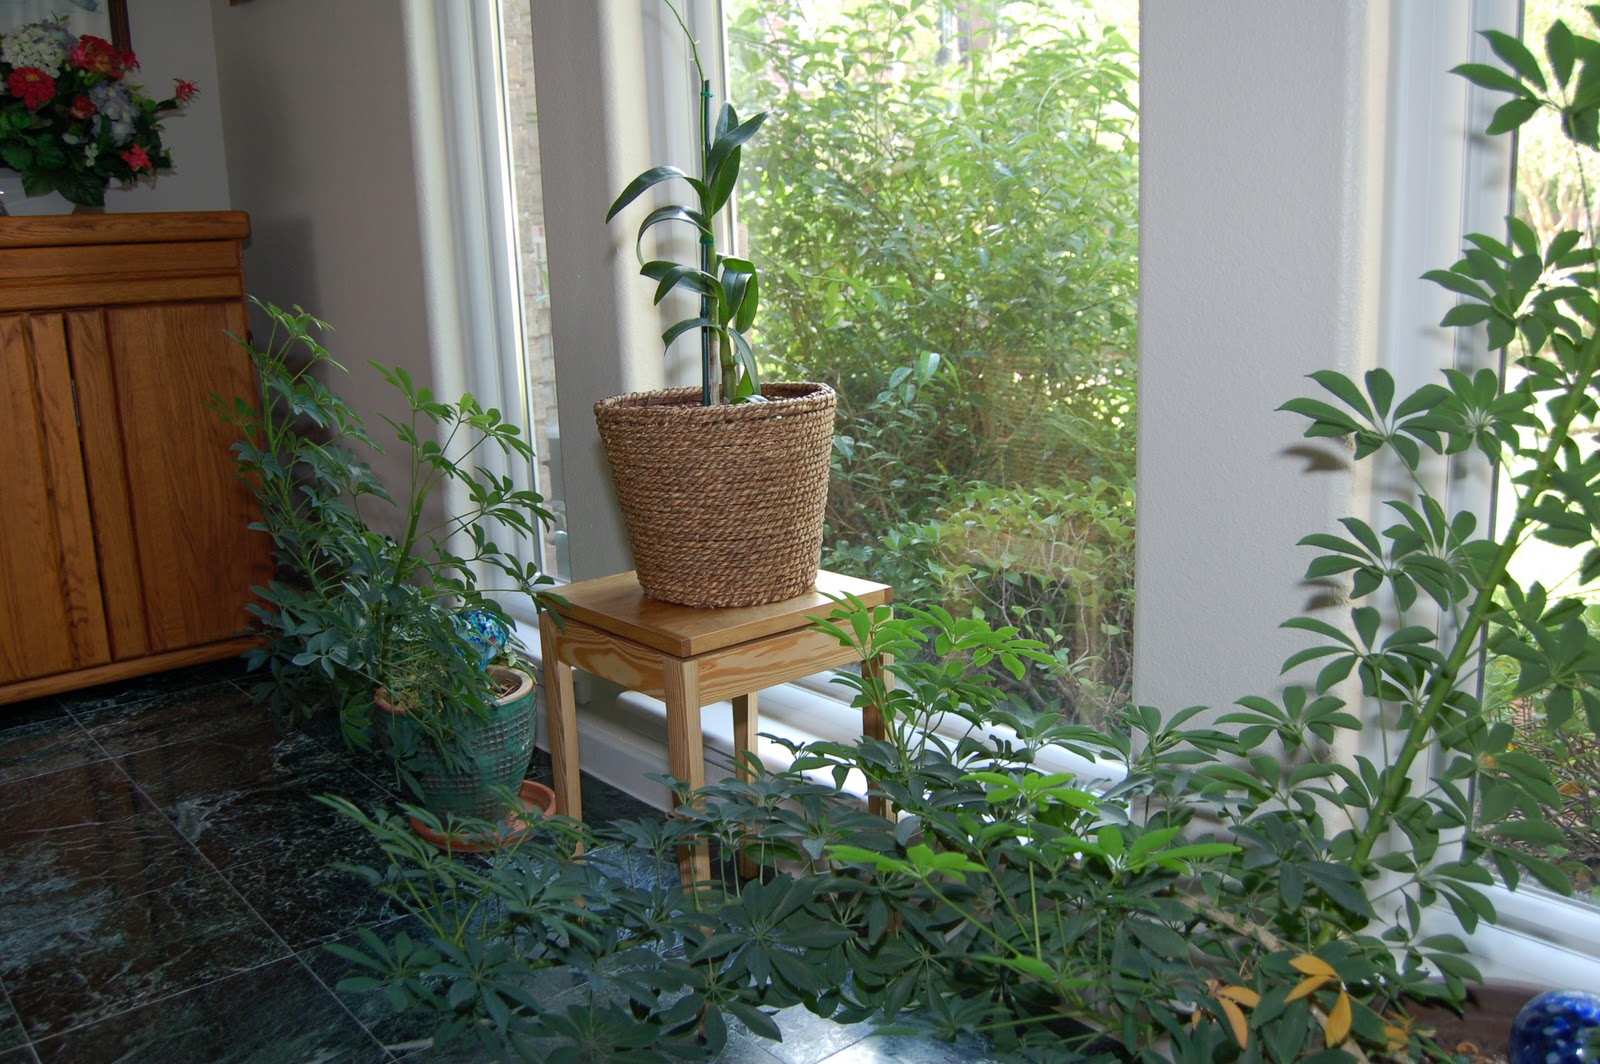
This project, even using soft wood like pine, is still strong enough to be used as a stool. However, you can actually make a more durable bar stool, for example, using oak or other hardwood with the basic principle and form of joinery.
With just a little practice and imagination, future projects are going to get easier and your skills will take you to higher levels of workmanship.

Women in woodworking
Women in woodworking
Click picture to enlarge.
The days of brute strength to perform much of the chores around the house are long gone, like eons ago. Many activities that used to be the domain of men are no longer. In woodworking, the power assisted tools are so common and at reasonable prices that the screw driver is hardly a tool that required more energy than squeezing a trigger. I am talking about the cordless drill/driver. And that leads to the power saws, power sanders, nailers, etc.
Woodworking has never been a sport that required speed or agility but indeed when hand tools were all there were, strength was a prerequisite. So every little project around the house that required cutting wood to little pieces and joined them together to make them into bigger parts to complete a "project", was a man's chore.
Not anymore. There are more and more women engaging in woodworking today and they hold their own and in many cases do a better job. Women are not shy or too proud to read and follow instructions. They probably pay more attention to details and probably better at organizing.
Sorry guys. I'm one of you but I have to admit that we don't particularly like to read instructions nor take kindly to asking for directions. So men, please pay attention to suggestions from the ladies. And read those instructions that come with the new tool you just recently acquired. We have actually evolved from hunter to gatherer - of tools, that is. Use them properly.
The golden ratio
The golden ratio
Legend has it that the dimension of your credit cards, the index cards and the Greek Parthenon have one thing in common - the golden ratio. Not going into mathematics here but rather go direct to woodworking applications, the ideal ratio that ancient Greeks deemed the ideal for the length to width proportion, or in the case of the Parthenon the width to height, is approximately 1.62. The 3X5 inch index card is close to that (5 divided by 3) and the credit card that is dimensioned at 3.375" X 2.125" is likewise close to that ratio.
It is not always possible to do everything in that ratio but keep it in mind when you begin to dimension your project if aesthetics is important. Common woodworking projects of tables, shelves and boxes, or picture frames, etc., are going to be rectangles or squares. With the latter, there is nothing to do but make all four pieces the same length. In a rectangle, where length and width are different, you might as well proportion them to the golden ratio, where possible, to make the dimension pleasing to the eyes.
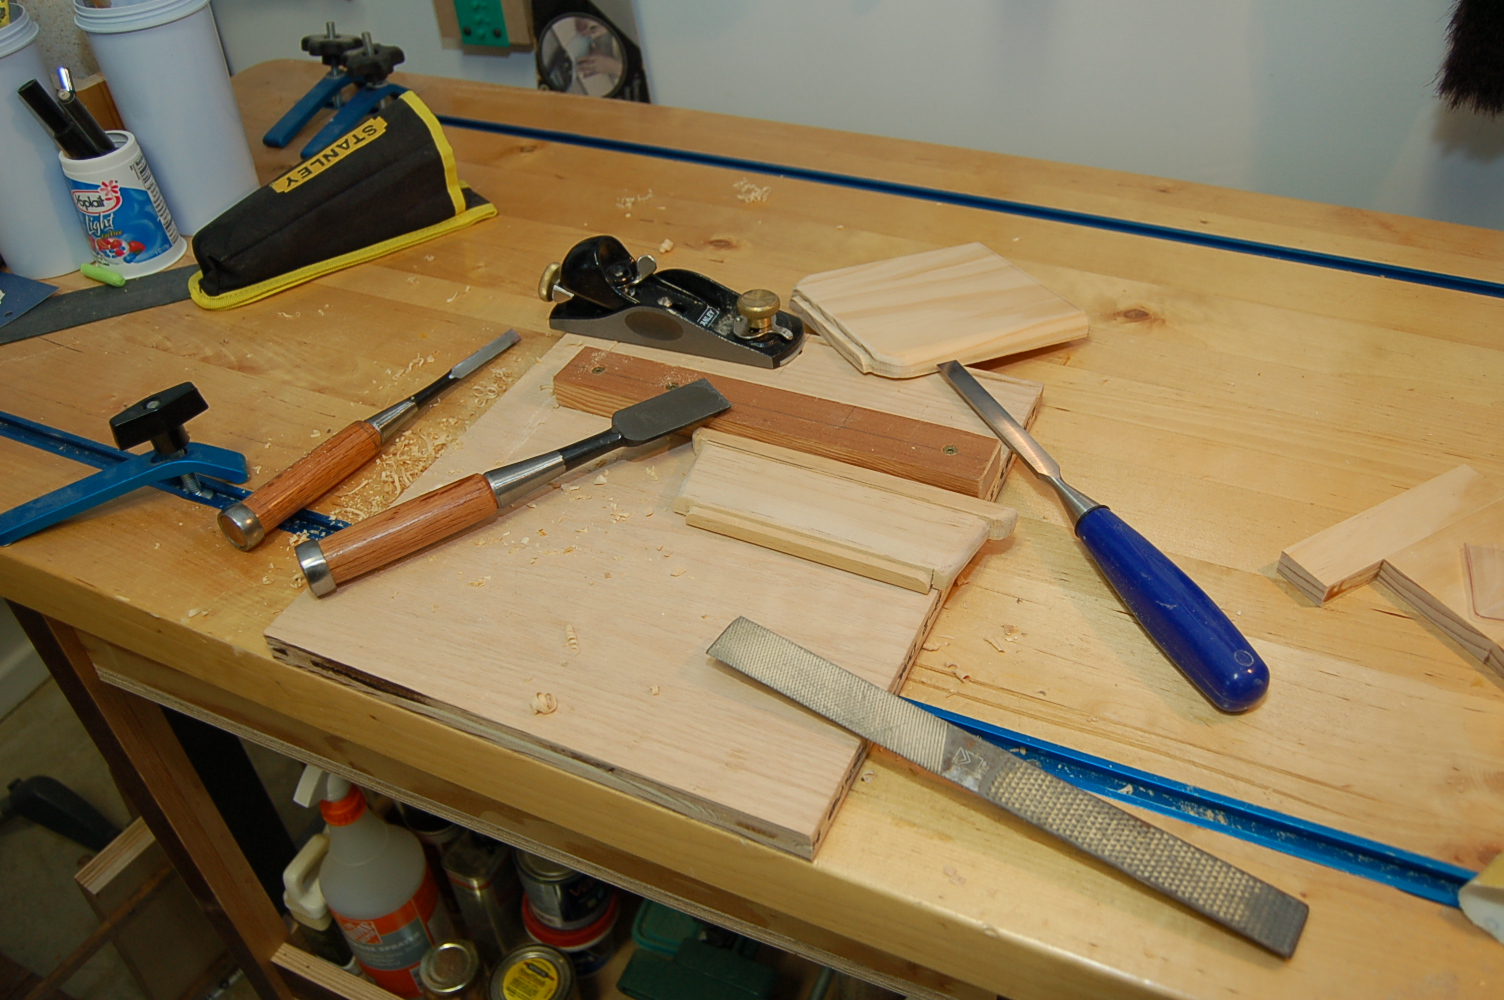
Turn scrap wood into a project
Turn scrap wood into a project
Throwing away scrap wood is probably one of the more wasteful ways we dispose of wood. I truly believe that even a tiny bit of the amount of timber being cut down around the world that can be preserved in the form of a woodworking project is worth the day or part of a weekend for us to spend some time on. The wood species does not matter. The humble pine that was used to make this project has earned its place in our home. So do oak, walnut and other exotic and some actually endangered species from forests in far away places.
The starter projects I talked about were done with pocket hole joinery. This one, as an example, was done with a little bit more advanced form of joinery. And, like everything else as in woodworking or other crafts, proper tools will do the trick. So, here mortise and tenon was employed but it will require tools beyond the bare minimum that I suggested in my previous topic.
Here clamps and glue were used to put it all together.
But I will go more into that in later postings. Just wanted to show a different method. Again, as you get comfortable doing projects using pocket hole joinery, and you are willing to do more, then mortise and tenon is a good one to learn. What started out as scrap wood has found its place in our home.
The torsion box platform
The torsion box platform
Ever wondered how airplane wings are designed to maintain their rigidity and strength? And yet be light enough so that its own weight is not a liability to flight and fuel. The torsion box design makes it possible; and in woodworking, this offers many possibilities to build a platform that is lightweight, strong and extremely rigid.
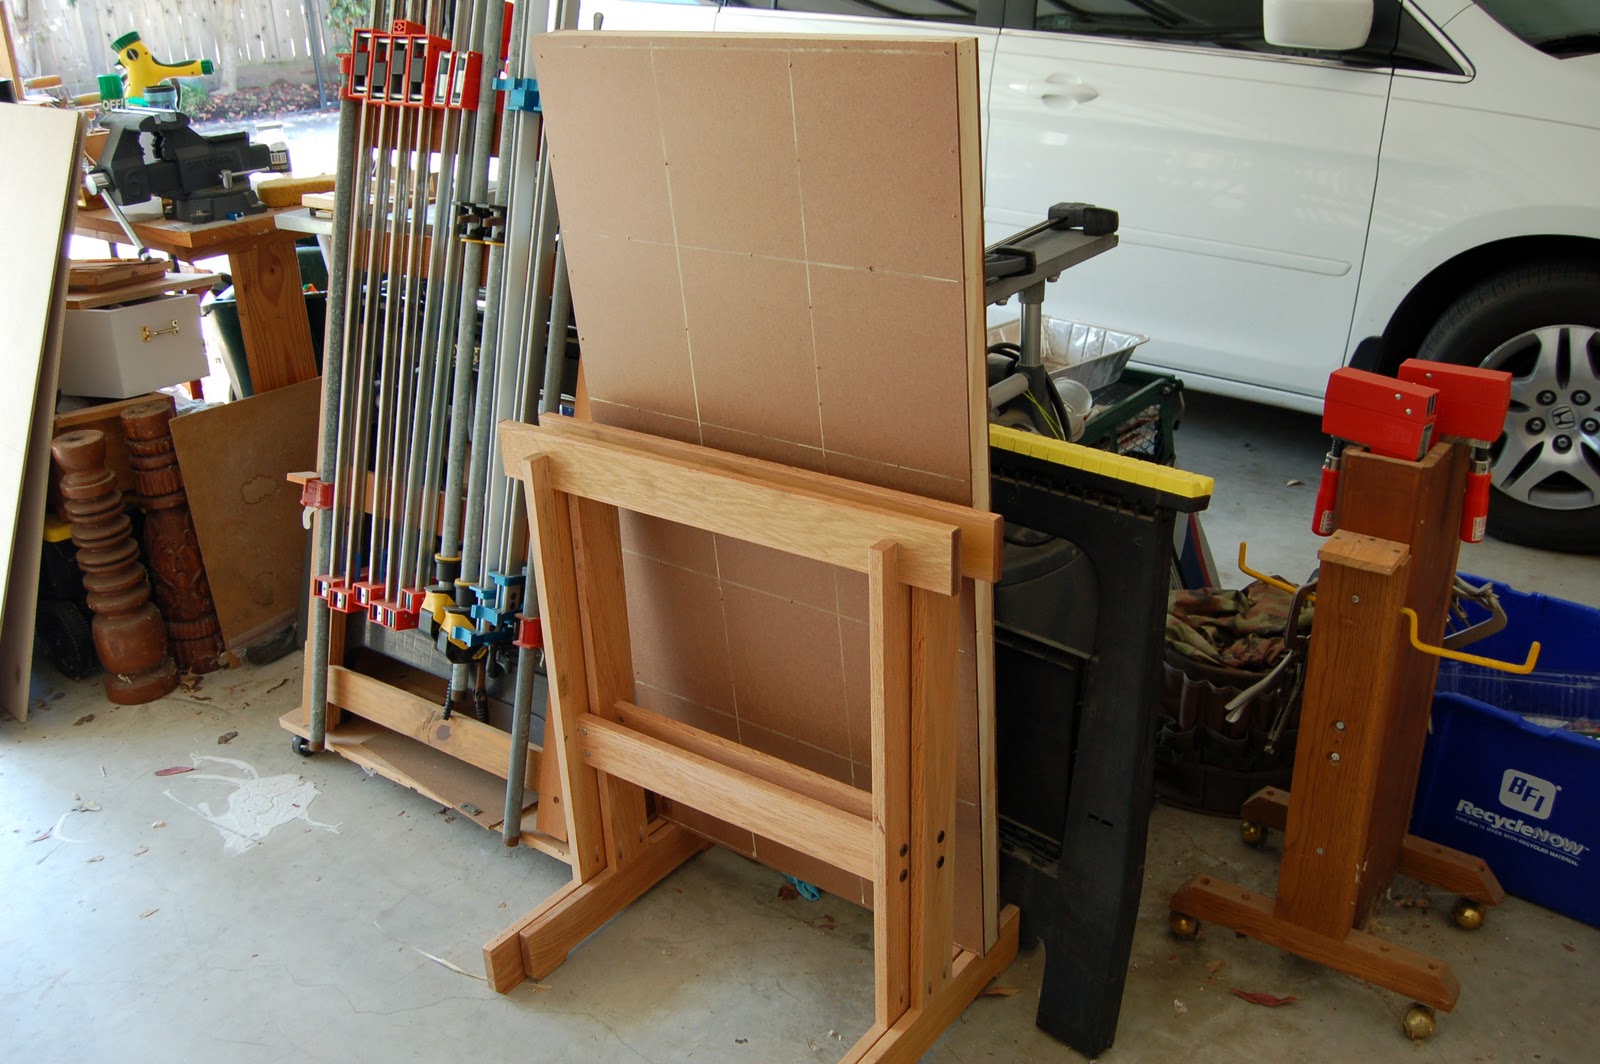
All our beds in the house have torsion box platforms (see other beds made the same way in "my personal story...woodworking", in the blog archive). Click picture to enlarge.
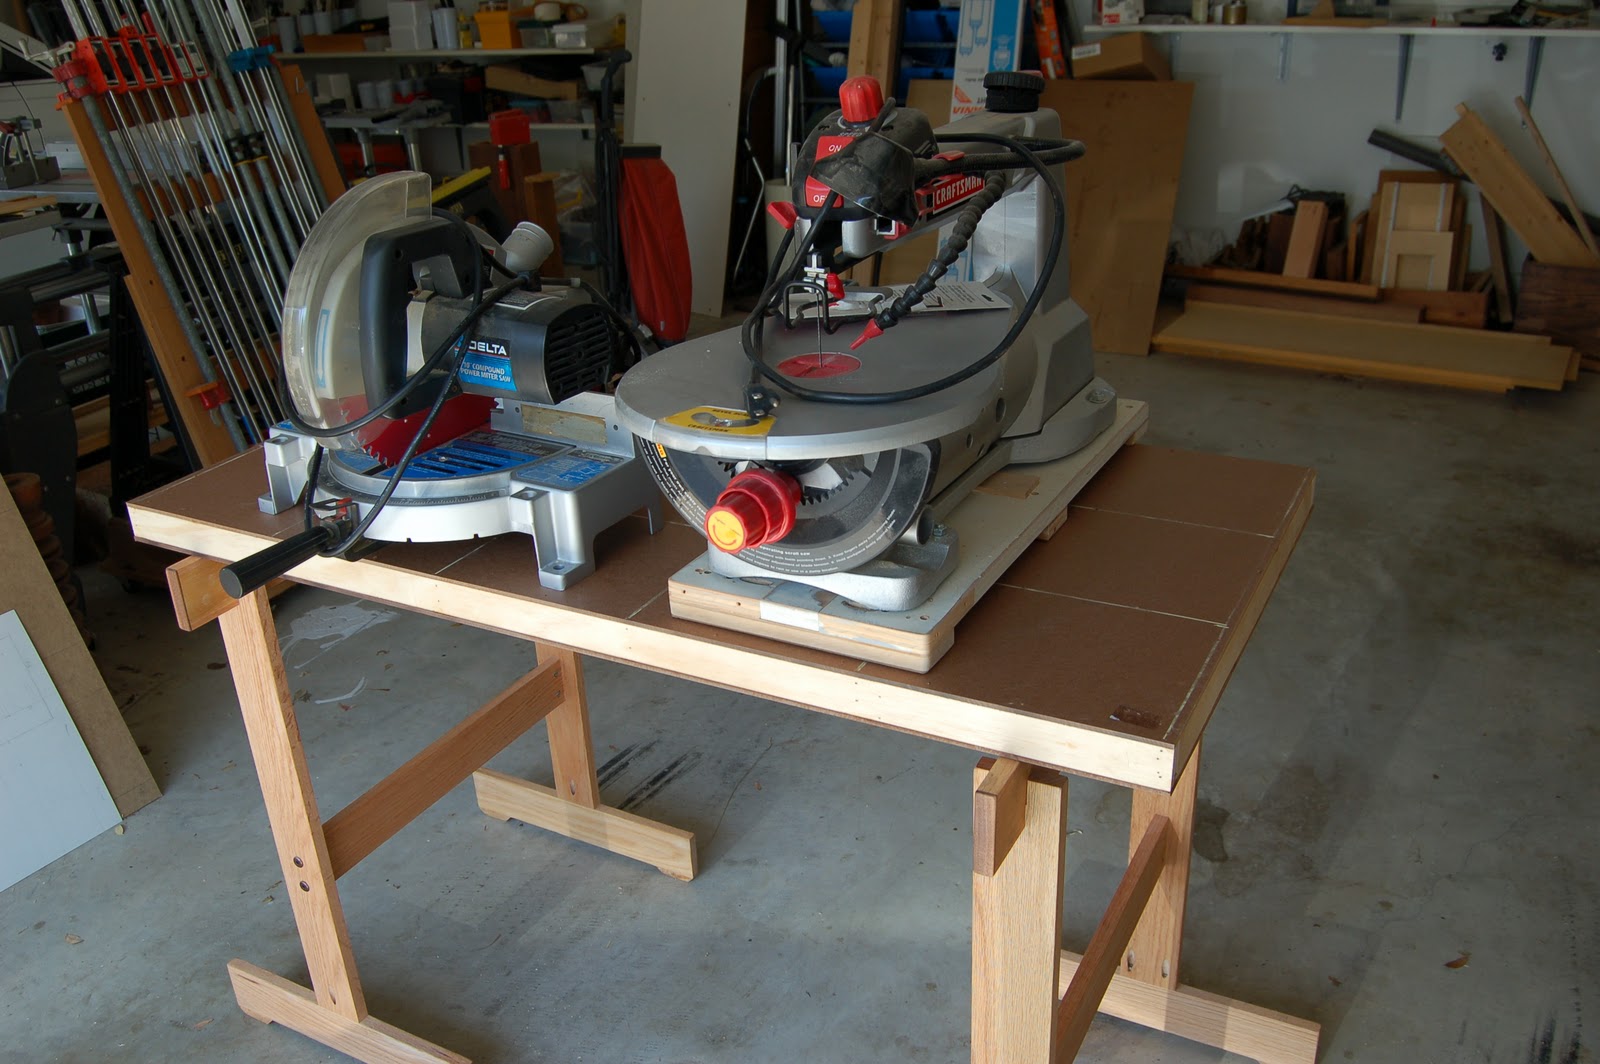
Also built a very sturdy, light weight bench
All of these structures are practically air inside, thin skin over a grid structure, like ribs. It is this design that makes for a much lighter weight compared to a comparably dimensioned solid wood, yet rigid and strong.
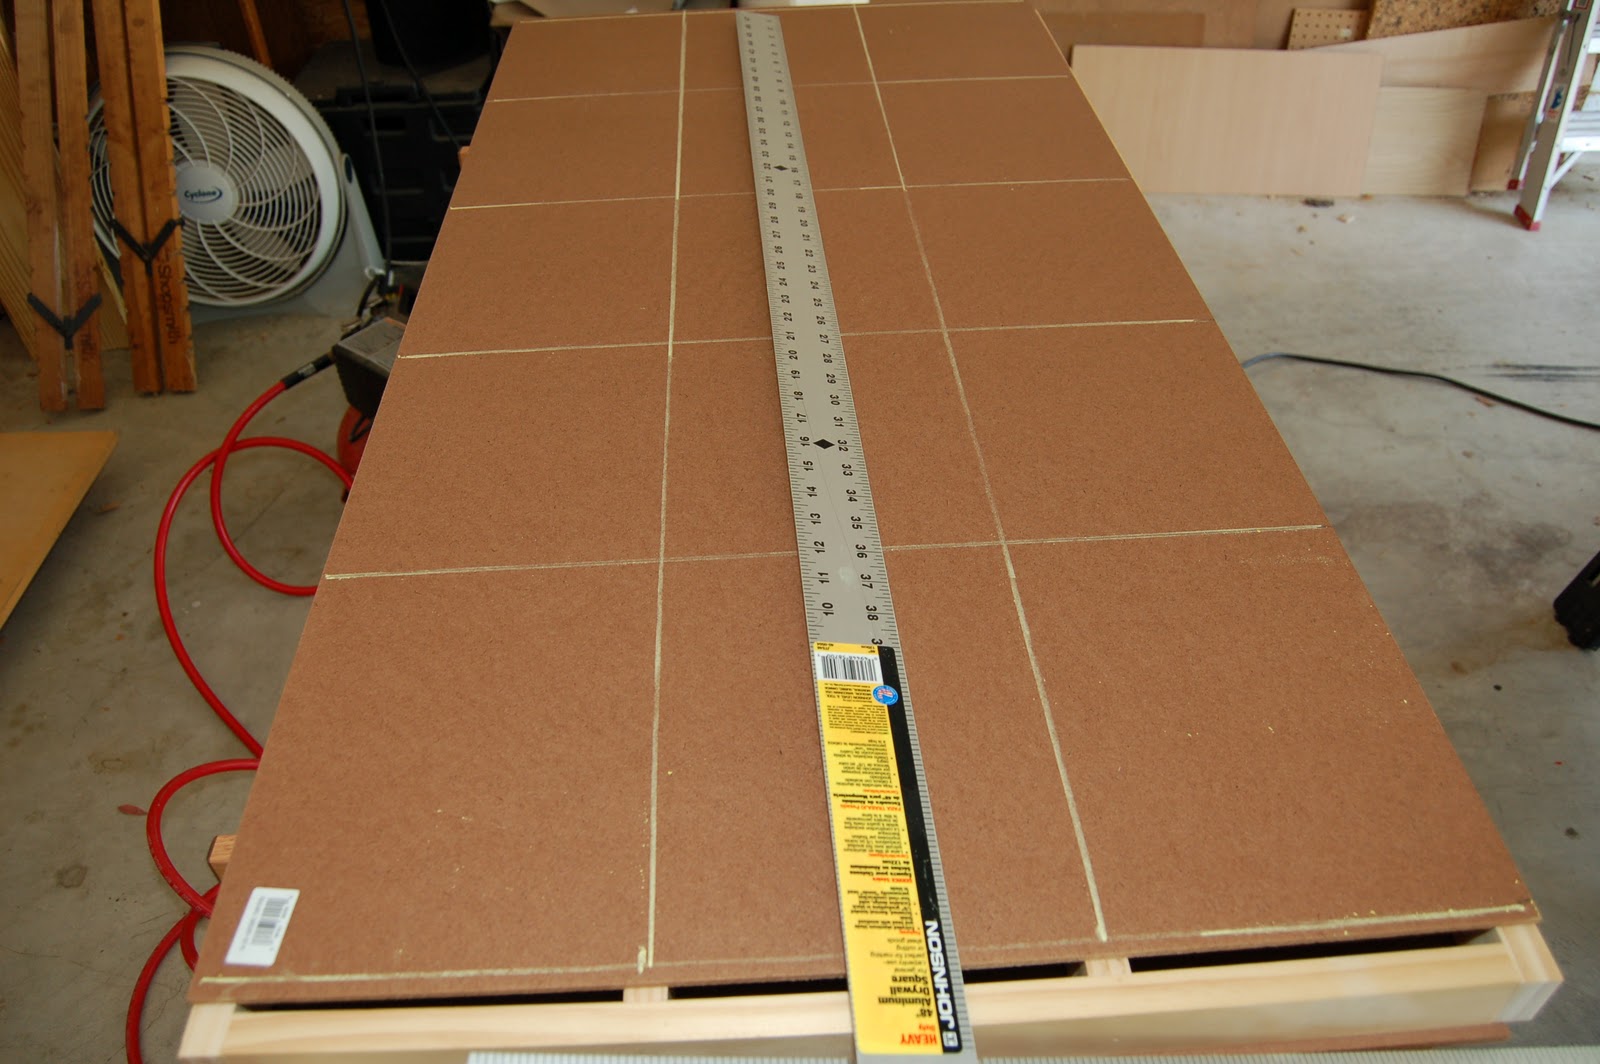
This is a half day project. From your nearest home center, 2 pieces of 2X4 hardboard (tempered) and three pieces of 1X2X8 premium pine will cost about $25.00. Lay out one of the boards flat and cut to dimension the 1X2 pieces as shown:
From the original "basic woodworking tools", the only additional tool needed is a brad nailer kit (available with compressor, air hose and other accessories). Worth having for under $150, since the compressor alone can serve many functions and the nail gun has its own special applications.
The spacer blocks are very useful for laying out the "ribs" easily and consistently.
The key at this stage is to sandwich the ribs with the two thin skin of hardboard with glue and small brads. Lay out straight lines with chalk to guide you where to drive the nails.
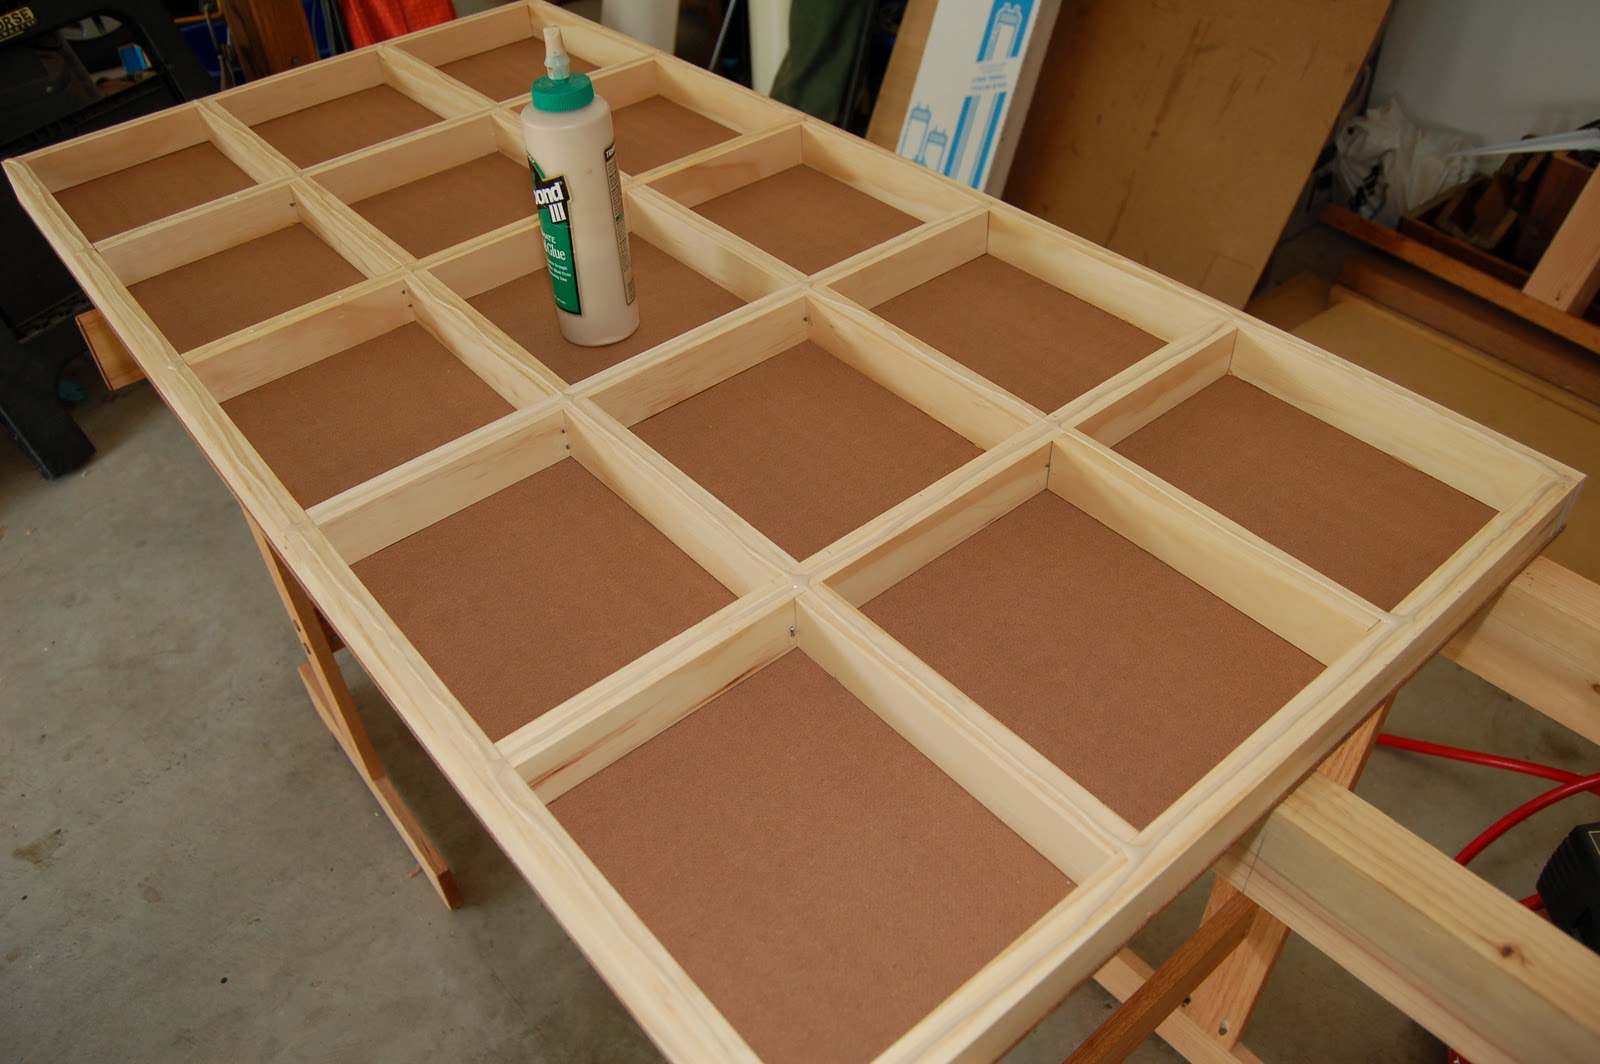
The finished project is light but so rigid it will not even flex or bend under heavy load. And because of its light weight, it is very portable and makes for a reliably strong temporary workbench, or for other platform functions. Stores out of the way for very little footprint. Project was done in half a day.
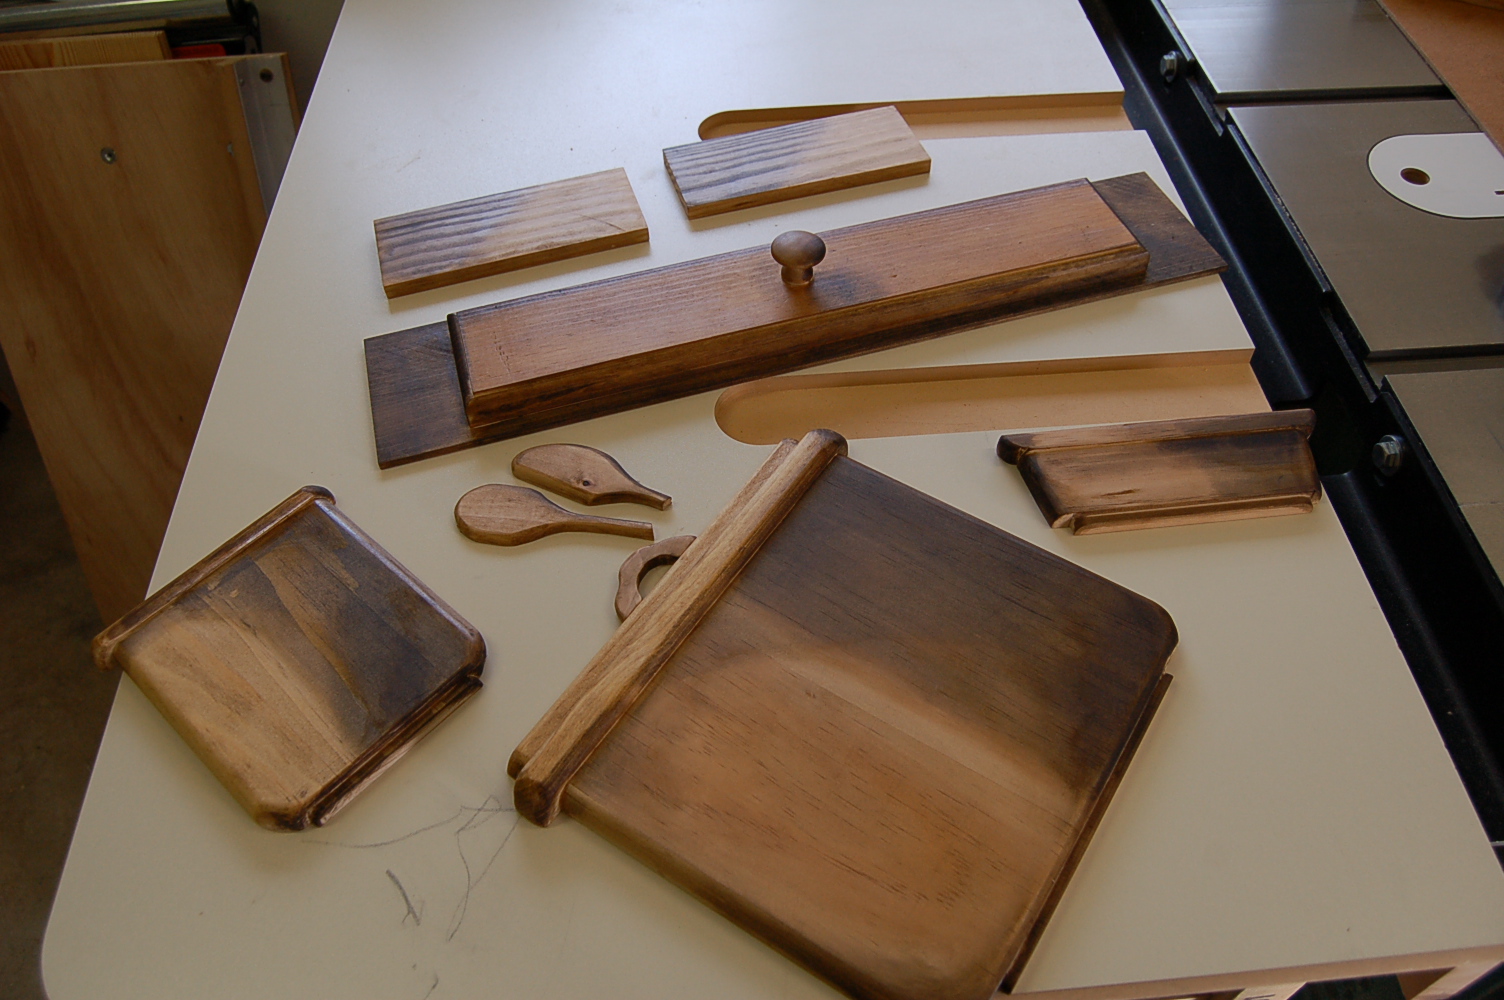
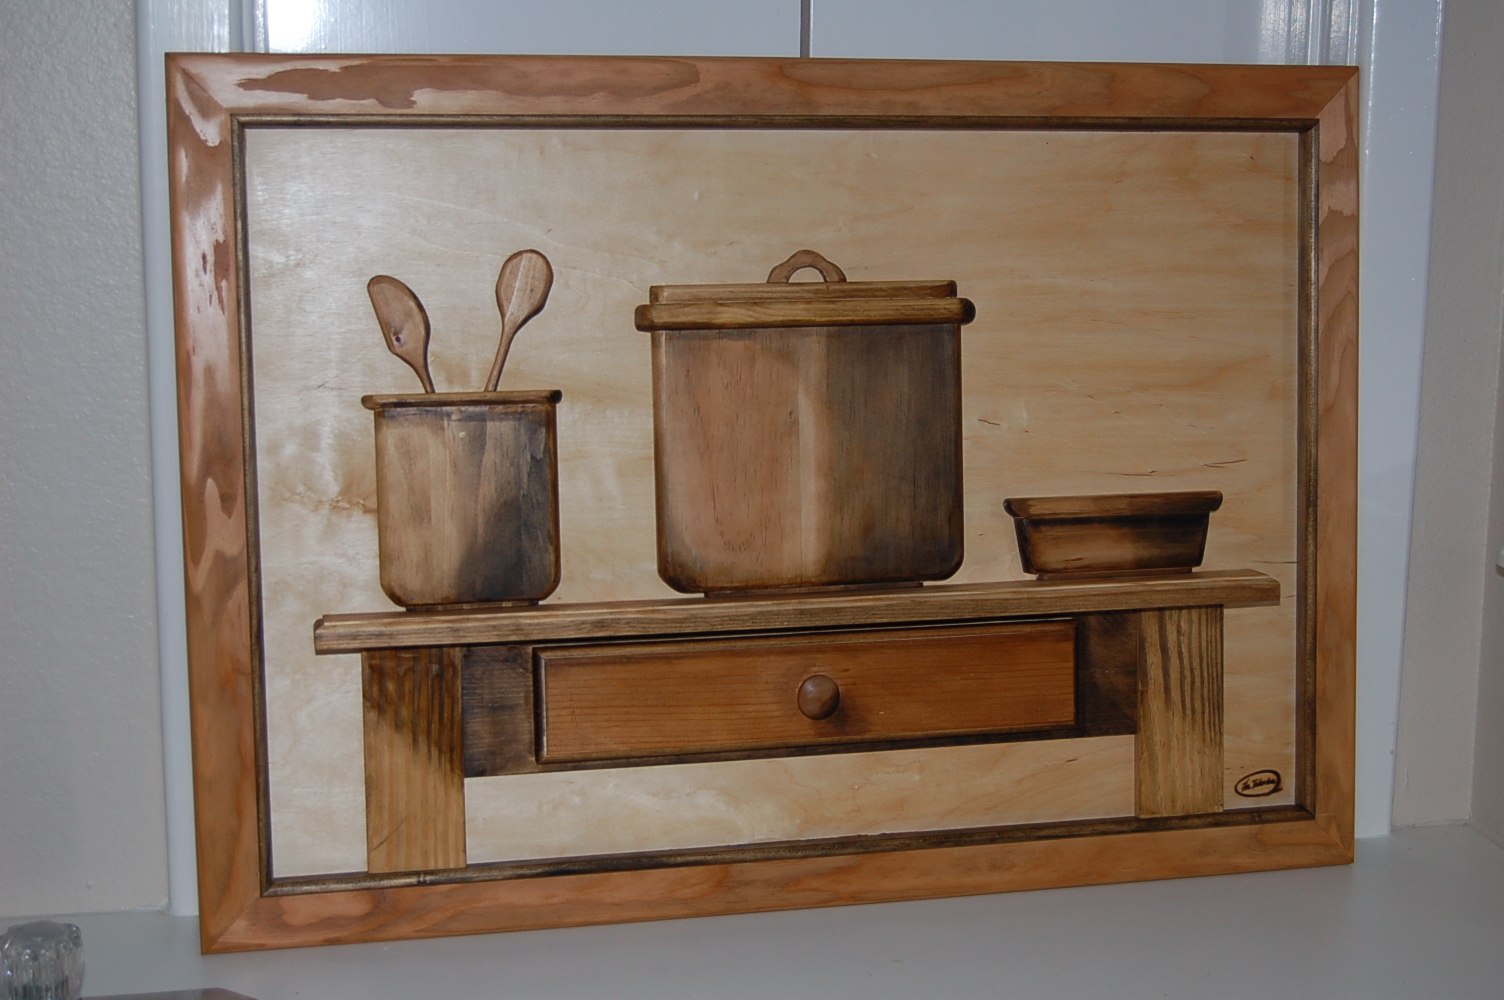
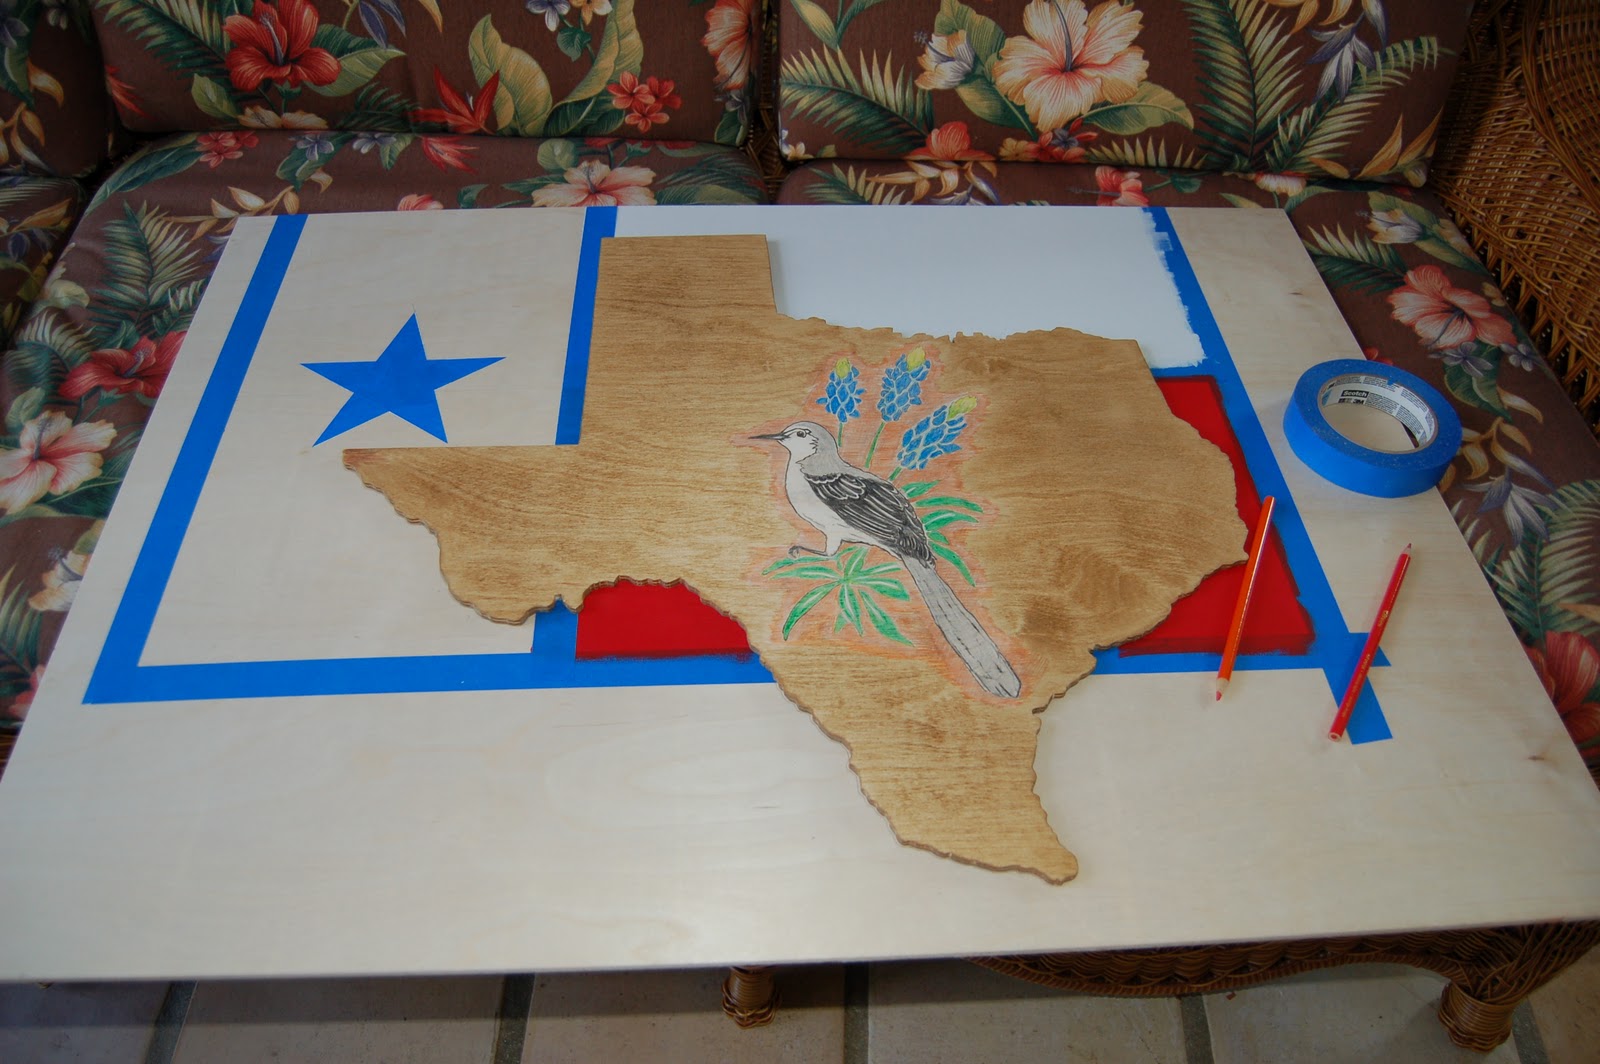
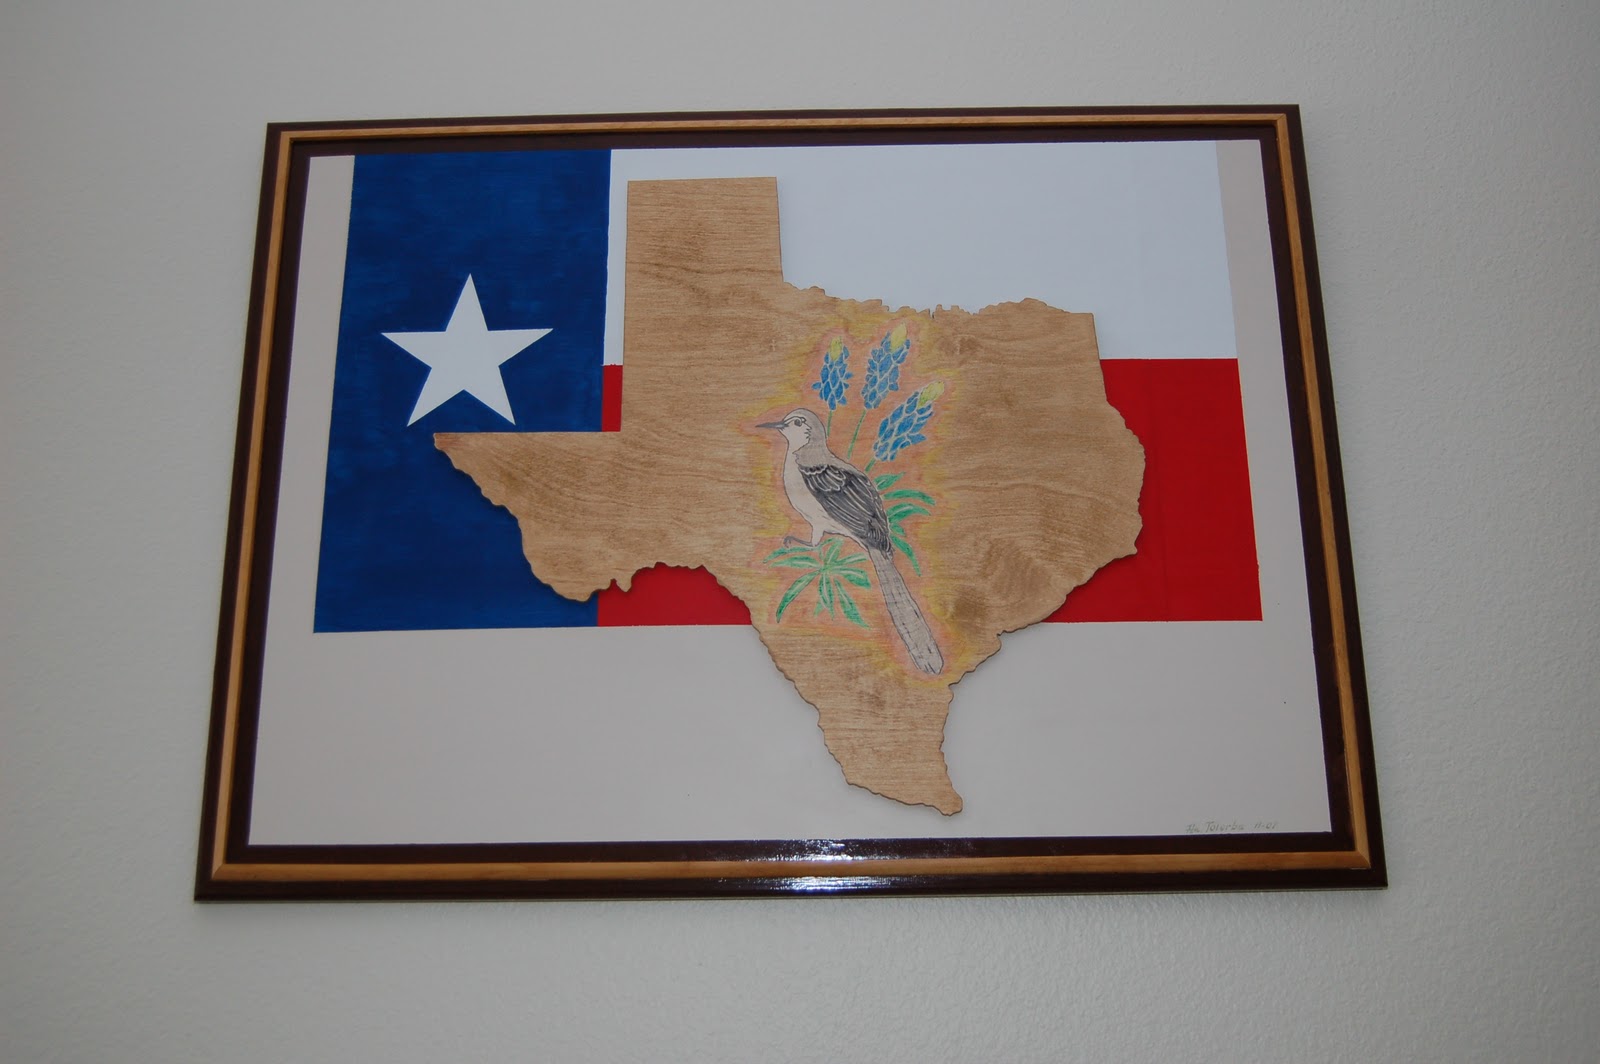
Crayola of the mockingbird (State Bird) and Bluebonnet (State Flower) over plywood and paint for the Texas flag completed this project.
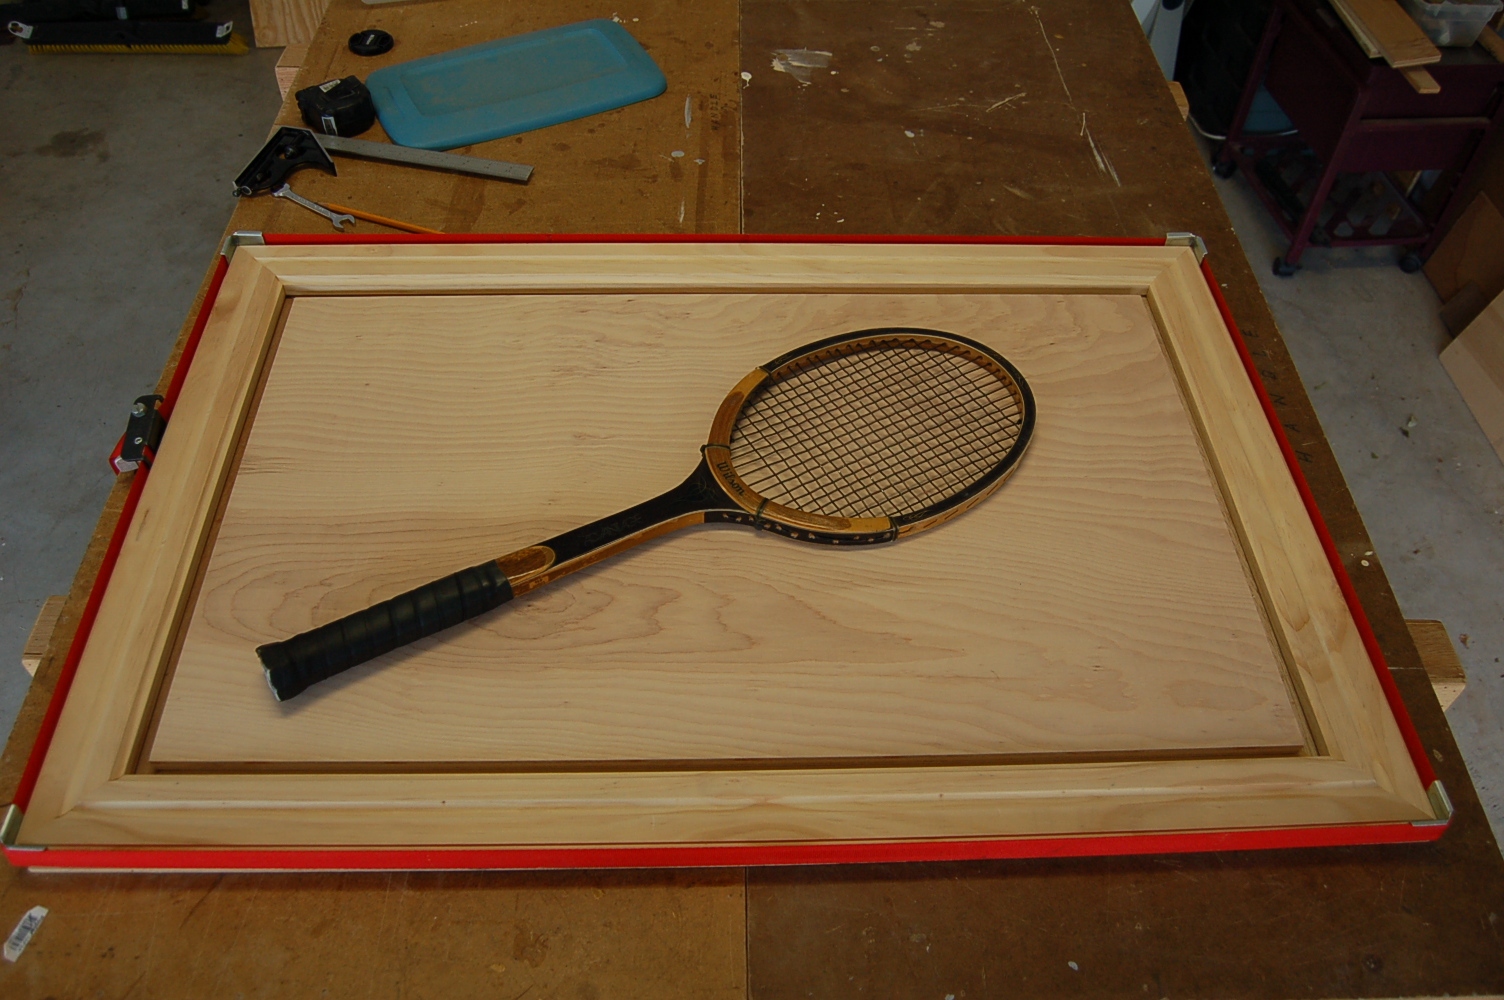
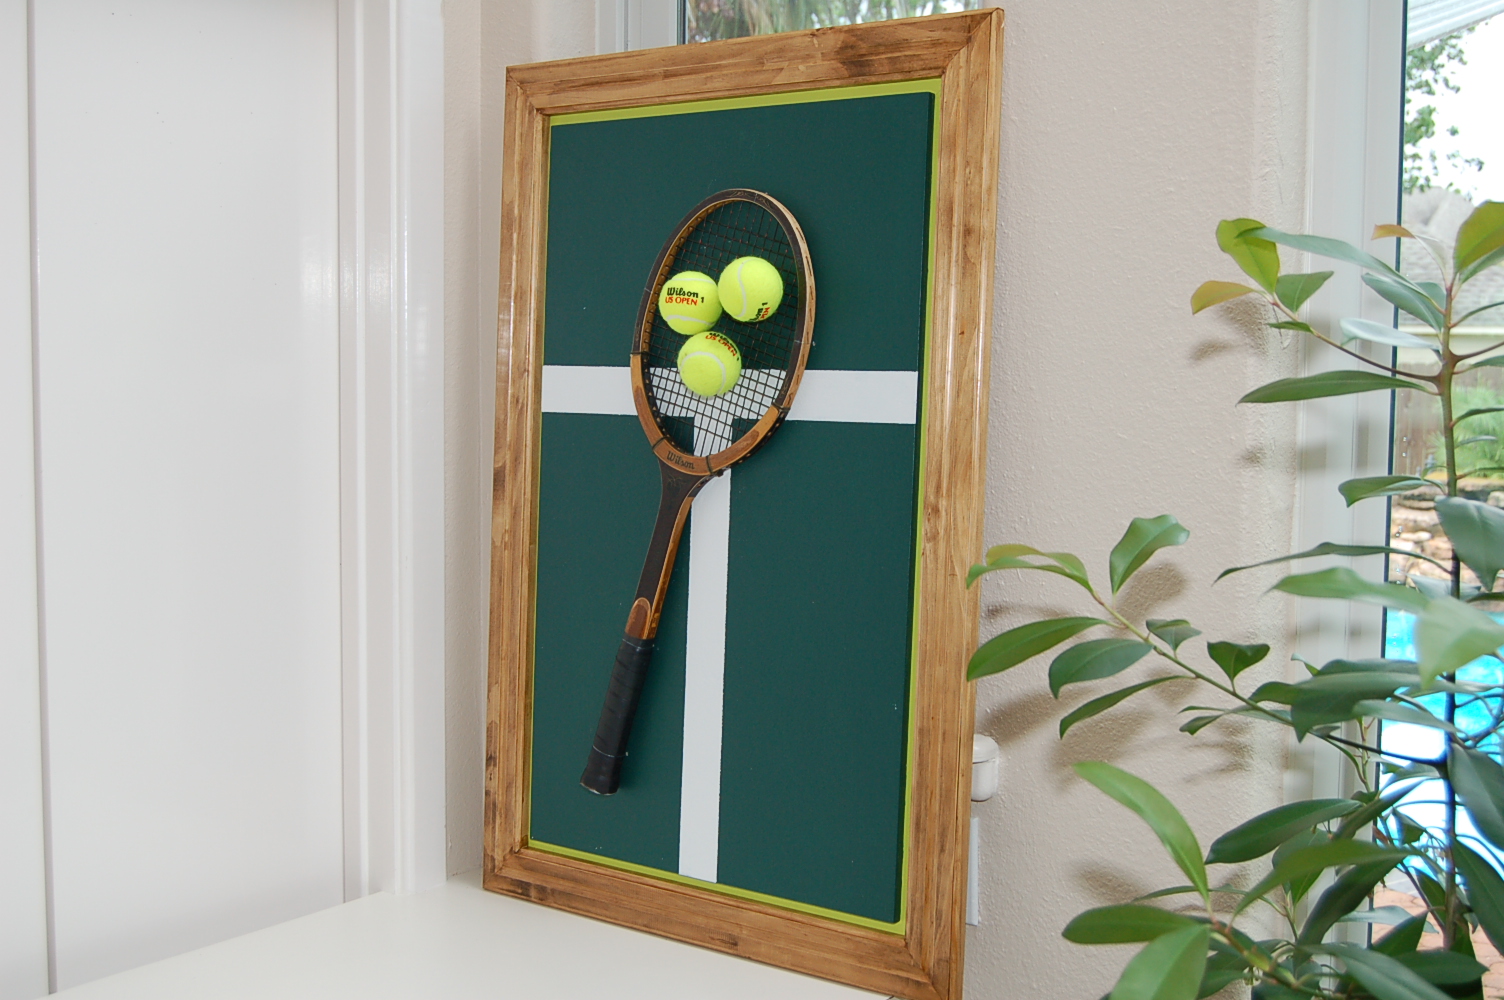
An old wooden tennis racket, circa early 1980s, was spared from the dumpster and now has its place as a relic of days gone by. That was when when skill and grace and tennis went together.
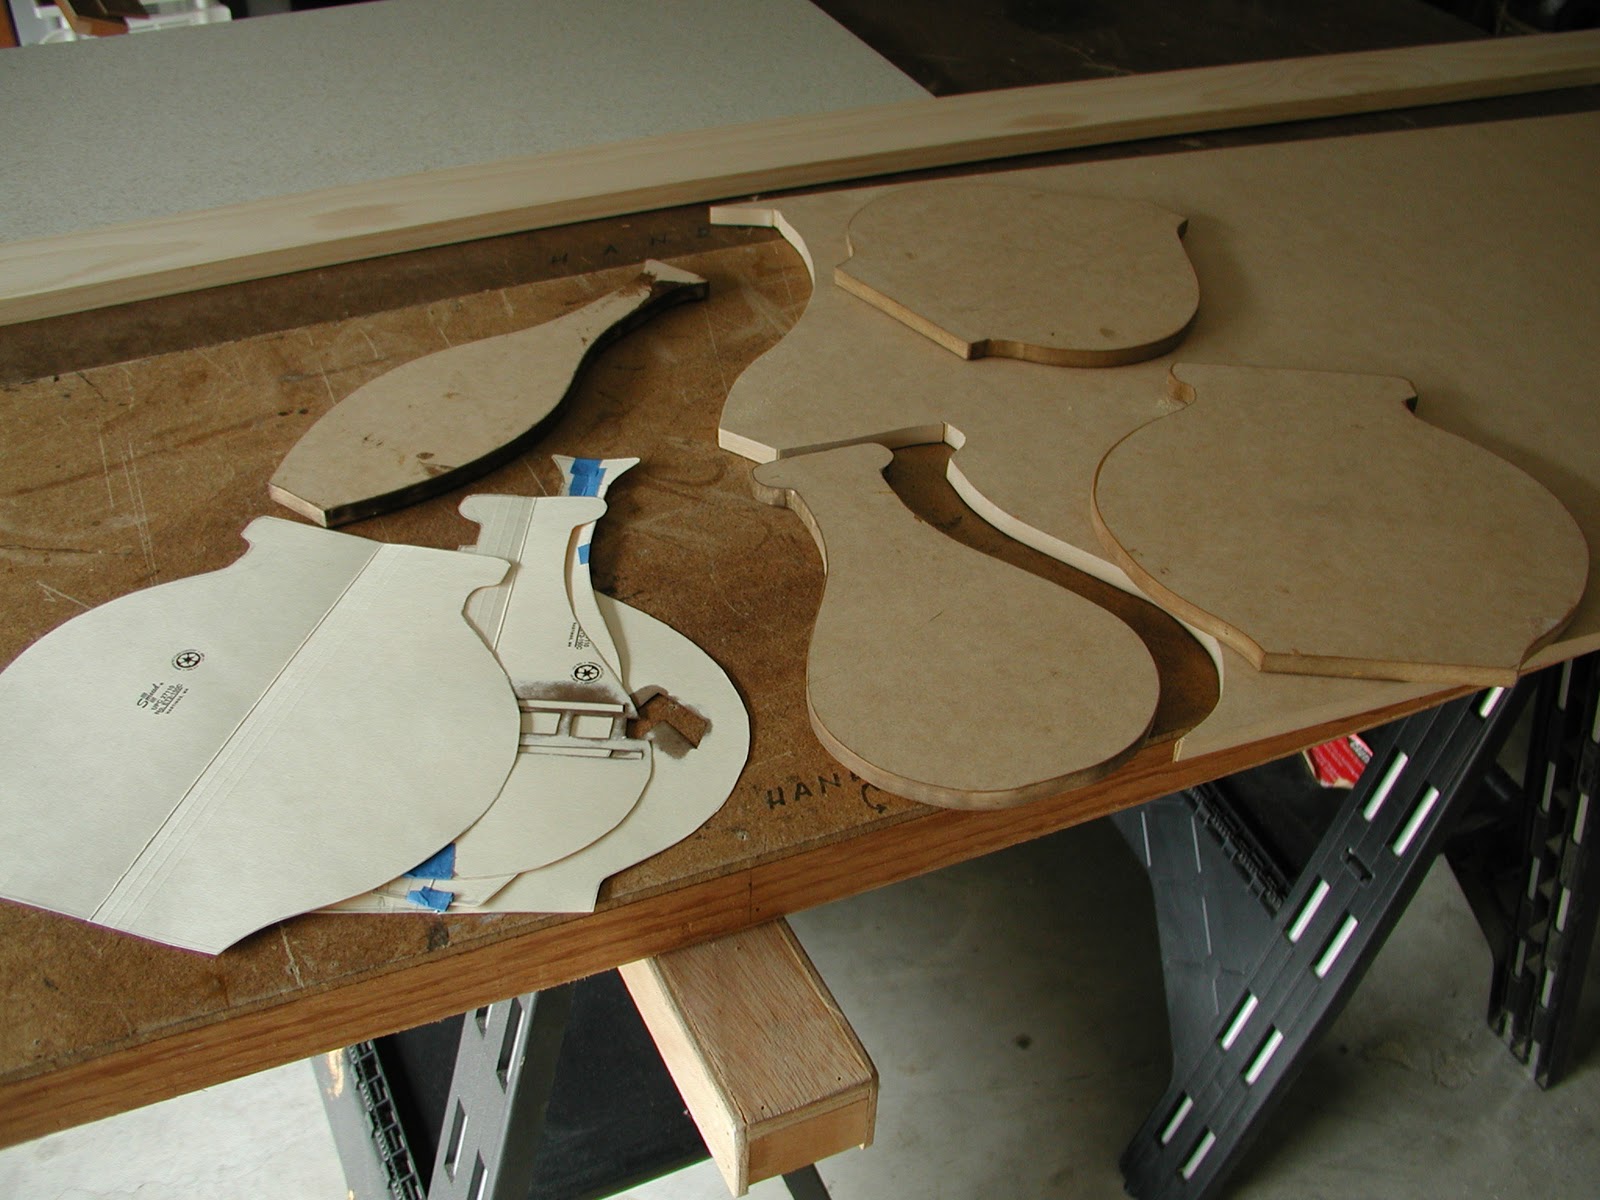
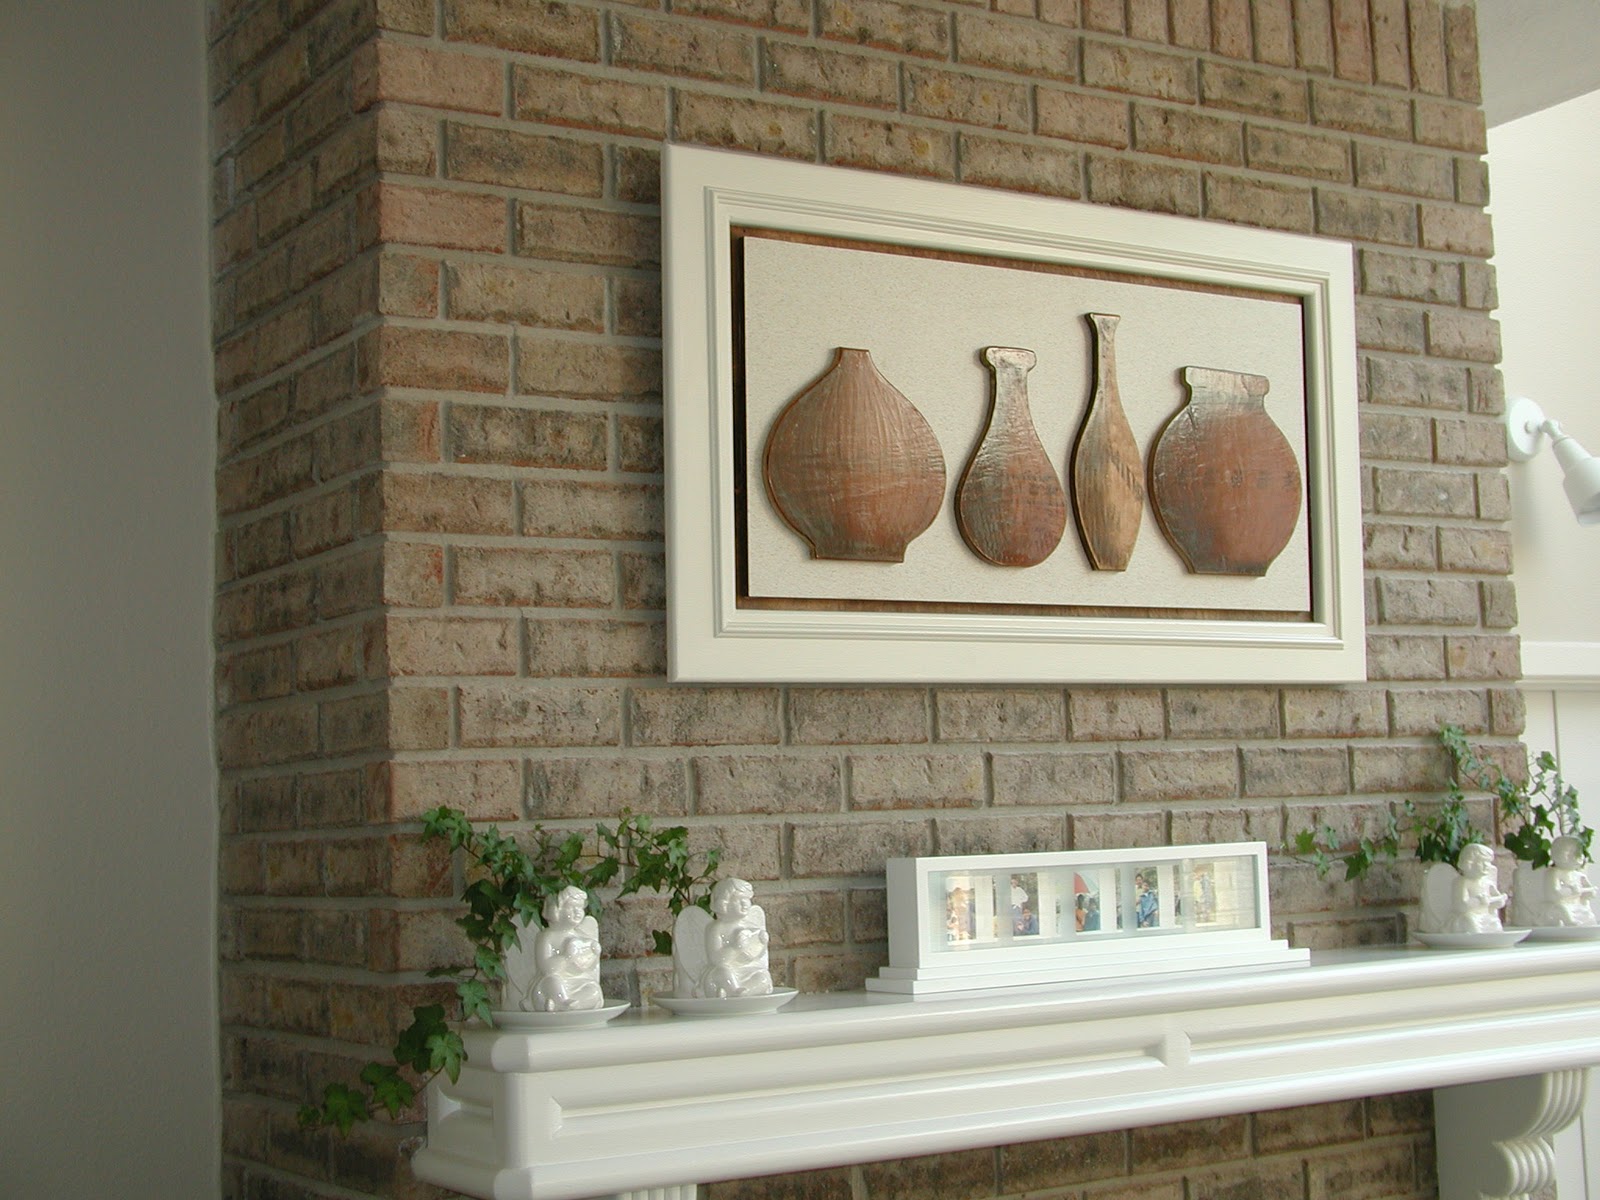
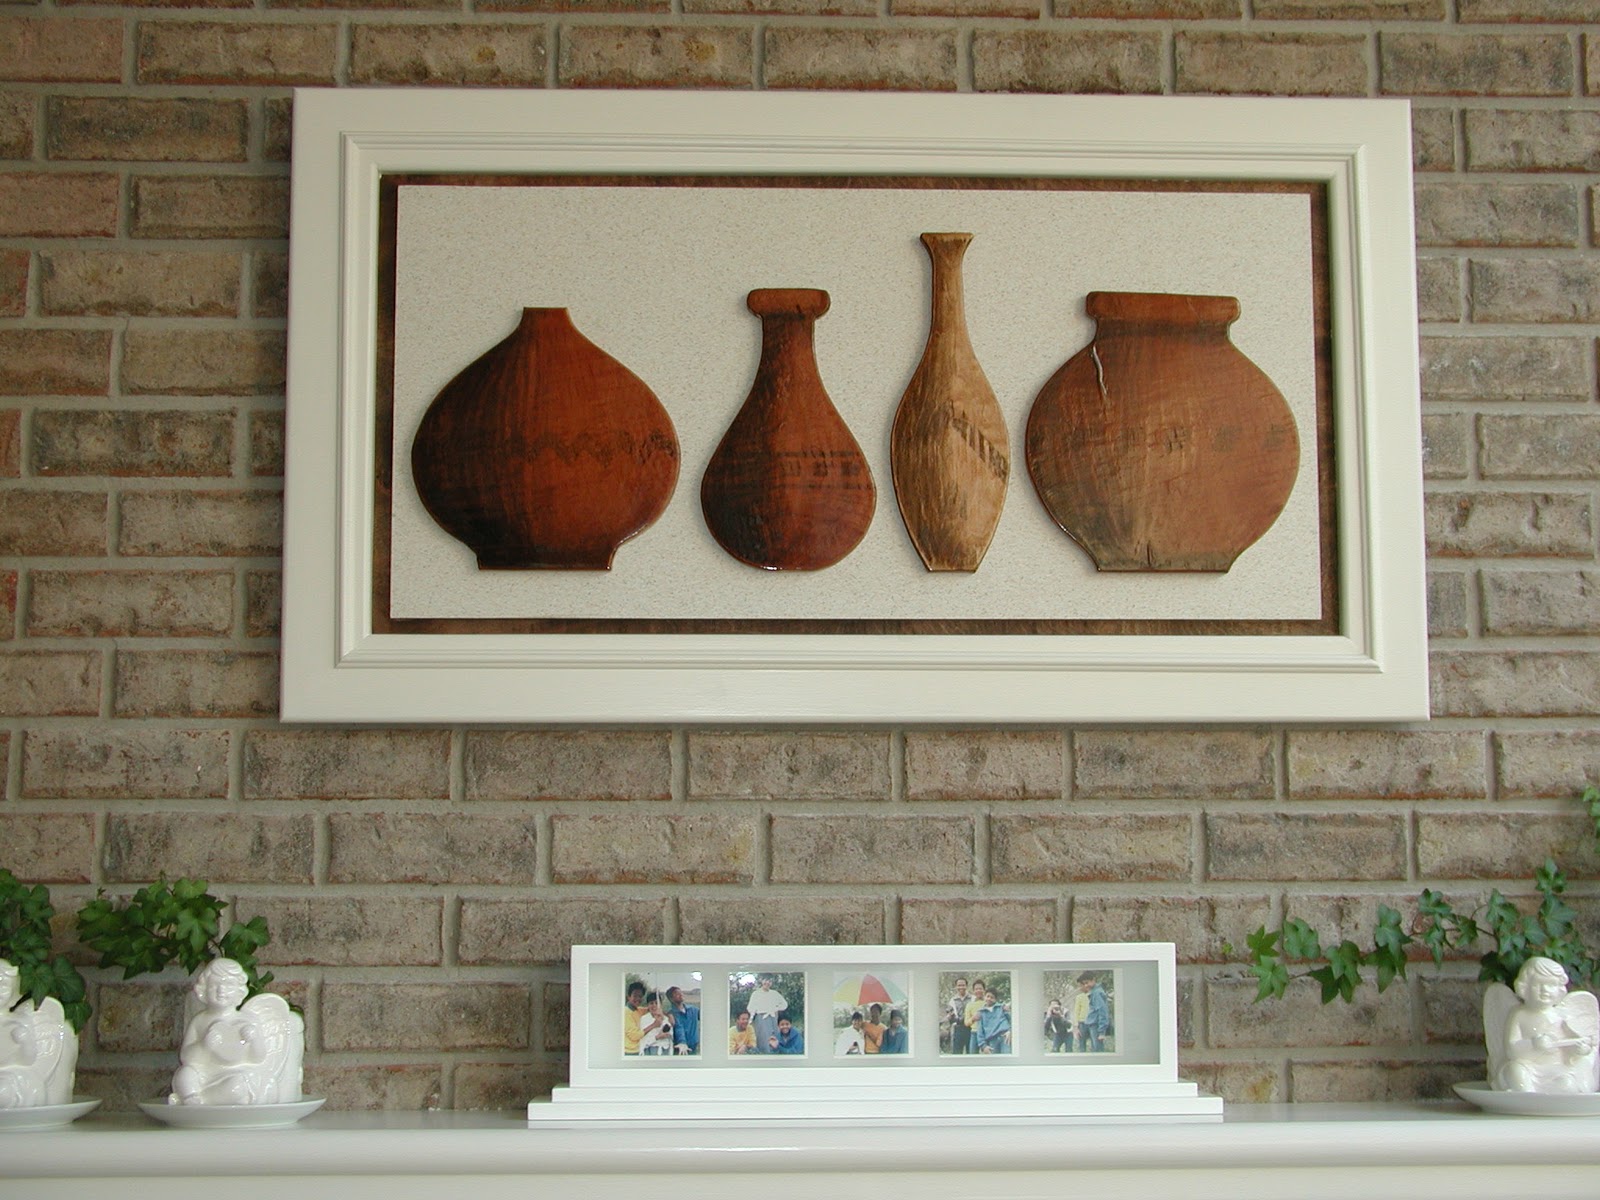
Manila folder was perfect to make the drawing of the pottery. Veneer was used to cover the MDF for color and grain. Wood stain provided the shading for effect.
My personal story
My personal story
We immigrated to this wonderful country in early 1979 from a place where labor was cheap and where you can summon a craftsman to your home to do woodworking for you at practically minimum wage. Needless to say, doing woodworking was farthest from my mind when we arrived here. We lived in a furnished apartment for over a year and then we were able to purchase and moved into our first home in the summer of 1981. Not having owned any furniture - everything was rented - we moved into our new home with nothing but suitcases and a washer/dryer set. We've been in the house three months and our neighbors thought we haven't moved yet because they didn't see any moving van come to deliver our furniture.
Our small income, the reality of a mortgage, car payment and raising a family (we have two sons) didn't leave much for anything else, even money to furnish the house. From a store that sold only unfinished furniture we bought a butcher block kitchen table made of beech and some chairs so we had a place to take our meals. The table was well constructed but I had to sand it and put finish on it. We still have it today. We bought mattresses (but no box springs so we can save about 30%) and set them directly on the carpet so that we had something to sleep on.
We carried on for sometime with the bare essentials and as we continued to window shop for furniture we were met with the discouraging prospect of paying and owing a lot for these other pieces of the American dream. We just couldn't afford the additional burden.
One day, my wife and I went to a home show where I was mesmerized by a 5-in-one woodworking tool being demonstrated. They also offered a one year plan to pay for it. I told my wife, "we need to get this and I'll start making furniture for the house". My wife trusted me although she hasn't even seen me make anything. So, we signed the papers and a couple of weeks later I had the tool. I still have it today.
First order of business was to construct the beds. We only had mattresses so I had to design a platform bed that required no box springs. Our present beds in all three bedrooms (our second home now) are a third generation from the originals. Each was made a little differently but the platforms are all based on the torsion box (you will have to wait for a posting on this subject in my later blogs). Click pictures to enlarge.
So that's how I got into woodworking. Not initially for the joy or pleasure of getting into a hobby but out of pure necessity. But over the years I have come to enjoy it and I'm glad I did, especially when the retirement train blew its whistle. The amount of time that comes with retirement is easily filled with projects that now I am able to write about with simple unadulterated pleasure.
To view all pictures of all the beds, please click here.
Many topics are dedicated to the beginning woodworker - anyone who can measure, scribe a straight line, make simple cuts with a miter saw, drill a hole on a fixed workpiece, and then drive screws with a drill/driver can start making projects that will be pleasing to the eye and have strong structural integrity. There are topics too for those looking for advanced projects who may want try out other techniques.
There are plenty of pictures for visual clarity.
For beginners or those just starting to learn, please read first the following short topics in the following order: "Basics of Woodworking"; "Basic Rules of Woodworking"; "Tools of the Trade under $500"; "Why Pocket Hole Joinery".
Then when you're ready, I recommend that you first read up on these topics: "The Orchid Planter" and "The Plant Stand". These two little projects will get you going, develop your confidence, allow you to practice on easy to cut, cheaper material, yet produce quality results.
Please navigate from topic to topic by clicking on them on the outline of postings under Blog Archive. Or, go from page to page by clicking on "Older Posts" /"Newer Posts" at the end of each page. There are human interest stories like my personal story on how I got into woodworking, the golden ratio, and women in woodworking.
PLEASE MAKE THIS YOUR REFERENCE TO REVIEW PAST OR READ FUTURE POSTINGS.
Page updated
Google Sites
Report abuse