Embedded Files


Fizzy Rainbow Science
Fizzy Rainbow Science
Materials List:
Materials List:
Shallow trays
Medicine droppers or Eyedroppers
Baking Soda
White vinegar
Food Coloring
What to Do:
Place baking soda into a shallow tray. Allow time to explore it with their senses– touching it and smelling it.
Provide bowls of vinegar and food coloring. You can use little medicine droppers to drip the vinegar onto the baking soda tray. Listen to the chemical reaction of the vinegar and baking colours start to mix.


Wreck-It Ralph's Explosion Experiment!
Wreck-It Ralph's Explosion Experiment!
THINGS YOU NEED
A two litre bottle of Diet Coke
2 rolls of Mentos mints
1 piece of 8x10 inch paper - construction paper or coloured paper
Tape
HOW TO CREATE YOUR OWN WRECK-IT RALPH EXPERIMENT
Remove the lid from the Diet Coke and set the bottle of soda on a flat surface.
Roll the paper into a tube around a pack of Mentos mints, tape it into place and pull it off of the roll of mints.
Hold your finger over one end of the paper tube and have your child fill it up with Mentos mints. (It will probably hold a pack and a half of mints.) Check that the paper is unbent, so that the mints will easily fall from the end of the tube when you remove your finger.
Hold the tube of mints over the mouth of the bottle. Do a count down and when you shout “one,” quickly dump the mints into the bottle. Then stand back and see what happens!
WRITING TASK
Write what you saw happen when you carried out the experiment.
Try and use 5 senses - what did you see, hear, smell, taste, touch


Make a Playdough Minion!
Make a Playdough Minion!
THINGS YOU NEED:
Blue/Yellow Playdough (or plain playdough and add food colouring)
Googly Eyes
Black/Blue Pipe Cleaners or Black/Blue Felt Material
Black ribbon
Glitter to add to playdough (optional)
Scissors
HOW TO MAKE YOUR VERY OWN PLAYDOUGH MINION:
Grab a large piece of the yellow Play-Doh and create a minion-like shape by rolling it around and then squishing it down. Your goal is to make a shape that is small and stout.
Flatten a large piece of blue Play-Doh for his pants with your hands, or a small rolling tool.
Stand up the minion in the center of the Play-Doh, and then wrap the blue piece around his bottom half so that it is completely covered.
Join the edges of the blue Play-Doh on the minion’s sides by squeezing them together, and then pinch off the excess. Smooth this area over with your finger.
Cut the pipe cleaner into a few small pieces to represent your minion’s hair and goggle straps.
Insert the pipe cleaner into the top of the minion’s head. You can go with either a spiky effect by sticking them straight in, or a comb-over style by inserting the pieces of pipe cleaner into the middle of the head, then smoothing them down towards the outside (alternate which side you lay them over towards).
Place a googly eye in the center of the goggle.
Push a piece of pipe cleaner into the Play-Doh on either side of the eye for the goggle straps.


Creepy Crawly OOBLECK
Creepy Crawly OOBLECK
THINGS YOU NEED TO MAKE YOUR SPIDER OOBLECK:
Cornstarch
Water
Googly Eyes/Plastic Creatures(any little objects)
Tweezers
Cookie Sheet
HOW TO MAKE YOUR OWN SPIDER OOBLECK:
Simply mix up about a cup of cornstarch and 1/2 a cup of water! You can adjust the ratios as needed.
Pour and spoon onto a cookie sheet and stick in your goodies (really anything can be used for sticking into the oobleck!).
Add a pair of tweezers and play!

Can you build a chair for a bear?
Can you build a chair for a bear?
Collect up some chair making materials from around your home. Good materials might include toilet paper and paper towel rolls, recycled bottles and containers, masking tape, Lego or Duplo blocks, pipe cleaners, cardboard and scissors. Can you use these to create a chair for your favourite teddy bear? Put your chair to the test. If your teddy is too heavy for the chair, what is it about your design that you need to change? Change one thing and try again. Remember that good engineers never give up! Draw a picture of your chair and write about it in your learning journal.
Collect up some chair making materials from around your home. Good materials might include toilet paper and paper towel rolls, recycled bottles and containers, masking tape, Lego or Duplo blocks, pipe cleaners, cardboard and scissors. Can you use these to create a chair for your favourite teddy bear? Put your chair to the test. If your teddy is too heavy for the chair, what is it about your design that you need to change? Change one thing and try again. Remember that good engineers never give up! Draw a picture of your chair and write about it in your learning journal.
Animal Photographer of the Year
Animal Photographer of the Year
Click on the picture to the left and enjoy a slideshow of some amazing animal photographs.
While in your garden, or on a walk, try to take some interesting photos of animals you find. After it has rained you often find worms that have come to the surface. How close can you get to capture detail in your photo?
Can you sketch the main features you captured in your photo?
Can you search online and record 3 interesting facts about the animal you have photographed?
You could be a future Wildlife Photographer of the Year!!

Make Your Own
Animal Skeleton!
Make Your Own
Animal Skeleton!
Learning: Animal Skeletons
- click here for Power Point on skeletons
and/or click here for the book video (try muting the video and reading some yourself!)
Use the scientific lingo! In your learning journal write the name of and draw a picture of each of the following:
A vertebrate - an animal that has a spine
An invertebrate - an animal that doesn't have a spine
An animal with an endoskeleton - a skeleton on the inside of their body
An animal with an exoskeleton - a skeleton on the outside of their body
Activity: Make your own skeleton!
Either draw your favourite skeletons or print it from the PDF above
Put pasta, straws, noodles or natural materials on top of your drawing/printed page to create a skeleton of that animal, like this picture <--
Take a photo and send it to your teacher
Optional: Make it into a model for your room! (This is tricky) Put pipe cleaners or wire inside the pasta, or glue it together and make it a model for your room, like the bottom picture <--
Salt Dough Dinosaur Fossils
Salt Dough Dinosaur Fossils


What is a fossil?
What is a fossil?
Can you write a story about making dinosaur fossils?
Can you write a story about making dinosaur fossils?
Or if you prefer, you could make up a story about being a famous paleontologist who finds a dinosaur fossil in your back garden!
Or if you prefer, you could make up a story about being a famous paleontologist who finds a dinosaur fossil in your back garden!

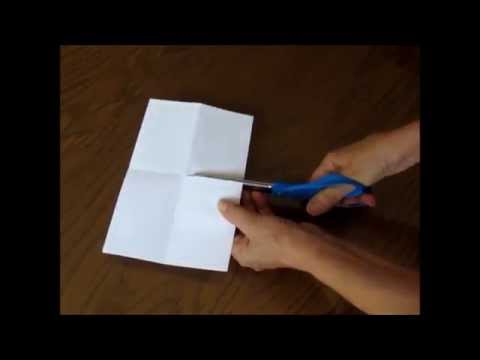
Paper Towel Magic!
Paper Towel Magic!
Can you follow the steps in the video to create your own paper towel magic!
Can you follow the steps in the video to create your own paper towel magic!
Wow! How does it do that?
Wow! How does it do that?
Writing Challenge
Writing Challenge
Have a go at writing a recount. What did you do? What happened?
See if you can start your sentences with first, next and then. Can you include a conjuntion and a WOW word?

Find white flowers in your garden or out on a walk. Fill a cup or a jar halfway with water and drops of food colouring. Put each flower into a cup of coloured water. Make sure the end of its stalk is in the water!
Leave it for a few hours and watch how the flowers change!
Colour Changing Flowers
Colour Changing Flowers

Writing Challenge
Writing Challenge
Have a go at writing a recount. What did you do? What happened?
See if you can start your sentences with first, next and then. Can you include a conjuntion and a WOW word?

Magic Milk
Magic Milk
What you need:
Milk
Different food colouring
Dishwashing liquid
Cotton buds
What to do:
Pour a thin layer of milk in a shallow dish.
2. Add drops of food coloring all around in the milk.
3. Pick up a cotton bud and dip it in the dish soap.
4. Then put the cotton swab in the milk – pressing it down in one spot and hold it there for about 15 seconds.
Watch what happens!

Make a rubber egg!
Make a rubber egg!
You will need
You will need
- One raw egg
- White vinegar
- A jar that the egg fits into and a lid
Gently place the egg inside the jar and cover with white vinegar. Put the lid on the jar. After 24 hours, drain the vinegar away and replace it with fresh vinegar. Set it aside and patiently wait for 7 days. Yes. 7 whole days! While you are waiting, hone your powers of observation. What is going on inside the jar? What do you see?
Gently place the egg inside the jar and cover with white vinegar. Put the lid on the jar. After 24 hours, drain the vinegar away and replace it with fresh vinegar. Set it aside and patiently wait for 7 days. Yes. 7 whole days! While you are waiting, hone your powers of observation. What is going on inside the jar? What do you see?
Gently play with your egg on a smooth surface. What does the egg feel like? Can you make it do a little bounce? What happened to the shell? Does light pass through it? What happens if you repeat the experiment and put food colouring in with the vinegar at the start? Do some research online... can chickens actually lay eggs like this? If you think yes, why? Record your discoveries in your learning journal!
Gently play with your egg on a smooth surface. What does the egg feel like? Can you make it do a little bounce? What happened to the shell? Does light pass through it? What happens if you repeat the experiment and put food colouring in with the vinegar at the start? Do some research online... can chickens actually lay eggs like this? If you think yes, why? Record your discoveries in your learning journal!
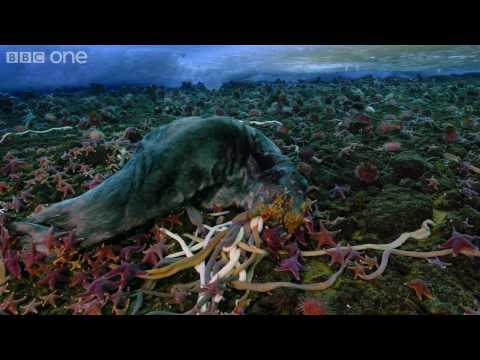
Spiky Starfish
Spiky Starfish
Starfish are super interesting. They are actually echinoderms (spiny skinned sea urchins, related to kina). They're not really fish. They can't swim and they do not use gills to breathe like fish. They are also ferocious predators!
Starfish are super interesting. They are actually echinoderms (spiny skinned sea urchins, related to kina). They're not really fish. They can't swim and they do not use gills to breathe like fish. They are also ferocious predators!
Watch the BBC video about starfish and the important role that they play in our oceans.
Then follow the instructions below and draw a starfish in your learning journal!
Watch the BBC video about starfish and the important role that they play in our oceans.
Then follow the instructions below and draw a starfish in your learning journal!

Make a Tornado in a Jar!
Make a Tornado in a Jar!
The swirling winds of a twister are called a vortex. In this experiment you will make a vortex that looks like a real tornado! While real twisters happen in air, the vortex you make in this activity is in water. Both air and water are fluids. That means that they move in similar ways.
What you will need:
240ml Jar with lid
Water
Vinegar
Clear liquid dish soap
A pinch of glitter


Bubble, bubble, toil and trouble!
Bubble, bubble, toil and trouble!
Get outside on a fine day with a wooden spoon and a bowl and make yourself a potion! Find interesting flower petals and leaves for your potion. Daisies, dandelions and lavender flowers are perfect!
Get outside on a fine day with a wooden spoon and a bowl and make yourself a potion! Find interesting flower petals and leaves for your potion. Daisies, dandelions and lavender flowers are perfect!
If you want to take potion making to a new level, try adding some of these awesome extras.
If you want to take potion making to a new level, try adding some of these awesome extras.
- mud or sand
- wood shavings or bark
- mortar and pestle for grinding and pulverising
- chalk to grind into powder
- food colouring
- baking soda and a container of vinegar for fizzy potions
- measuring cups and jugs
- plastic scoops
- pipettes
- tongs and/or tweezers
Write a story in your learning journal about your potion. You can write like a scientist and record each step you took to make your potion. Or you can write like David Walliams and create a story about who your potion is for and what they will use it for!
Write a story in your learning journal about your potion. You can write like a scientist and record each step you took to make your potion. Or you can write like David Walliams and create a story about who your potion is for and what they will use it for!
Important note: If your caregivers are trying to grow vegetables, don't use these in your potion. If you're not sure whether to pick something or not, make sure you ask first!
Important note: If your caregivers are trying to grow vegetables, don't use these in your potion. If you're not sure whether to pick something or not, make sure you ask first!

Museum Fun
Museum Fun
Do you like going to the Museum? I love visiting them all over the world. Right now we can't go exploring, so the next best thing is to take a virtual tour.


Observation Grid
Observation Grid
Visit one of the 30 rooms on the virtual tour and then find your favourite. Fill in the grid about what you saw, what you think and things you have learned.
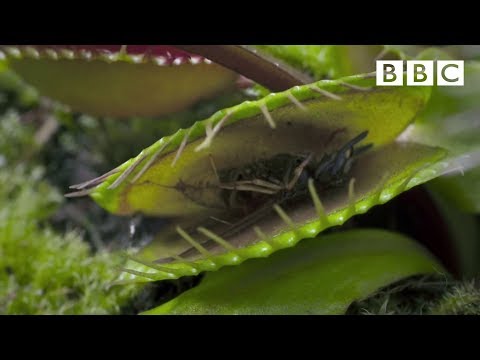
Carnivorous Plants
Carnivorous Plants
Watch the BBC video about Venus Fly Traps and learn what makes them so successful.
Then, in your learning journal, design and draw a plant that eat insects.
Watch the BBC video about Venus Fly Traps and learn what makes them so successful.
Then, in your learning journal, design and draw a plant that eat insects.
Your plant will need roots (to get water from the soil) and leaves (to make food) but it will also need to trap insects. It might do this by:
Your plant will need roots (to get water from the soil) and leaves (to make food) but it will also need to trap insects. It might do this by:
- trapping the insect in a cage of some kind
- drowning the insect
- making the insect stick to it
- having a trap that’s easy to get in but impossible to get out.
Give your plant a name and describe how it traps insects.
Give your plant a name and describe how it traps insects.
Make a Science Mini-book
Make a Science Mini-book
Choose the best thing you have learned about in the Science section. Maybe you're a volcano guru. Maybe you're fascinated with praying mantids? Or maybe starfish or even Venus Fly Traps? Click on the video and learn how to make your very own mini book. Record your favourite facts about your best subject. Remember to draw and label pictures about your facts too!
Choose the best thing you have learned about in the Science section. Maybe you're a volcano guru. Maybe you're fascinated with praying mantids? Or maybe starfish or even Venus Fly Traps? Click on the video and learn how to make your very own mini book. Record your favourite facts about your best subject. Remember to draw and label pictures about your facts too!


Become a Praying Mantis expert!
Become a Praying Mantis expert!
Lots of children become fascinated with the praying mantis insects that live in the bushes and gardens around our homes and schools. Watch this BBC Earth video to learn more about mantids. Then complete one or all of the follow up activities listed below in your learning journal.
Lots of children become fascinated with the praying mantis insects that live in the bushes and gardens around our homes and schools. Watch this BBC Earth video to learn more about mantids. Then complete one or all of the follow up activities listed below in your learning journal.
Watch the video, follow the instructions and draw a praying mantis in your learning journal. Can you label the thorax, the eyes, the antennae, the wings, the abdomen and the legs?
Watch the video, follow the instructions and draw a praying mantis in your learning journal. Can you label the thorax, the eyes, the antennae, the wings, the abdomen and the legs?
Click here for more marvellous mantid activities...
Click here for more marvellous mantid activities...
Many mantid species use camouflage to hide from predators and sneak up on prey. Most praying mantises that we see in New Zealand are a green or light brown colour, but some species that live overseas look like dead leaves, branches or flowers. Do some research about different praying mantis species online, then draw a picture of your favourite camouflaging mantis in your learning journal and record some facts about it.
Many mantid species use camouflage to hide from predators and sneak up on prey. Most praying mantises that we see in New Zealand are a green or light brown colour, but some species that live overseas look like dead leaves, branches or flowers. Do some research about different praying mantis species online, then draw a picture of your favourite camouflaging mantis in your learning journal and record some facts about it.
Either print or copy this diagram showing the life cycle of a praying mantis. Colour your diagram with realistic colours and then label it to show the egg case, the nymph, the adolescent and the adult praying mantis.
Extra for experts:
Do some online research. Can you find out the fancy name of the praying mantis' egg case, which protects the eggs until it's time for the nymphs to hatch?
The praying mantis is named because of the way the insect holds its front legs. They are bent and held together in a way that makes it look like it is PRAYING! However some people call them PREYING mantis because they are fierce hunters and catch lots of prey. What is your opinion about which name is the best? Write a sentence in your learning journal to record your view.
Tell someone in your family a fact that they didn't know about praying mantis!

Bathroom Party
Bathroom Party
If you choose this activity on Mother's Day you will be really popular!!
Did you know that you can clean your bathroom tiles with baking soda and vinegar? Sprinkle some baking soda into your bath and put some white vinegar into an empty spray bottle. Spray the baking soda with the vinegar and watch the reaction between these two. What can you hear? What can you see?
Next, put on some music you like, grab some cleaning cloths and scrub, scrub, scrub! Before you know it you will be having a fun bathroom party and cleaning up too! Make sure to ask the big person at your house first!

Banana Candle
Banana Candle
Did you know that you can make a candle from a banana and an almond? It is really important that you ask for help from the big person in your house before you start this as you will need matches too. You will need to cut the banana in half so that it can stand upright on a plate. Next, you will need to get an almond and scrape or cut the skin off it. If you have blanched almonds you can skip this step. Next cut the almond in half length ways and position it in the top of the banana. Ask your big person if you can use the matches or ask them to light it for you. Does your candle burn? What is in almonds that can make the flame burn?
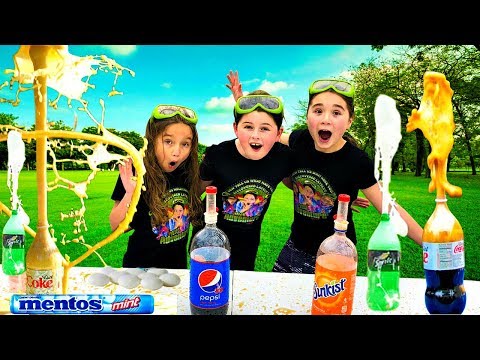
Mentos & Coke eruptions
Mentos & Coke eruptions
<<<<< Watch the video
You will need:
Bottle of Coke, Diet Coke or Coke Zero (you can try with any soda and any size bottle)
Mentos (4 mentos per big bottle)
A space outside

Method:
Collect all your equipment
Place coke on a flat surface. Remove the lid.
Get 4 mentos (big bottle)
Quickly place mentos in bottle
Move away otherwise you are going to get sprayed!
Write up the experiment. You could film it too! What is the chemical reaction that happens? Which coke had the most powerful eruption?
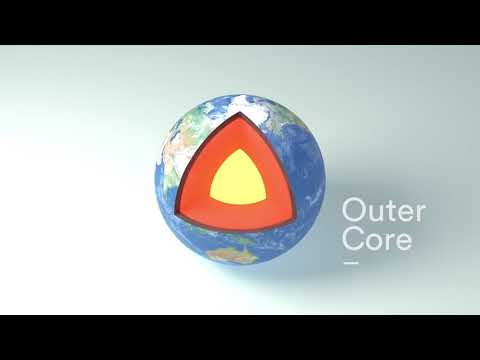
Layers of the earth
Layers of the earth
Did you know that the Earth is made of different layers?
Watch this video from Auckland Museum, then draw a diagram in your learning journal that shows Earth's layers. Add labels to your diagram. Make sure that you label:
- the Crust
- the Mantle
- the Outer Core
- the Inner Core
Extra for Experts: Can you add a fact to your diagram about each of the Earth's layers? Listen carefully to the video again and record your favourite fact about each layer.
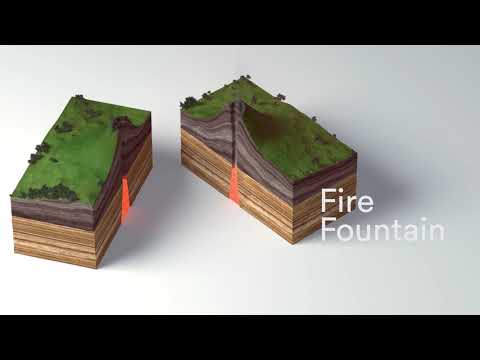
How did Auckland's volcanoes form?
How did Auckland's volcanoes form?
Have you ever wondered how Auckland ended up with so many different volcanoes?
Watch this video from Auckland Museum and learn about the formation of the many volcanoes that dot our landscape.
Mataoho was the ancestor god who Maori believed brought underground volcanic fires to New Zealand from Hawaiki. In your learning journal, draw a picture of what you think Mataoho would have looked like. Then write some sentences to describe the special powers that you think he would have.

Rainbow Walking Water
Rainbow Walking Water
You will need:
Small plastic cups or glasses
Paper towels
Food coloring in primary colors
Water
What to do:
Place 7 cups in a row and pour water in the 1st, 3rd, 5th, and 7th cup about 3/4 full.
2. Add 5 drops of red food coloring to the 1st cup and the 7th cup.
3. Add 5 drops of yellow food coloring to the 3rd cup.
4. Add 5 drops of blue food coloring to the 5th cup.
5. Take a half sheet of paper towel and fold it in half lengthwise and in half again lengthwise.
6. Trim off some of the length so that there isn’t too much excess paper towel that will stick up in the air between each cup. This will make the water walk more quickly.
7. Place one half of a rolled paper towel in the 1st cup and place the other half in the cup next to it. Then another paper towel from 2nd cup and into the 3rd cup. This continues until you have placed the last paper towel that drapes over from the 6th cup to the 7th cup.
8. Stare at the cups and watch what starts happening. You should quickly be able to see the colored water begin to crawl up the paper towel.
Make it happen! Click the arrow for instructions
Make it happen! Click the arrow for instructions
Fill the jar with 3/4 full of water
Put in one teaspoon of vinegar and one teaspoon of dish soap
Sprinkle in a small amount of glitter
Close the lid and twist the jar to swirl the water and see a vortex like a twister form in the centre of the jar.
What’s happening?
As you twist the jar, the water inside up against the glass is pulled along due to its friction against the glass walls. The fluid toward the inside takes longer to get moving. But eventually both the glass jar and the fluid are spinning as you rotate the bottle. When you stop rotating the jar, the fluid inside keeps spinning. A mini twister can be seen for just a few seconds when the outer fluid slows down and the inner fluid continues to spin rapidly. Try it again.

Bird watching
Bird watching
Go outside into your garden and find a comfortable place to sit to observe birds. Where so you think is the best place to sit? Take a pencil and some paper. You could draw a bird you see. You could describe a bird you see. You could count birds in a 10 minute time limit. Can you name the birds you found?
Go outside into your garden and find a comfortable place to sit to observe birds. Where so you think is the best place to sit? Take a pencil and some paper. You could draw a bird you see. You could describe a bird you see. You could count birds in a 10 minute time limit. Can you name the birds you found?


Bring on the ice age!
Bring on the ice age!
Find a container and something like some small plastic animals. Fill the container with water and place it carefully in your freezer. Tomorrow, check and see what has happened.
Find a container and something like some small plastic animals. Fill the container with water and place it carefully in your freezer. Tomorrow, check and see what has happened.
What could you use to excavate through the ice to reach your ice age dinosaurs? Pretend to be a paleontologist and have a go a excavating through the ice.
What could you use to excavate through the ice to reach your ice age dinosaurs? Pretend to be a paleontologist and have a go a excavating through the ice.
Find out what these words mean ... excavate, paleontologist. Write about your experience in your learning journal.
Find out what these words mean ... excavate, paleontologist. Write about your experience in your learning journal.
If you have balloons at home you might like to experiment with filling these with water. How will you fit your small animal in? When your balloon has frozen, it will look like a dinosaur egg.
If you have balloons at home you might like to experiment with filling these with water. How will you fit your small animal in? When your balloon has frozen, it will look like a dinosaur egg.
Can you collect some micro-treasures from outside and freeze them in ice cube trays? These might be daisies, petals, leaves that you like the shape of, shells or special shaped rocks.
Can you collect some micro-treasures from outside and freeze them in ice cube trays? These might be daisies, petals, leaves that you like the shape of, shells or special shaped rocks.
Write about your ice age science projects in your learning journal.
Write about your ice age science projects in your learning journal.


There are science mysteries all around us. Would you like to know how hand sanitiser kills germs?
There are science mysteries all around us. Would you like to know how hand sanitiser kills germs?
Click on the Mysterydoug link above and learn.
Click on the Mysterydoug link above and learn.

Mix 1 1/2 cups of cornflour with 1 cup of water.
Mix 1 1/2 cups of cornflour with 1 cup of water.
You can add food colouring for different colours and glitter too.
You can add food colouring for different colours and glitter too.
Ooble ooble oobleck!
Ooble ooble oobleck!
Make some oobleck! The really cool thing about oobleck is that it’s neither a liquid nor a solid. It’s actually a suspension (known as a non-Newtonian Fluid) and will behave like either, depending on the amount of pressure you apply.
Make some oobleck! The really cool thing about oobleck is that it’s neither a liquid nor a solid. It’s actually a suspension (known as a non-Newtonian Fluid) and will behave like either, depending on the amount of pressure you apply.
Squeeze it in the palm of your hand, and it will feel like a solid ball… But when you open your hand, it will flow over and between your fingers like a liquid. It’s the most bizarre feeling — you'll want to play with it for hours!
Squeeze it in the palm of your hand, and it will feel like a solid ball… But when you open your hand, it will flow over and between your fingers like a liquid. It’s the most bizarre feeling — you'll want to play with it for hours!
Hints and tips: oobleck is definitely an outside activity! Don't wash it down the sink, as it could block it. It's a good idea just to wrap it up and put it in the rubbish bin when you've finished.
Hints and tips: oobleck is definitely an outside activity! Don't wash it down the sink, as it could block it. It's a good idea just to wrap it up and put it in the rubbish bin when you've finished.

Can you make a boat that floats?
Can you make a boat that floats?
Find some boat making materials from around your home. Good materials might include tinfoil, corks, bluetack, paper, plasticine, toothpicks, bottle tops and little Lego people to use as sailors. See if you can use your materials to make a boat, then put it to the test! You could run some water in the bath for your test or even in the kitchen sink. Does your boat float? Can it hold Lego sailors? If your boat sinks, what do you need to change? Think about the shape of boats... why are they shaped that way? How does this help them to float? Draw a picture of your boat and write about it in your learning journal.
Find some boat making materials from around your home. Good materials might include tinfoil, corks, bluetack, paper, plasticine, toothpicks, bottle tops and little Lego people to use as sailors. See if you can use your materials to make a boat, then put it to the test! You could run some water in the bath for your test or even in the kitchen sink. Does your boat float? Can it hold Lego sailors? If your boat sinks, what do you need to change? Think about the shape of boats... why are they shaped that way? How does this help them to float? Draw a picture of your boat and write about it in your learning journal.

"Keep your face to the sunshine and you'll never see a shadow..."
"Keep your face to the sunshine and you'll never see a shadow..."
Go outside on a sunny day and look for your shadow. Take a friend, or your brother or sister, and draw around their shadow in chalk. What changes do you notice occurring as time passes? What is causing the change? At what time of day do you predict that your shadow will be the tallest? Why? What evidence do you have to prove that your answer is correct? Draw a picture of your findings and write about them in your learning journal.
Go outside on a sunny day and look for your shadow. Take a friend, or your brother or sister, and draw around their shadow in chalk. What changes do you notice occurring as time passes? What is causing the change? At what time of day do you predict that your shadow will be the tallest? Why? What evidence do you have to prove that your answer is correct? Draw a picture of your findings and write about them in your learning journal.

Grow, baby grow!
Grow, baby grow!
Carrot tops are one of the easiest plants to grow. They make pretty houseplants for a sunny window and their fern-like leaves are beautiful. Eventually, white lacy flowers will bloom.
You will need
Carrot tops are one of the easiest plants to grow. They make pretty houseplants for a sunny window and their fern-like leaves are beautiful. Eventually, white lacy flowers will bloom.
You will need
- A carrot top (2-3 cm from stem with some root growth remaining on top)
- Shallow dish
- 10 cotton wool
- Water
- Sunny and protected spot
Simply add a layer of cotton balls to your small dish. Add a light dribble of water over the cotton balls so they are wet but not completely flooded with water. Press your carrot top into the wet cotton balls and place the dish in a sunny location. Be sure to check that the cotton balls remain wet throughout the growing period. You do not want to dry them out.
Simply add a layer of cotton balls to your small dish. Add a light dribble of water over the cotton balls so they are wet but not completely flooded with water. Press your carrot top into the wet cotton balls and place the dish in a sunny location. Be sure to check that the cotton balls remain wet throughout the growing period. You do not want to dry them out.
It will take a few days before the carrot top begins to grow, however once it starts it will grow quite quickly if it's in the right conditions.
It will take a few days before the carrot top begins to grow, however once it starts it will grow quite quickly if it's in the right conditions.
Extra learning challenges: Have you tried growing one carrot top in a sunny spot and one in a dark spot? Have you tried talking kindly to one and shouting at the other one? Which one grows faster and why? You can also grow other root vegetables in the same way. Have you tried a kumara? Which one grows faster and why? Record your daily findings in your learning journal.
Extra learning challenges: Have you tried growing one carrot top in a sunny spot and one in a dark spot? Have you tried talking kindly to one and shouting at the other one? Which one grows faster and why? You can also grow other root vegetables in the same way. Have you tried a kumara? Which one grows faster and why? Record your daily findings in your learning journal.

Moldy old muffins
Moldy old muffins
Molds are microscopic fungi. They grow from tiny spores that float around in the air. When some of these spores fall onto a piece of food, they grow into mold.
Molds are microscopic fungi. They grow from tiny spores that float around in the air. When some of these spores fall onto a piece of food, they grow into mold.
Not all foods grow mold at the same rate. Let's do an experiment to explore this. Help your caregiver make some muffins and leave one on the kitchen bench, next to a muffin that you have bought from the supermarket. Record a prediction in your learning journal. Which muffin do you think will grow mold the fastest and why? Record what you see every day in your learning journal. Which muffin grows mold first? What does that mold look like? How fast does it grow? After a week, was your prediction right or wrong? What about after two weeks?
What conclusions can you draw from your experiment?
Safety note: Some of the mold that grows on food is not safe. Don't touch any of the mold that grows on your muffins and make sure your experiment stays away from your little brothers and sisters.

There's a fraction too much friction
There's a fraction too much friction
First, tear up pieces of tissue until they are as a small as you can get them… really small! Then brush a comb through your hair 20 times, and bring it close to the tiny pieces of tissue. If the pieces are small enough they will jump off the table to the comb, thanks to the wonders of static electricity.
First, tear up pieces of tissue until they are as a small as you can get them… really small! Then brush a comb through your hair 20 times, and bring it close to the tiny pieces of tissue. If the pieces are small enough they will jump off the table to the comb, thanks to the wonders of static electricity.
Why is this happening? After a plastic comb is pulled through dry hair it becomes charged with static electricity. The charge attracts uncharged objects like small pieces of paper or tissue.
Why is this happening? After a plastic comb is pulled through dry hair it becomes charged with static electricity. The charge attracts uncharged objects like small pieces of paper or tissue.
Did you know that you can bend water with static electricity? Turn on a tap and slowly turn down the water until you have a VERY thin stream of water flowing. Take a plastic comb and brush it through your hair 20 times. Now slowly bring the comb close to the flowing water (without actually touching the water). If all goes well, the stream of water should bend towards the comb! When you bring the charged comb near the tap it is attracted to the force of the water. The attraction is strong enough to actually pull the water towards the comb as it is flowing!
Did you know that you can bend water with static electricity? Turn on a tap and slowly turn down the water until you have a VERY thin stream of water flowing. Take a plastic comb and brush it through your hair 20 times. Now slowly bring the comb close to the flowing water (without actually touching the water). If all goes well, the stream of water should bend towards the comb! When you bring the charged comb near the tap it is attracted to the force of the water. The attraction is strong enough to actually pull the water towards the comb as it is flowing!
Can you act like a scientist to investigate these questions:
Can you act like a scientist to investigate these questions:
1. Does water temperature affect how much the water bends?
1. Does water temperature affect how much the water bends?
2. Does the size of the comb affect its power?
2. Does the size of the comb affect its power?
3. Does the amount of moisture in the air affect a comb's power? Try your experiments in the bathroom after someone has taken a shower.
3. Does the amount of moisture in the air affect a comb's power? Try your experiments in the bathroom after someone has taken a shower.
4. Does the material that the comb is made of affect its power?
Write about your investigations in your learning journal.
4. Does the material that the comb is made of affect its power?
Write about your investigations in your learning journal.

Shadow Art with toys
Shadow Art with toys
Start this craft by having your kids line up all their favorite toys outside. You can even tell your kids that the toys are having a parade. Finish getting the craft ready by putting a piece of white paper on the ground behind each toy. Then, challenge your kiddos to trace the shadow on the paper before the sun moves.

Create A Sprout House
Create A Sprout House
Click on the picture to follow the instructions of how to build your dream Sprout House ......

Want to explore the world from your room? Check out these virtual fieldtrips of the world's wonders, animals and arts!

Explore the Auckland Zoo
Explore the Auckland Zoo
Take a look at the cool webcams of the animals at our local Auckland Zoo
Try out one of the activities for kids that the Zoo have on the website. There are lots of great activities to download and discover new things about animals
Choose your favourite animal from the Auckland Zoo. See if you can find out lots of great facts. Check out the Animal links to help you learn new things. Make a poster, draw a picture or be creative and make an animal habitat.

Apple Tree
Apple Tree
Did you know you can grown an apple tree from seeds? The next time you eat an apple pick the seeds out of the core and save them. Place them on a wet handy towel and place on a windowsill somewhere sunny. If they sprout and grow a little root you can transfer them to some soil.
Did you know you can grown an apple tree from seeds? The next time you eat an apple pick the seeds out of the core and save them. Place them on a wet handy towel and place on a windowsill somewhere sunny. If they sprout and grow a little root you can transfer them to some soil.

Make a rain gauge
Make a rain gauge
Much of New Zealand was forecast to get some rain today, so have a go at learning to measure rain at your place—if you're lucky enough to get any!
Take a large plastic bottle. A bottle without a handle is easiest to use but just use whatever you have.
Take off the lid. Cut the top quarter or so off the bottle.
Insert the cut-off top into the bottle. This creates a funnel which will stop your collected rainwater from evaporating.
Hold a ruler against the bottle, with 0 at the base.
Get a permanent marker and mark on each cm up to 15 cm (higher if you like.)
Place your rain gauge outside in the open, away from trees and buildings.
Secure it in place by burying it slightly in the garden or in a pot.
Wait for the rain! Make sure you empty it out every day so you can measure from 0 each time you check.

Unbreakable bubbles
Unbreakable bubbles
Investigate what mixture makes the BEST bubbles ...
Water + Dish washing liquid
Water + Corn syrup + Dish washing liquid, or
Water + Glycerine + Dish washing liquid
Which one do you think will make the best bubbles and why? (Hypothesis)
Conduct your experiment and write about your observations.
What is your conclusion and why.
Was your hypothesis right?

Human Body Skeleton
Human Body Skeleton
Skeleton creations
Skeleton creations
Ok scientists, time to get creative!
What can you find to make a cool skeleton picture with? Don't forget to take photos of your awesome work!

Dinosaur skeleton
Dinosaur skeleton

Can you write or talk about the science of melting? What can you use to melt something? Can you turn the melted liquid into a solid again? How?
Make a Melted Crayon Cloud
Make a Melted Crayon Cloud
Use up any small, broken pieces of crayon by making a melted cloud out of them.
Using scissors, scrape shavings from pieces of broken crayon. Work over a piece of paper.
Use a stick or a clean finger to make the shavings into a cumulus cloud shape.
Place wax/baking paper over the cloud and press a warm iron directly onto it. Don't move the iron, keep it in one place to prevent smudging. A few seconds should be enough. (Newspaper or kitchen towels beneath your artwork will keep the ironing board clean while you do this.)
Remove the wax/baking paper and voila—a melted crayon cloud.

Make some Bath Bomb's
Make some Bath Bomb's
You will need:
- 1 1/2 cups bicarbonate of soda
- 1/2 cup citric acid powder (supermarket)
- 1/2 teaspoon of oil (almond/olive/nut/vegetable oil)
An essential oil such as peppermint, lavender, orange if you wan to add a smell
Food colouring if you want to add colour
Rubber gloves (always best if you are using food colouring)
Moulds from craft shops or a muffin tray.
Sieve
Page updated
Report abuse