
Shelter Building
Embedded Files
If you get lost in the wild, the first thing to plan for is building a shelter. It will protect you from a wide variety of uncontrollable and unpredictable factors in a disaster situation. You should construct a shelter even before finding water and food.

Survival shelters are a form of temporary shelter that serves the purpose of keeping you alive rather than comfortable in dangerous situations. It protects you from severe conditions such as heat, rain, wind, and cold. The microclimate of the shelter allows you to sleep, rest and hide from wild animals. It is your temporary base where you store water, food, and some survival equipment.
Though we take these factors for granted in our everyday lives, they play a key role in survival. Not having a shelter exposes you to the risk of hypothermia, which needs very little time to shut down your circulatory system, including the heart.
Types of Shelters
You can not be sure about the resources you will have away from home. Therefore, by educating yourself ahead of time, you should know about as many different shelter options as possible. Location may experience extreme changes in weather conditions from season to season. Hence, it is essential to stay prepared for all the unfavorable circumstances you may face in the wild.
Natural Hollow
A tree hollow or tree hole is a semi-enclosed cavity which has naturally formed in the trunk or branch of a tree. They are found mainly in old trees, whether living or not. Hollows form in many species of trees, and are a prominent feature of natural forests and woodlands, and act as a resource or habitat for a number of vertebrate and invertebrate animals.

Tree holes can be caused when an injury to the tree, such as breakage of a limb, creates an opening through the bark and exposes the sapwood. The sapwood is attacked by fungi and bacteria, which form a cavity in the bole of the tree. The resulting cavity can fill with water, thus becoming a type of phytotelma. Therefore, there are wet and dry tree holes. Tree holes are important habitats for many animals
In Our Story
At first Sam makes himself a tent. But by chapter five, Sam is acknowledging the necessity of having a shelter that is undetectable by visitors in the Catskill forests. He fears that if he is discovered by adults, they will force him to go back to his life and family in New York City. Sam discovers a giant hemlock tree that is rotting in the center.
The tree is big enough for him to carve out a shelter and remain hidden from others, should the need arise. He executes this and then moves into his more permanent home in the hollow of the old Hemlock tree.
"The house is a hemlock tree six feet in diameter, it must be as old as the mountain itself. I came upon it last summer and dug and burned it out until I made a snug cave in the tree that I now call home." (p. 3)
Lean-to
Lean-to
This is an easy and simple shelter to construct in the wild that makes a windscreen in a hurry. You will need to find a well-drained and dry area, and wood or tree branches to complete the construction. If you have the right gear and a little knowledge you can set yourself up with a comfortable shelter that will keep you warm and dry and protected during wet weather and harsh environment.


There are two kinds of Lean-to shelters you could build. A "between trees" lean-to and a "detached" one. Check out this link for detailed instructions on how to construct them. https://www.survivalworld.com/shelters/lean-to-shelter/
Debris Shelter
The facts are that the debris hut, built correctly, is an airflow management system. that sheds water, prevents conduction, and provides protection from radiation and convection. It does so without need of fire, knife, plastic/canvass sheeting, or cordage. The Debris Hut Shelter relies on the individuals radiant body heat to not only warm, but also to dry the occupant inside. The debris hut is so efficient that, with the door open, a properly built one makes the occupant invisible to mosquitos as well as infrared. See also A-frames below.

Once you find a site that is free of hazards such as widow makers, ground hornets, and the like, make sure it is high enough in elevation, has plenty of materials, is either dry or will dry out quickly due to drainage, exposure, and/or materials type.
Next look for a dead, but off the ground hardwood that died from lack of sunlight at about three to five inches across at the base. Never shake or try to carelessly push one of these trees down. Often the tops snap off they will come down on your head! This can kill you. Instead, find one you can either gently and consistently apply pressure to or use a snag that has considerably lean. Playing survivor usually results in injury. Think like a gardener who can’t afford to miss a days work from stupid injuries. This attitude will not only keep you safe, but it will also keep you busy at a sustainable rate. Young folks tend to burn themselves out and build inadequate shelters as a result.
For how to construct a debris shelter read here: http://www.primitiveskills.com/earth-living/debris-hut-survival-shelter-tutorial/
Tree-pit or Tree-root Shelter

A tree pit shelter offers protection from environmental elements in deep snow conditions. A large tree with thick lower leafy branches is an ideal choice to construct this type of shelter. The leafy branches and raking up a pile of vegetation will help in camouflaging it as well as extra protection from the elements. Read here for instructions: https://www.survivalworld.com/shelters/tree-pit-shelter/
When you are in the wild, make the most of what you find. If you find a fallen tree, analyze the structure if you can crawl under the roots. Alternatively, you can use a flat root system of a fallen tree as a sheltering wall.

A-frame

It is a triangle-shaped type of survival shelter that keeps your body heat close. A-frame shelter is constructed with collected wood and tarp. Many people refer to it as tarp shelters, A-Frame Debris Shelter, A-Frame Tarp Shelter, or a one-man shelter. The compact and small design allows you to trap more body heat while using natural materials such as dry leaves to prevent heat loss.
Unlike a lean-to shelter, the a-frame has two sides making it a better shelter option to stay protected from rain and cold wind. Construction Instruction: https://www.survivalworld.com/shelters/tarp-shelter/
Swamp Bed
A swamp bed keeps you off the muddy ground or water. Consider the available materials nearby to make the construction work easier. Explore the simple construction guide for swamp beds for more knowledge. Construction Instruction: https://www.survivalworld.com/shelters/swamp-bed/

Igloo

Involved information on cold weather survival click here
We are sure you have heard of an Igloo before. If you live in an area that has snowy conditions with a good pile of snow then designing a simple dome-shaped igloo might be the perfect solution to survive the cold, harsh winter. Igloos have been used for thousands of years. This shelter is suitable for a mound of snow, a solid snowbank. They can keep you warm when the outside temperature is below zero degrees Fahrenheit.
Rock Shelter
A rock shelter or a rock house is a cave-like opening at the base of a cliff or bluff. If you are wandering near a waterfall, there is a higher probability of finding a rock shelter. Using such a natural survival shelter saves you time and energy that you can invest in other aspects of survival. If you are sheltering in a rock house, build fire in the mouth of the shelter and a reflector behind it. Building the fire inside will heat the roof, which may cause slabs to spall off.

No matter what shelter you have constructed you can also consider the inside of the shelter and how you would like to sit and sleep and store your gear.
You can make smaller lean-tos but I like to have room to store gear and get things out of the rain if need be. You can scoop up pine needles and put your sleeping pad and bag on top of them. This will add some cushion beneath you and also keep you from losing lots of heat to the hard ground through convection.
Some people will cut logs and create a wood floor in the bottom of their lean-to shelter. It is also nice to shove those pine needles to the back of the shelter to trap more of your heat inside the shelter. Pine boughs can make a nice bed, too.

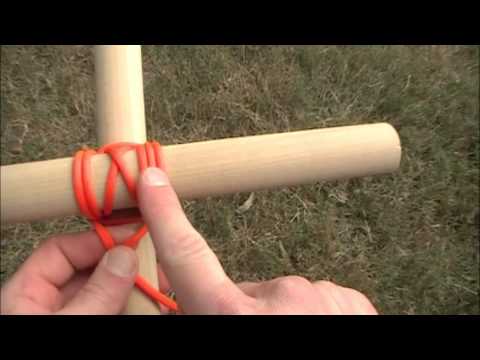
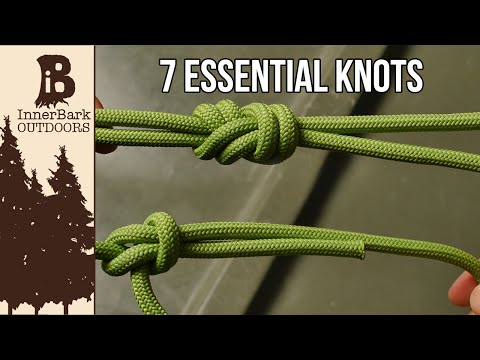
Knots
Making a knot is a key skill to have when you are constructing a shelter. Knots are what keeps your shelter structure together. For a rigid shelter, you need to make rigid knots. Different types of knots serve different purposes. Once you have mastered making them, you can easily select the best-suited type of knot for any particular task.


Overhand Knot
The Overhand Knot or Thumb Knot is the smallest, simplest and most commonly used knot. It is used as a stopping knot, for example, to prevent the end of a rope from untwisting. When tied at the end or standing part of a rope, this knot prevents it from sliding through a block, hole, or another knot. It can also be used to increase a person’s grip on a rope.

Odds are, even if you don’t know it by name, you can already tie this knot. The overhand knot is used in pretty much everything from wrapping bows to tying your shoes. However, sometimes it’s good to cover the basics just to get our form right. After all, this essential knot is the foundation of camping, crafting, and climbing.
With a knot this simple, the only tip is to respect its limitations. There’s a reason why this knot is part of countless knots and used as a stopper, but only used for basic applications in its own right.
Put too much load on this knot, and it might come undone. Try to wrap this knot around something that moves too much or is too wide, and it’s bound to come undone when you need it most.
This is a core knot, but it lacks power on its own. Consider this knot the team player that makes everything work.
Square Knot (Reef Knot or Hercules Knot)
Left over right, right over left.
If you’ve heard that mantra before, it’s how most people learn how to tie this knot. This knot is built out of two alternating overhand knots which form the functional body of this particular tie.
This knot is also often listed as amongst the most deadly knots for how often it is misused. Because it’s a beginner knot, and it can feel very sturdy, countless people have been injured by relying on this knot in the wrong situations.

Start with two lengths of rope. It’s very important that these two ropes be roughly the same diameter to ensure that the knot will be strong. It also helps if they are of roughly the same strength.
The biggest tip to give here is to make sure what you’ve made is actually a square knot. The two loose ends should be on the same side and the knot itself should be symmetrical as in our example. If this isn’t the case, you’ve probably accidentally tied a thief’s knot or a granny’s knot.
Clinch Knot (Fisherman's Knot)
It is the standard terminal joining and a commonly used knot that every fisherman prefers to learn for fishing. A Clinch knot is an easy knot to tye a line to hook, snap swivel, or lure. It can bear some tension but can make tension for some beginners. So use this knot with proper guidelines as it may be the starting point of an angler.

To tie the best knot, we have to follow some basic instructions. These instructions use some standard terms. These self-explanatory terms are:
Tag end; the termination point of the line is the tag end. This part tying the knot.
Standing line; the rest of the line that runs towards the reel is the standard line.
Turn; also called a wrap. It makes when you pass the tag end nearby the standing line.
Steps for typing a Fisherman's Knot:
Take a hook and braided thread to form a strong clinch knot.
Take the end of a line and put it in the hole of a hook.
Take the end of a line and put it in the hole of a hook.
Wind thread 3 to 5 times the end of the line around the mainline. You can also wind more wraps as per your requirement.
Make sure you leave a loop while wrapping the end of the line around the mainline.
Now put the end of the line in the created loop.
Now a little secret, take the end of the line and hook together, close it to the whole, and tie it.
Now you have a nicely formed and ready-to-use clinch knot.
Bowline Knot
Use the bowline to create a fixed ‘eye’ or loop at the end of the rope. Once you know the bowline, it’s easy to tie and fast to untie. It’s a historic knot, receiving its name on sailing vessels. A bowline, or bow line, holds a square sail into the wind, towards the front of the boat. It also prevents the wind from pressing the sail to the mast.
Many people know how to make a bowline with the help of the rabbit mnemonic device. After making the loop, think of the working end of the rope as a rabbit who comes out of the hole, runs around the tree (the standing line), and goes back into the hole.

The bowline performs best when holding a load. Otherwise, it can loosen over time. With practice, you can learn to tie the bowline with one hand, making it an ideal knot for survival situations. Whether tying up a boat or in rescue situations, you can rely on this essential knot to hold.
Steps for tying a Bowline Knot:
1. Form a loop with the working end of the rope on top.
2. Thread the working end back through the loop and beneath the main rope.
3. Loop the working end around the main rope and back through the loop a second time.
4. Pull the tag to constrict the knot.
Remember that no perfect knot exists to tie. You can only hope for a knot to be good enough to catch a fish, so practice is crucial for everything. Most knots are easy to understand and use in daily life depends on our tasks. So, choose your favorite knot, do practice for it and then apply it practically.

Page updated
Google Sites
Report abuse