Embedded Files
For some time I had the idea of building my own little home-server. It would primarily serve as central backup device and wireless access point but could also be used for remote control. Before, I used an old Pentium 2 400 MHz for this, and as storage just a bunch of external hard disks. This takes up a lot of space, creates a cabling mess and trying to figure out which file is on which disk is not very flexible. Not even speaking about all the different styles of enclosures you end up with...
As a side note, it is often said that an old pc is very energy-hungry. That's not completely true: with my Conrad Energy Monitor I measured an idle power draw of 40 Watts, which is still reasonable.
The hardware
The hardware
Motherboard (Gigabyte GA-D510UD)
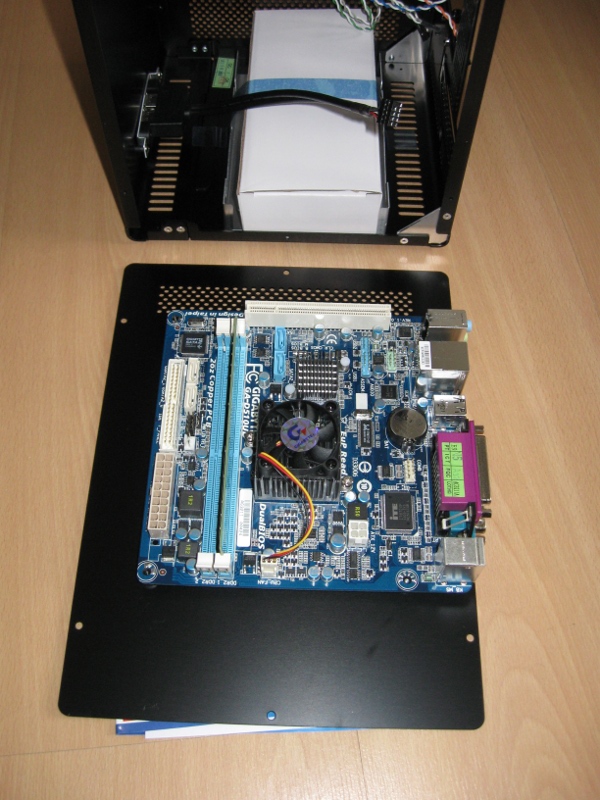
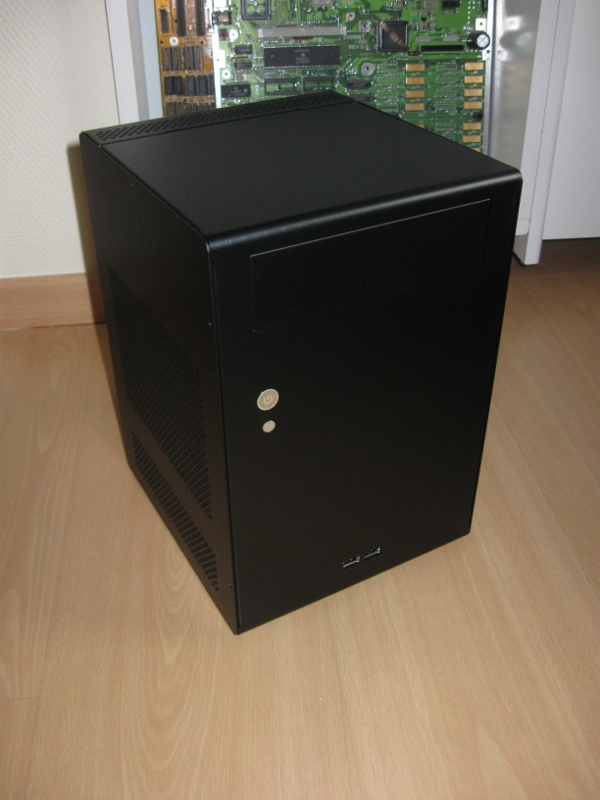
Case (Lian Li PC-Q07)
Replaced ATX power supply bay with a fabricated dual hard drive bay:

Cooling & Noise
Cooling & Noise
CPU cooling modifications


Originally, this motherboard came with a tiny heatsink and 40mm fan that is controlled by the motherboard's BIOS. The heatsink uses "standard" mounting holes spacing, but because of the crowded area around it, I decided against replacing it. The fan had to go however, as it can spin up to 5000 rpm and even then the generated airflow does not cool anything in its surroundings. Such as the PicoPSU. While the latter is rated to 120W and passively cooled, I figured some air moving around it wouldn't hurt. Some time ago I recovered a low-profile 80mm fan from a JVC Home Theater System. Originally, it didn't have a tachometer signal. However, after checking with an oscilloscope, this was provided on an empty soldering pad under the cover sticker. Nice! Next up, an aluminium shroud was made to be able to mount the 80mm fan onto the 40mm heatsink. It is made out of thin strips of sheet metal that I spot-welded together. Below an in-action shot...

Fancontrol
Of course, the BIOS fan control would make the new fan spin too fast now. This is where the Linux fancontrol deamon comes in. It reads the values reported by lm-sensors every 10 seconds and controls the appropriate PWM output.
Output of the 'sensors' command on kernel 2.6.32 and lm-sensors 3.1.2-6 with the original fan:
coretemp-isa-0000Adapter: ISA adapterCore 0: +19.0°C (crit = +90.0°C)coretemp-isa-0001Adapter: ISA adapterCore 1: +22.0°C (crit = +90.0°C)coretemp-isa-0002Adapter: ISA adapterCore 2: +22.0°C (crit = +90.0°C)coretemp-isa-0003Adapter: ISA adapterCore 3: +19.0°C (crit = +90.0°C)it8720-isa-0290Adapter: ISA adapterin0: +0.93 V (min = +0.00 V, max = +4.08 V)in1: +1.86 V (min = +0.00 V, max = +4.08 V)in2: +3.33 V (min = +0.00 V, max = +4.08 V)in3: +2.99 V (min = +0.00 V, max = +4.08 V)in4: +3.04 V (min = +0.00 V, max = +4.08 V)in5: +4.08 V (min = +0.00 V, max = +4.08 V) ALARMin6: +4.08 V (min = +0.00 V, max = +4.08 V) ALARMin7: +2.16 V (min = +0.00 V, max = +4.08 V)Vbat: +3.17 Vfan1: 2213 RPM (min = 0 RPM)fan2: 0 RPM (min = 0 RPM)temp1: -55.0°C (low = +127.0°C, high = +127.0°C) sensor = thermistortemp2: +41.0°C (low = +127.0°C, high = +127.0°C) sensor = thermal diodetemp3: +40.0°C (low = +127.0°C, high = +127.0°C) sensor = thermal diodecpu0_vid: +3.400 VOutput of 'sensors' on kernel 2.6.34 with new modified fan. Weirdly enough, with this kernel the reported coretemp is now about 5-10 degrees higher (just as the critical temperature).
coretemp-isa-0000Adapter: ISA adapterCore 0: +26.0°C (crit = +100.0°C)coretemp-isa-0001Adapter: ISA adapterCore 1: +30.0°C (crit = +100.0°C)coretemp-isa-0002Adapter: ISA adapterCore 2: +30.0°C (crit = +100.0°C)coretemp-isa-0003Adapter: ISA adapterCore 3: +26.0°C (crit = +100.0°C)it8720-isa-0290 Adapter:ISA adapterin0: +0.91 V (min = +0.00 V, max = +4.08 V)in1: +1.86 V (min = +0.00 V, max = +4.08 V)in2: +3.34 V (min = +0.00 V, max = +4.08 V)in3: +2.98 V (min = +0.00 V, max = +4.08 V)in4: +3.04 V (min = +0.00 V, max = +4.08 V)in5: +4.08 V (min = +0.00 V, max = +4.08 V) ALARMin6: +4.08 V (min = +0.00 V, max = +4.08 V) ALARMin7: +2.16 V (min = +0.00 V, max = +4.08 V)Vbat: +3.17 Vfan1: 890 RPM (min = 0 RPM)fan2: 0 RPM (min = 0 RPM)temp1: -55.0°C (low = +127.0°C, high = +127.0°C) sensor = thermistor
temp2: +39.0°C (low = +127.0°C, high = +127.0°C) sensor = thermal diode
temp3: +38.0°C (low = +127.0°C, high = +127.0°C) sensor = thermal diodecpu0_vid: +3.100 VAfter some attempts to get the cpufreq-drivers to work, I noticed the Atom does not have any clock/power scaling ability. Quite surprising for a cpu that's intended to be used in low power embedded systems...
Fortunately, the BIOS of the Gigabyte motherboard allows to reduce the bus clock from 166 to 100MHz. This results in a CPU speed of 1GHz, making it possible to bring the core voltage down to 0.956V. This should save a little bit of power and allow a reduced fan speed setting.
Power saving with "laptop_mode"
Power saving with "laptop_mode"
Originally I wanted to use noflushd to limit the number of times the disk spins up for a trivial read/write. Due to some stupid incompatibility (noflushd complains about being unable to spin down the disks) I searched for an alternative. And I found it in the Linux Journal in the form of the Laptop Mode settings:
Using these tweaks, Laptop Mode can create up to ten minutes without disk activity. When you're not changing any files at all, you can get even longer periods without spinning up the disk. After all, if there's nothing to write, there's no reason to spin up the disk. Unfortunately, when you've mounted the filesystems with the default options, things change by themselves; the filesystem records access times. Access times are updated even when you're only reading files, and they must be written to disk eventually. To avoid this problem, Laptop Mode remounts all filesystems with the noatime mount option. This makes them stop recording access times, so you actually can get more than ten minutes of time without disk I/O.Now it's really quiet for hours on end!
Power supply
Power supply
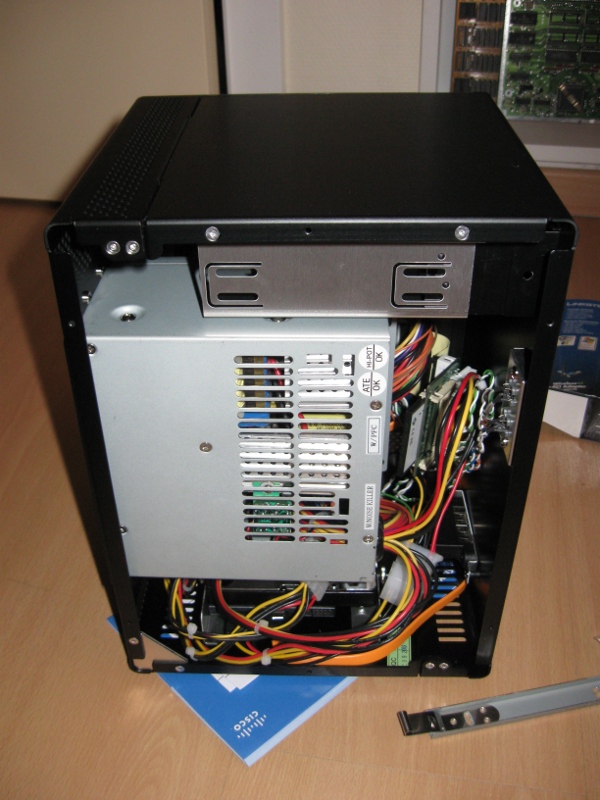

The LianLi PC Q07 provides a mounting bracket for an ATX PSU. This is what I originally used, but apart from being extremely bulky, noisy and the cabling being a mess, it's very inefficient under such a low load. With a Conrad Energy Monitor, I measured 40W idle (all disks spun down).
In combination with the fact that I wanted to mount extra drives in place of the ATX PSU, I decided to go for a 120W PicoPSU. Two versions were available, and I opted for the one that can be used with a varying input voltage between 12 - 25V. This way I could use an old Dell laptop power brick (typically 19V) that I got for free because it had a rupted cable.One word of caution though, the DC-plug you get with the PicoPSU (2.5mm) is not shielded. This means that, in my case, the negative pole of the power brick will be connected to the case itself. This leads to sparks and is not very safe anyway. I have now isolated the plug from the case with some heat shrink tubing and a plastic washer.Another caveat (or maybe also an advantage) is the fact that the PicoPSU is delivered with only 1 molex and 1 sata power connector. The Gigabyte motherboard already requires an additional P4 12V connector, so I had to make a few new cables. But it reduces clutter as well...
System drive
System drive
To reduce noise & power consumption of the system drive constantly spinning up & down, I tried to use a CF card in an IDE adpater. This proved to be a lot of trouble. First of all, it's extremely slow (read speed of only a few MB/s). More importantly, I couldn't get the system to boot from it, even if it was recognized as a hard disk drive during installation. Eventually, I bought a reasonably priced ($27) 4GB Disk-On-Module on ebay (seller vistandigital, for those interested).I'm quite pleased with it: it's very small (comparable to the PicoPSU, but thinner) and the speed is decent (with dd I obtained a read speed of about 22 to 26MB/s).The flash drive is formatted in ext2, as I do not need/want the journalling. Obviously, no swap drive is configured, as it would wear the drive out very fast. And with 1 gigabyte of memory and the typical workload, swapping should really not be necessary.Software configuration
I decided to use the same Linux distro that I use on my laptop, the 64 bit version of the debian derived sidux. Some would argue that it is not done to put a debian unstable distro on a server, but that's the way I want it. In default trim, sidux includes the X-window system, xfce and a lot of other unnecessary packages. These were purged and after installation I imaged the system disk with dd so I can start from scratch much easier should I feel the need to do so.
LVM
As mentioned, the primary goal of the server is to provide central access to my backups. For now it has only a single 2 TB Western Digital Green WD20EADS drive. As I intend to expand the storage later on, an LVM configuration would be nice.
LVM allows to make abstraction of the physical volumes. Logical volumes are created within a volume group, that can can consist of multiple hard drives. It is then possible to expand and shrink the logical volumes while the system is running. A good tutorial on LVM (and RAID on LVM) can be found here.
For now, I have created three logical volumes, 100G each and formatted in ext4, which are all mounted in a subfolder of /media/share.
Samba
At the end of the tunnel is Samba/CIFS/whatevers... to share the LVM disks in my network. I created a guest account with a different password for visitors and shared the /media/share folder.
HostAP
This box also serves as Wireless Access Point in my home. Therefore a linksys WMP54G was added. This WLAN ward is based on the Ralink RT73 chipset which I have used before to setup Linux APs. I'll add more on the hostap and dhcp configuration later.

Page updated
Google Sites
Report abuse